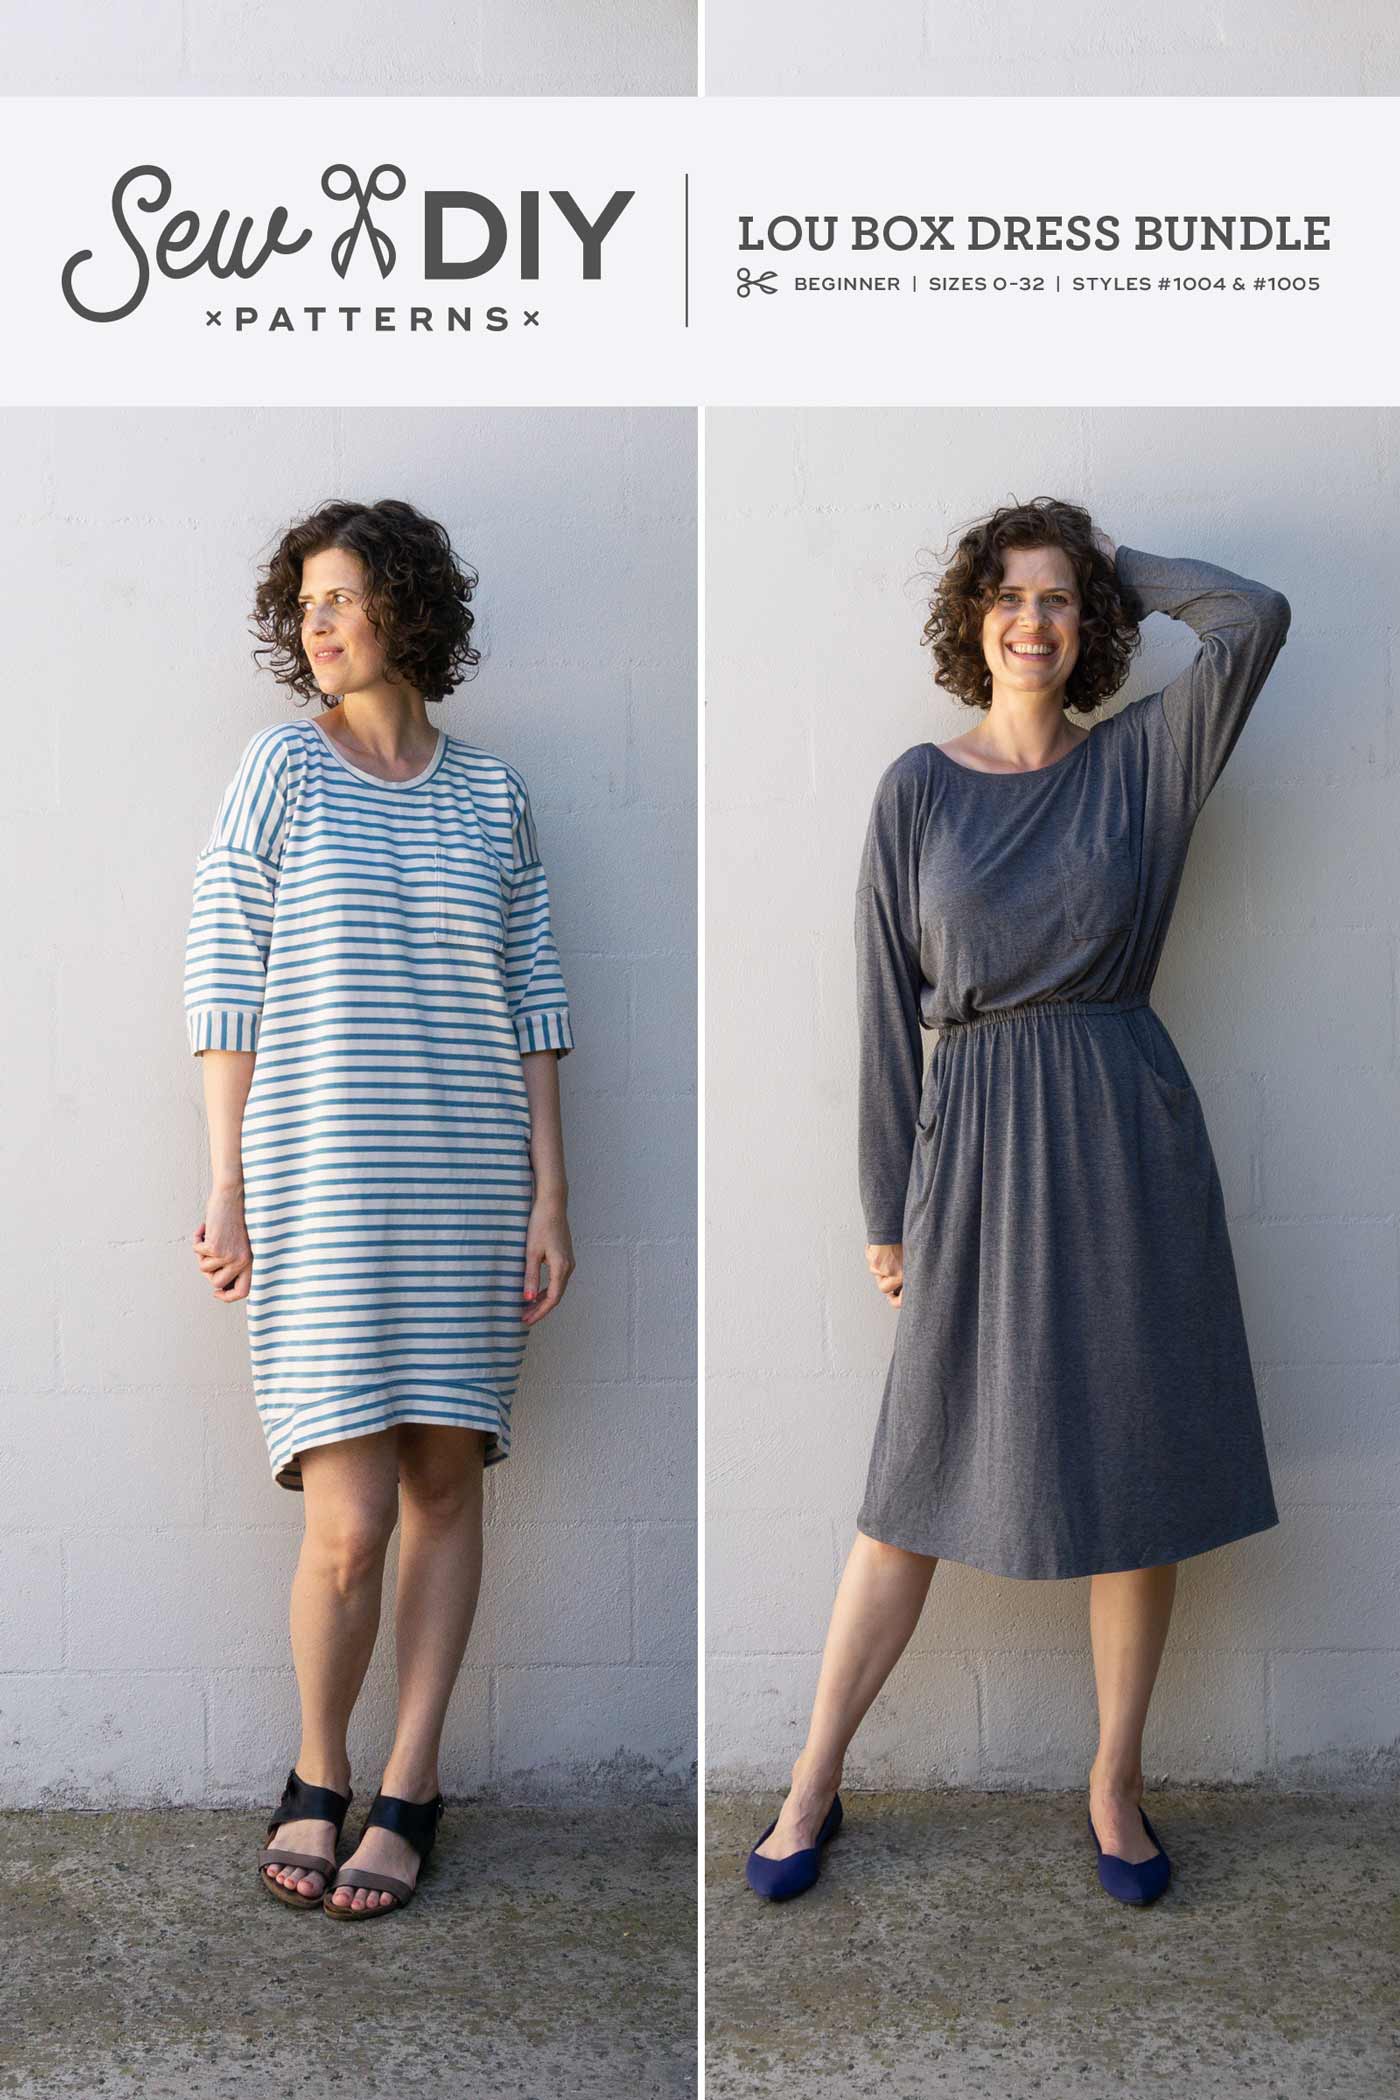
Finishing a knit neckline is not hard but it can be intimidating if you haven’t done it before. To finish a knit neckline, we’ll stitch a folded strip of fabric to the neckline opening and today I’m sharing two different methods – with one shoulder open and in the round. You can use either one to sew a Lou Box Dress. The second method is a little bit cleaner but I think the first method is easier for beginners. Give both a try and see which one you prefer. However, I do recommend using method two (in the round) if you have a thicker knit fabric.
The trickiest thing about attaching knit neck binding is that different fabrics will require a different length of binding because fabrics have different amounts of stretch. In general, the length of the binding should be 85-90% of the length of the neck opening. If it’s the correct length, the binding will stretch to fit the opening and lay flat without any rippling. If your fabric has less stretch, then you may need to cut a longer piece of binding.
How to Sew a Knit Neck Binding
Supplies:
Walking foot or tissue paper
Ballpoint or stretch machine needle
Flexible measuring tape
Rotary cutter, gridded ruler and self-healing cutting mat (optional)
CUTTING THE BINDING
The easiest way to cut neck binding is using a rotary cutter and cutting mat. If you sew a lot, I highly recommend investing in these tools. They will help you cut your fabric more accurately and more quickly than using scissors because the fabric stays flat while you cut. The rotary cutter works like a pizza cutter to quickly slice through the fabric.
Knit neckbands should be cut on the crosswise grain, perpendicular to the selvage of the fabric. For woven fabric, we cut on the bias because it has the greatest amount of stretch but since our knit fabric already has stretch, we can save fabric and cut on the crosswise grain. To cut your neck binding, place the pattern piece on the fabric, put the ruler on top and slice away. Now we’re ready to sew!
Note: For these examples, I'm sewing the Lou Box Dress 2 View B with the low back. The same method will work for any rounded neck top or dress.
METHOD ONE - ONE SHOULDER OPEN
Let’s start with an open neckline. In this method, we will stitch only one shoulder seam, attach the neck binding and then stitch the second shoulder seam. This method is often easier for a beginning sewist to handle but can be challenging if you use a thicker fabric like ponte or sweatshirt fabric. If your fabric is thicker, head on down to Option 2.
Step 1: Stitch the right shoulder. Press seam to back.
Step 2: Fold binding lengthwise with WRONG sides together and press. You now have a long strip with one folded edge and one raw edge.
Step 3: Next we want to pin the binding to the neckline with the length evenly distributed. Fold the binding in fourths and mark with pins.
There are two ways to mark the quarter points in the neckline. The first is to fold it in fourths. First fold in half and then in half again as shown above. The second method is to use a flexible measuring tape to measure the neckline. Divide that number in fourths and place a pin at each quarter mark. (You’ll only be placing three pins because the beginning and end counts as one point.) Note that the pins will not match up with the shoulder seam and will not look symmetrical.
Next pin your binding to the neckline matching the quarter marks. You can see that the binding will need to stretch a bit to fit the neckline.
Step 4: Attach the walking foot to your sewing machine. Or if you don’t have a walking foot, grab some strips of tissue paper and place them between the feed dogs and your fabric. (This will help move the fabric through the machine.) Set your machine to a straight basting stitch.
I recommend stitching with the binding against the throat plate and the dress on top. I find this is an easier way to keep the raw edges aligned. When the dress is on the bottom it can sometimes slip away from the edge of the binding and you won’t know until after it’s already stitched. Use a 1/4 inch to 3/8 inch seam allowance. As you start to stitch, gently stretch the binding to match the length of the neckline. Because we have it pinned in quarters, you only need to stretch one-fourth of the binding at a time. Make sure to only stretch the binding and not the top.
Step 5: After basting, gently press the binding with the seam allowance going towards the dress and the binding going towards the center of the neckline. Evaluate your fabric to decide if everything looks flat. Sometimes I’ll need to re-baste just one section and on other rarer occasions, I’ll need to cut a new piece of binding. If you had a really hard time stretching the binding to fit the neckline that’s a good indication that you’ll need to use a longer piece of binding.
When everything looks good, stitch the seam again using a serger/overlocker or the stretch stitch on your conventional machine. Press well.
Step 6: Topstitch the seam allowance of the binding to the shirt using a zig zag stitch or a twin needle. See this tutorial for my tips for using a twin needle.

Step 7: Finally we need to stitch the second shoulder seam. To make sure that the seams for the binding line up, I recommend that you start stitching from the neckline and baste first. Press the seam towards the back of the dress and, if desired, you can tack down the seam allowance.
METHOD TWO - IN THE ROUND
Step 1: Stitch the shoulder seams. (When you're sewing with a serger, it's safer to place pins parallel to the seam line and outside of the seam allowance so that there's less risk of hitting one with the knife. Check out my post about using pins safely for more info.) Press seams to back.
Step 2: Stitch the short ends of the binding together to form a loop. Fold binding lengthwise with WRONG sides together and press.
Step 3: Next we want to pin the binding to the neckline with the length evenly distributed. Fold the binding in fourths and mark with pins.
There are two ways to mark the quarter points in the neckline. The first is to fold it in fourths. First fold in half and mark the center back and center front. Fold it in half again and mark the halfway point between center front and back.
Alternately, you can use a flexible measuring to measure the neckline. Divide that number in fourths and place a pin at each quarter mark. One pin should be at the center back and one at the center front. Note that the pins will not match up with the shoulder seam but they will look symmetrical.
Next pin your binding to the neckline matching the quarter marks. I recommend matching the seam in the binding to the center back. This decreases the bulk and makes it really easy to know which side is the back of your dress when you go to put it on.
Step 4: Attach the walking foot to your sewing machine. Or if you don’t have a walking foot, grab some strips of tissue paper and place them between the feed dogs and your fabric. (This will help move the fabric through the machine.) Set your machine to a straight basting stitch.
I recommend stitching with the binding against the throat plate and the dress on top. I find this is an easier way to keep the raw edges aligned. When the dress is on the bottom it can sometimes slip away from the edge of the binding and you won’t know until after it’s already stitched. Use a 1/4 inch to 3/8 inch seam allowance. As you start to stitch, gently stretch the binding to match the length of the neckline. Because we have it pinned in quarters, you only need to stretch one-fourth of the binding at a time.
Step 5: After basting, gently press the binding with the seam allowance going towards the dress and the binding going towards the center of the neckline. Evaluate your fabric to decide if everything looks flat. Sometimes I’ll need to re-baste just one section and on other rarer occasions, I’ll need to cut a new piece of binding. If you had a really hard time stretching the binding to fit the neckline that’s a good indication that you’ll need to use a longer piece of binding.
When satisfied, use a serger/overlocker or the stretch stitch on your conventional machine to stitch the binding in place.
details on how to stitch in the round on serger.?
Step 7: Topstitch the seam allowance of the binding to the shirt using a zig zag stitch or a twin needle. See this tutorial for my tips for using a twin needle.
LOU BOX DRESS SEWALONG SCHEDULE
DAY 1 RTW Inspiration Tues Jan 9
DAY 2 Fabric & Supplies Wed Jan 10
DAY 3 How to Print and Store PDF patterns Thurs Jan 11
DAY 4 How to Finish a Knit Neckline Mon Jan 15
DAY 5 How to Finish a Woven Neckline Tues Jan 16
DAY 6 How to Sew a Patch Pocket Wed Jan 17
DAY 7 How to Sew In-Seam Pockets with a Serger Thurs Jan 18
DAY 8 How to Sew Lou Box Dress 2 Scoop Pockets Mon Jan 22
Day 9 How to Sew Lou Box Dress 1, View A Sleeves Tues Jan 23
DAY 10 How to Sew Lou Box Dress 1, View B Sleeves Wed Jan 24
DAY 11 How to Sew Lou Box Dress 2 Waist Casing Thurs Jan 25
DAY 12 How to Sew a Hem Facing Fri Jan 26
If you haven't picked up your pattern yet, they are available in the shop at the links below.