In today’s blog post and video, we will be showing you how to make a full bust adjustment to the Lou Box Top pattern. If you haven’t already read it, we recommend reading our post and watching the video about selecting your size and measuring yourself. To recap that post, we recommend making a full bust adjustment to this pattern if your bust/full bust is 4 or more inches larger than your upper bust. This pattern has plenty of ease but during the testing phase, we discovered that if you have a full bust, the hem of the top may lift up and look uneven. A full bust adjustment will help solve that issue.
Because the Lou Box Top is designed for both woven and knit fabrics, we have two methods for how to do the full bust adjustment (FBA for short). The first method will create a dart at the side seam. The second will have no dart. If you are using woven fabric you can use either method. If you are using knit fabric, we recommend the method without a dart.

Before we get ahead of ourselves, what is an FBA anyway?
A full bust adjustment is a change that is made to a pattern to accommodate a larger bust size while keeping the neckline, shoulders, armscye and back the same size. For example, your body might be a size 10 but your bust is a size 16 and if you make a size 16 it will be big enough for your bust but too big for your shoulders and back. So, to create a better fitting garment, we’ll take a size 10 and add more surface area to the bust area only.
On page 3 of the instruction booklet for the Lou Box Top pattern, you will find the size chart. If you plan to make an FBA then we recommend selecting your size based on the upper bust measurement. In the graphic above, we show an example of someone with an upper bust of 43” and bust of 50”. The difference is greater than 4, so you would want to select a size 20 and make an FBA. Read on for how to calculate the FBA.
I think the trickiest part of doing an FBA is deciding how big of an adjustment to make. we’ve tried to make it as easy as possible in the graphic above. Up there, we’ve outlined the steps you need to go through and give example calculations FBA.
Just for fun, here’s an alternate example. Let’s say you have a bust of 38” and an upper bust of 32” inches.
First take the difference between upper bust and bust.
38-32 = 6 (That’s more than four so we will want to do an FBA.)
Now, because this pattern is drafted for a C-cup, subtract 3.
6-3 = 3 (This means that we need 3 extra inches of room at the bust area.)
Now, divide this number in half because we will make the adjustment to half of the pattern.
3/2 = 1.5 (So we will move the paper 1.5” during the FBA.)
Now you’re ready to make your own FBA. Watch the video below and reference the images if needed for all the details.

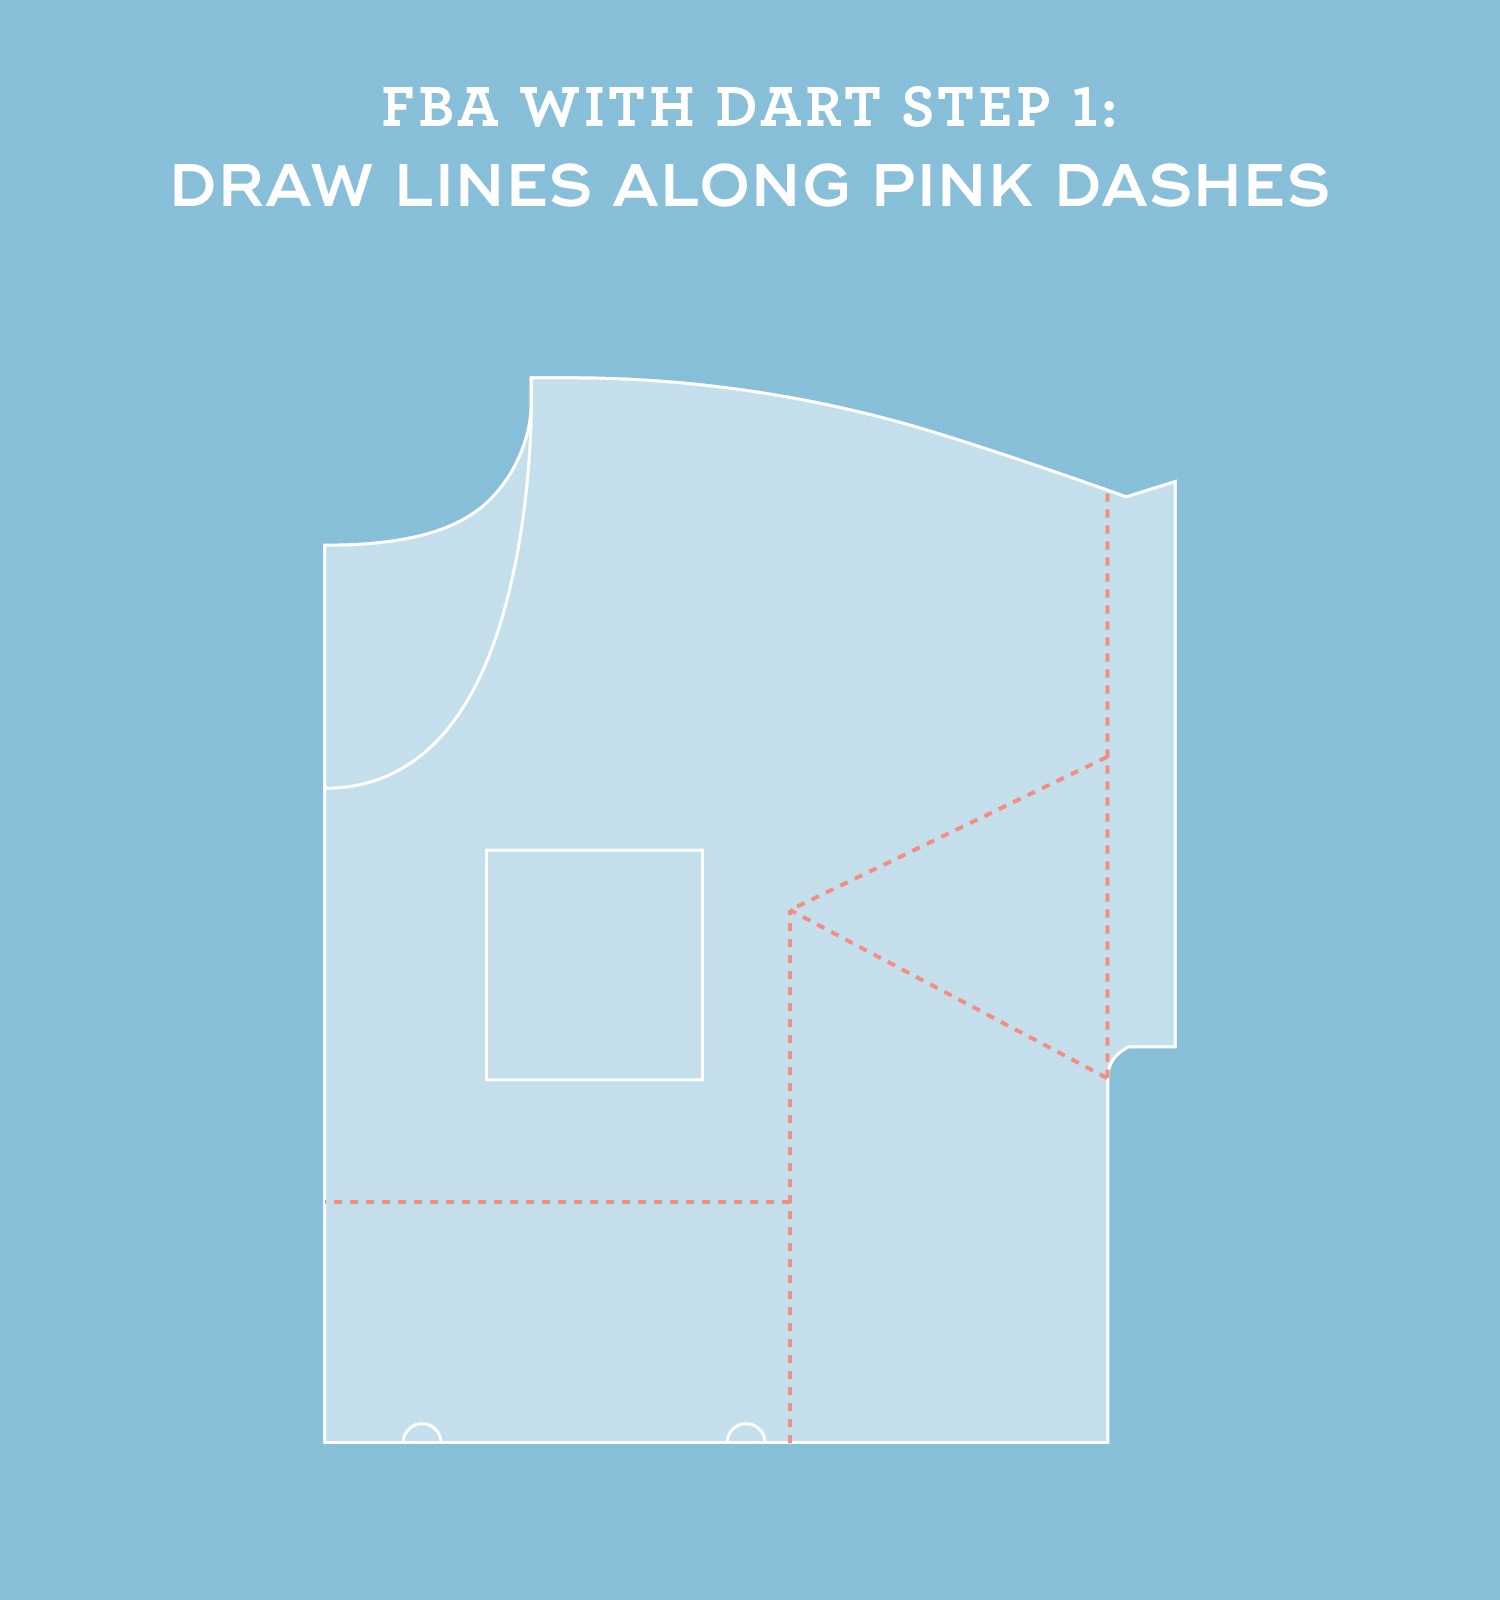
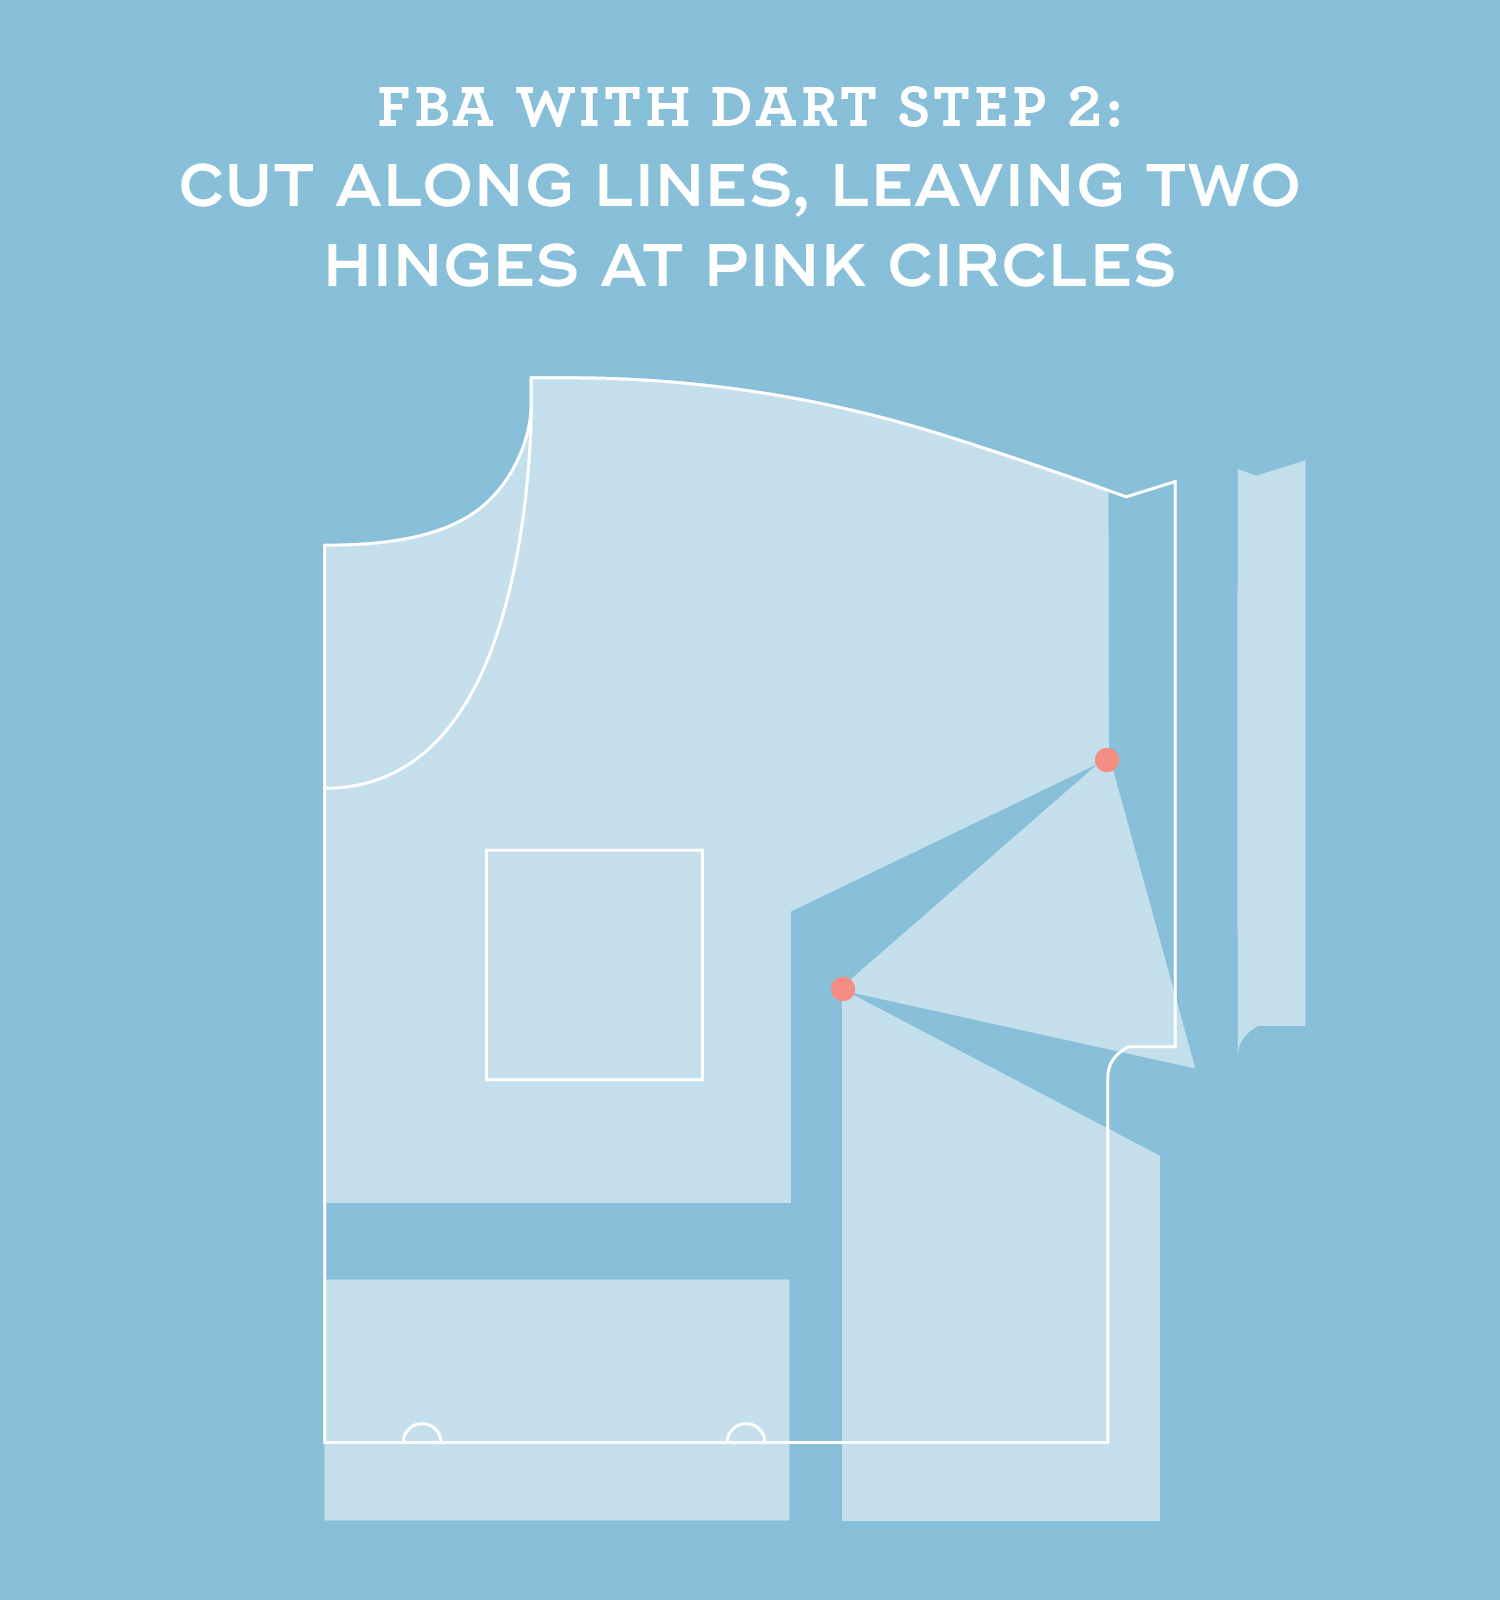
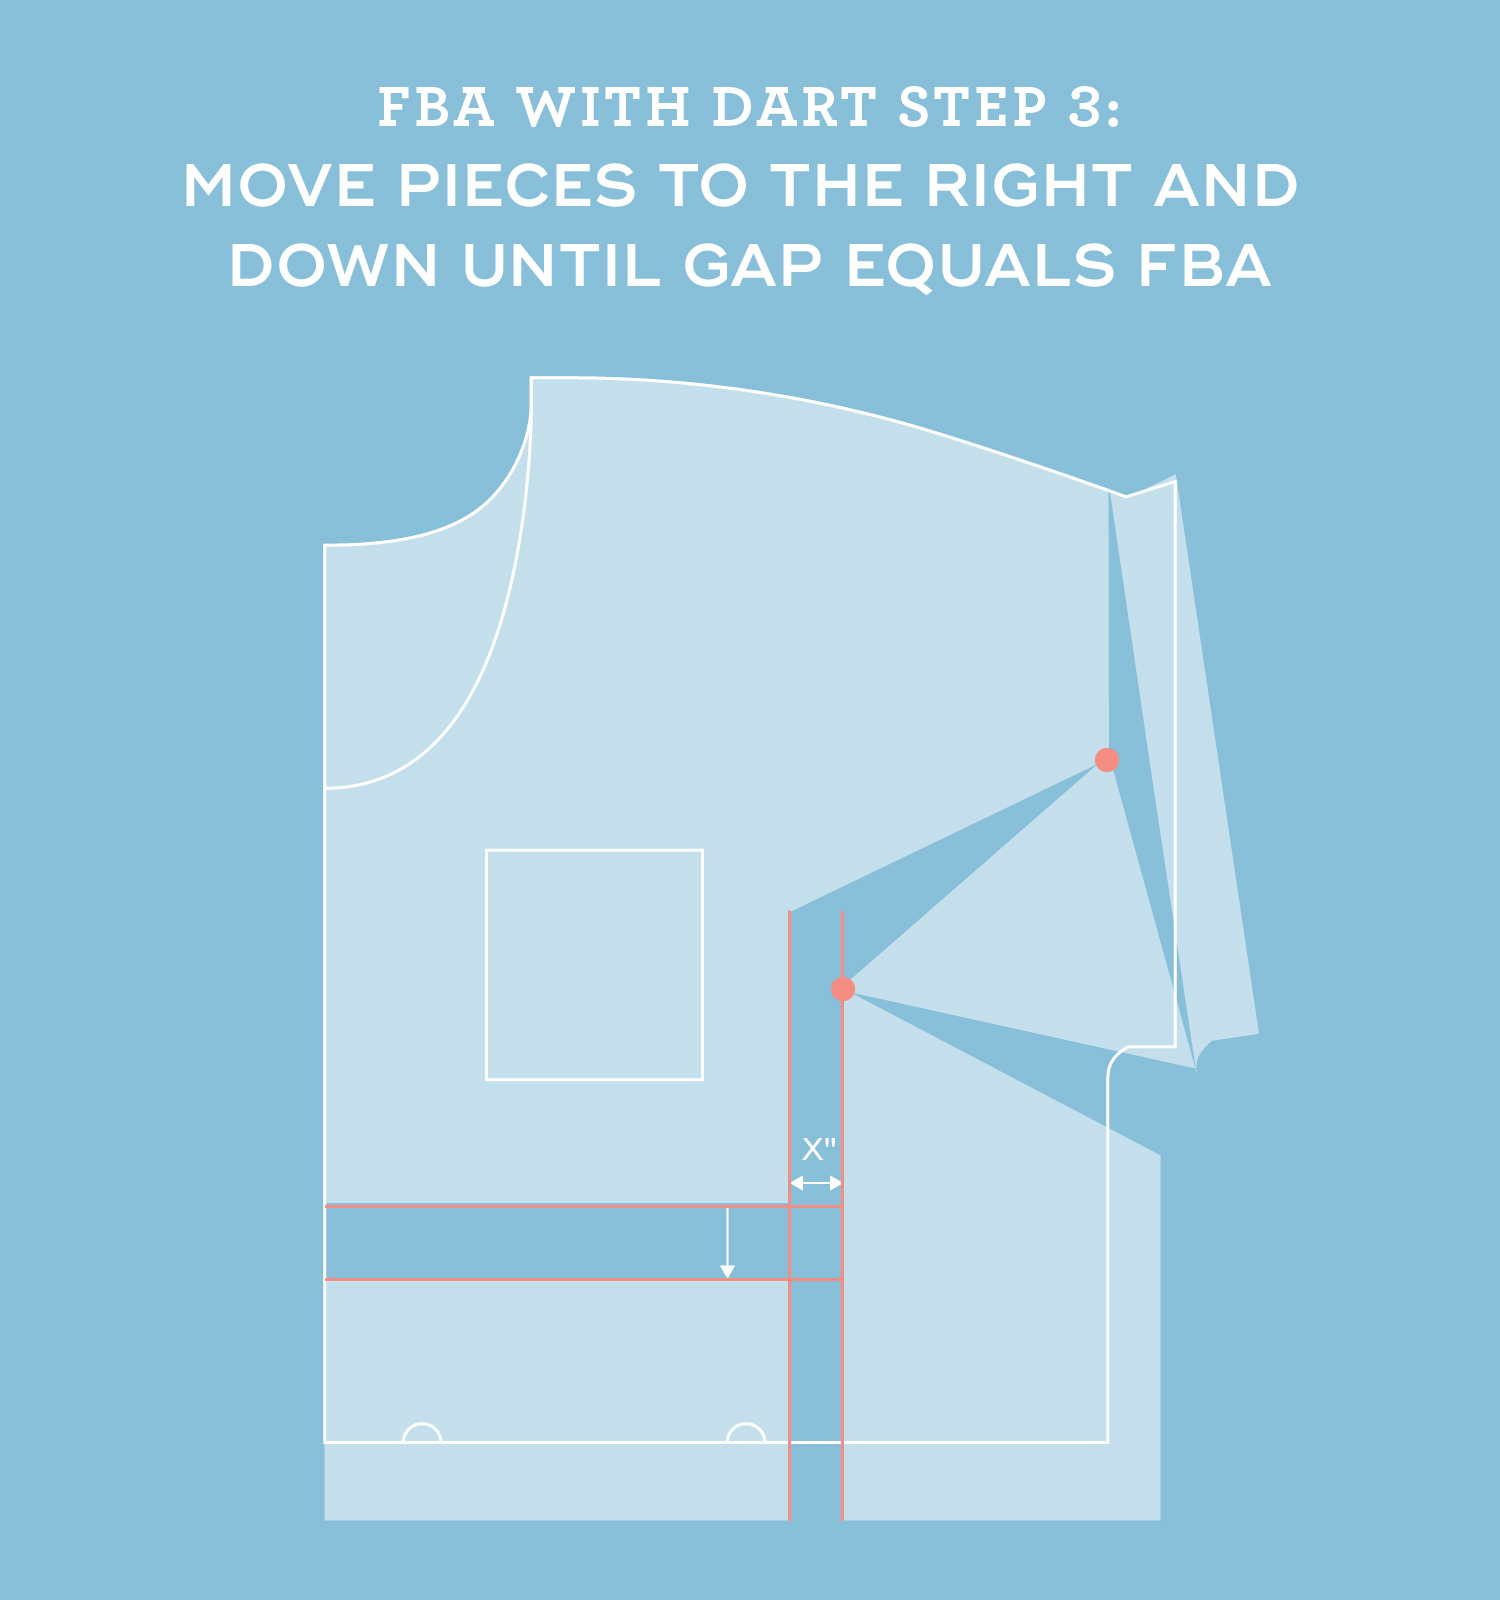
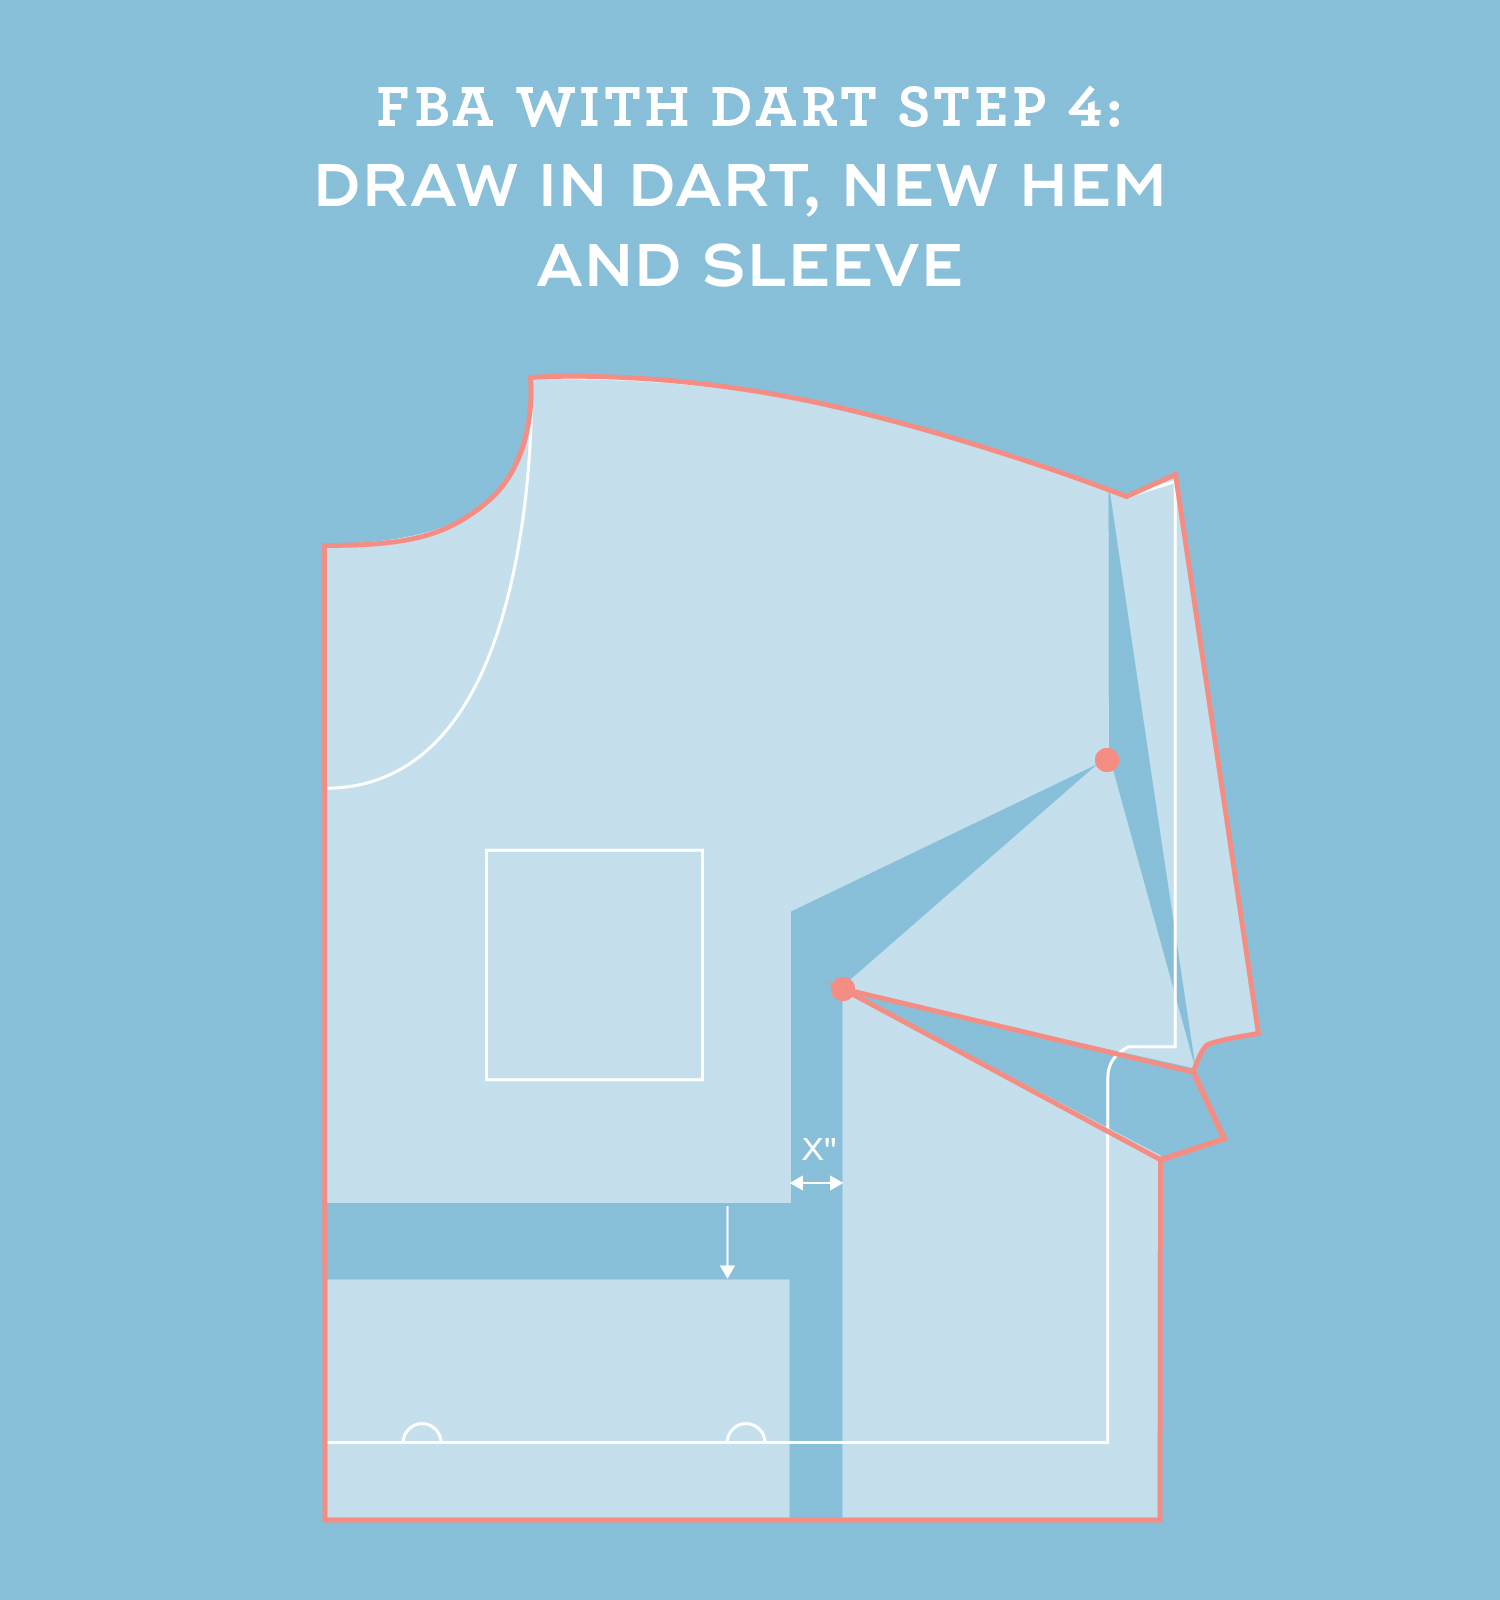
How to make a full bust adjustment method 1 – with a dart
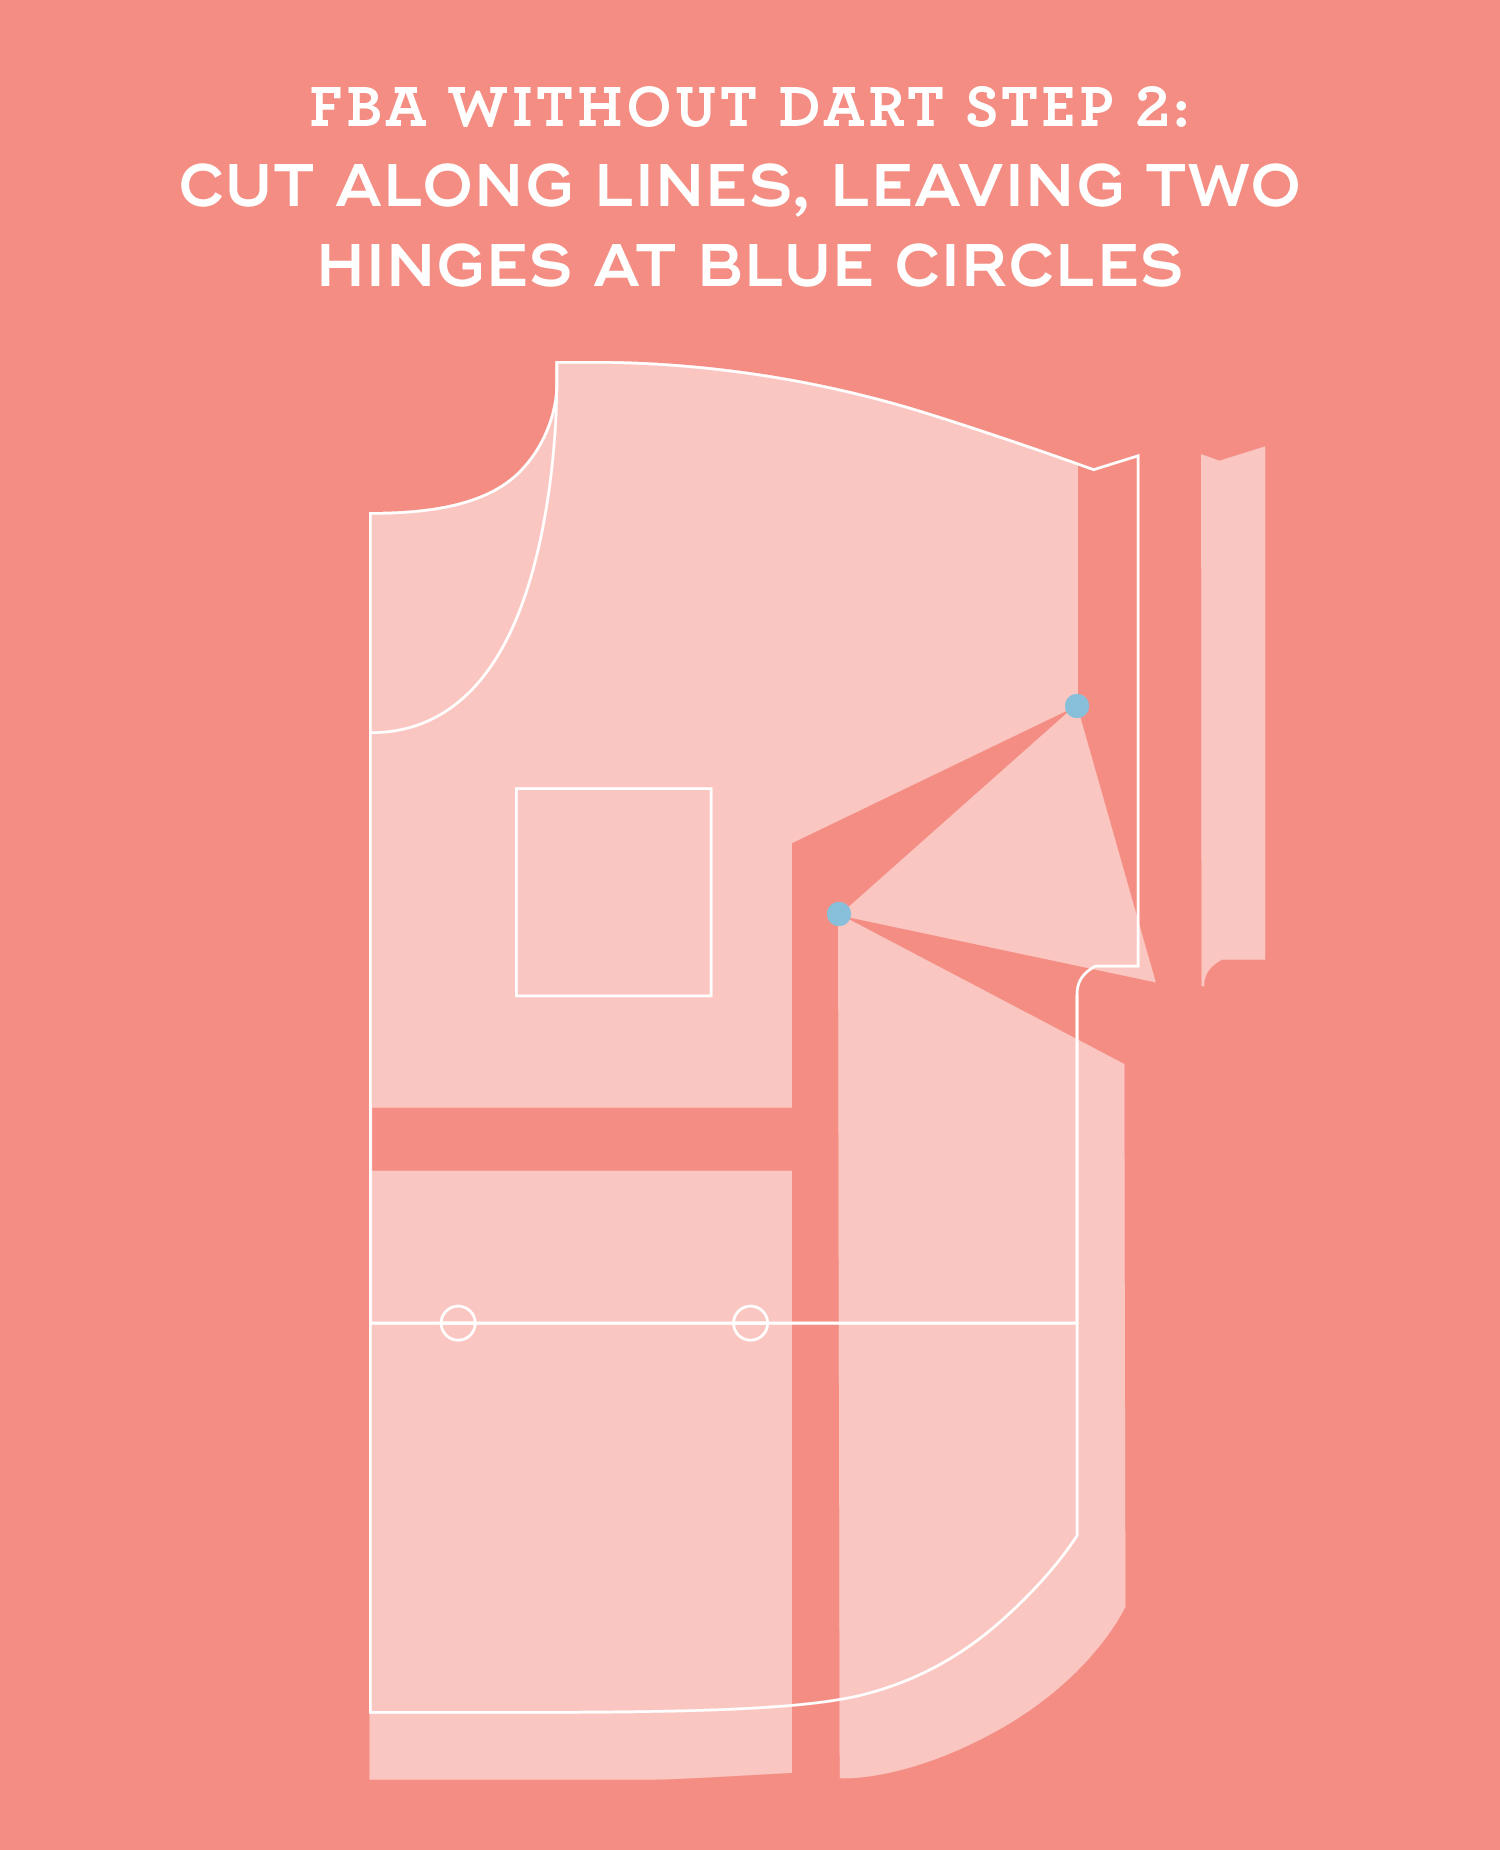
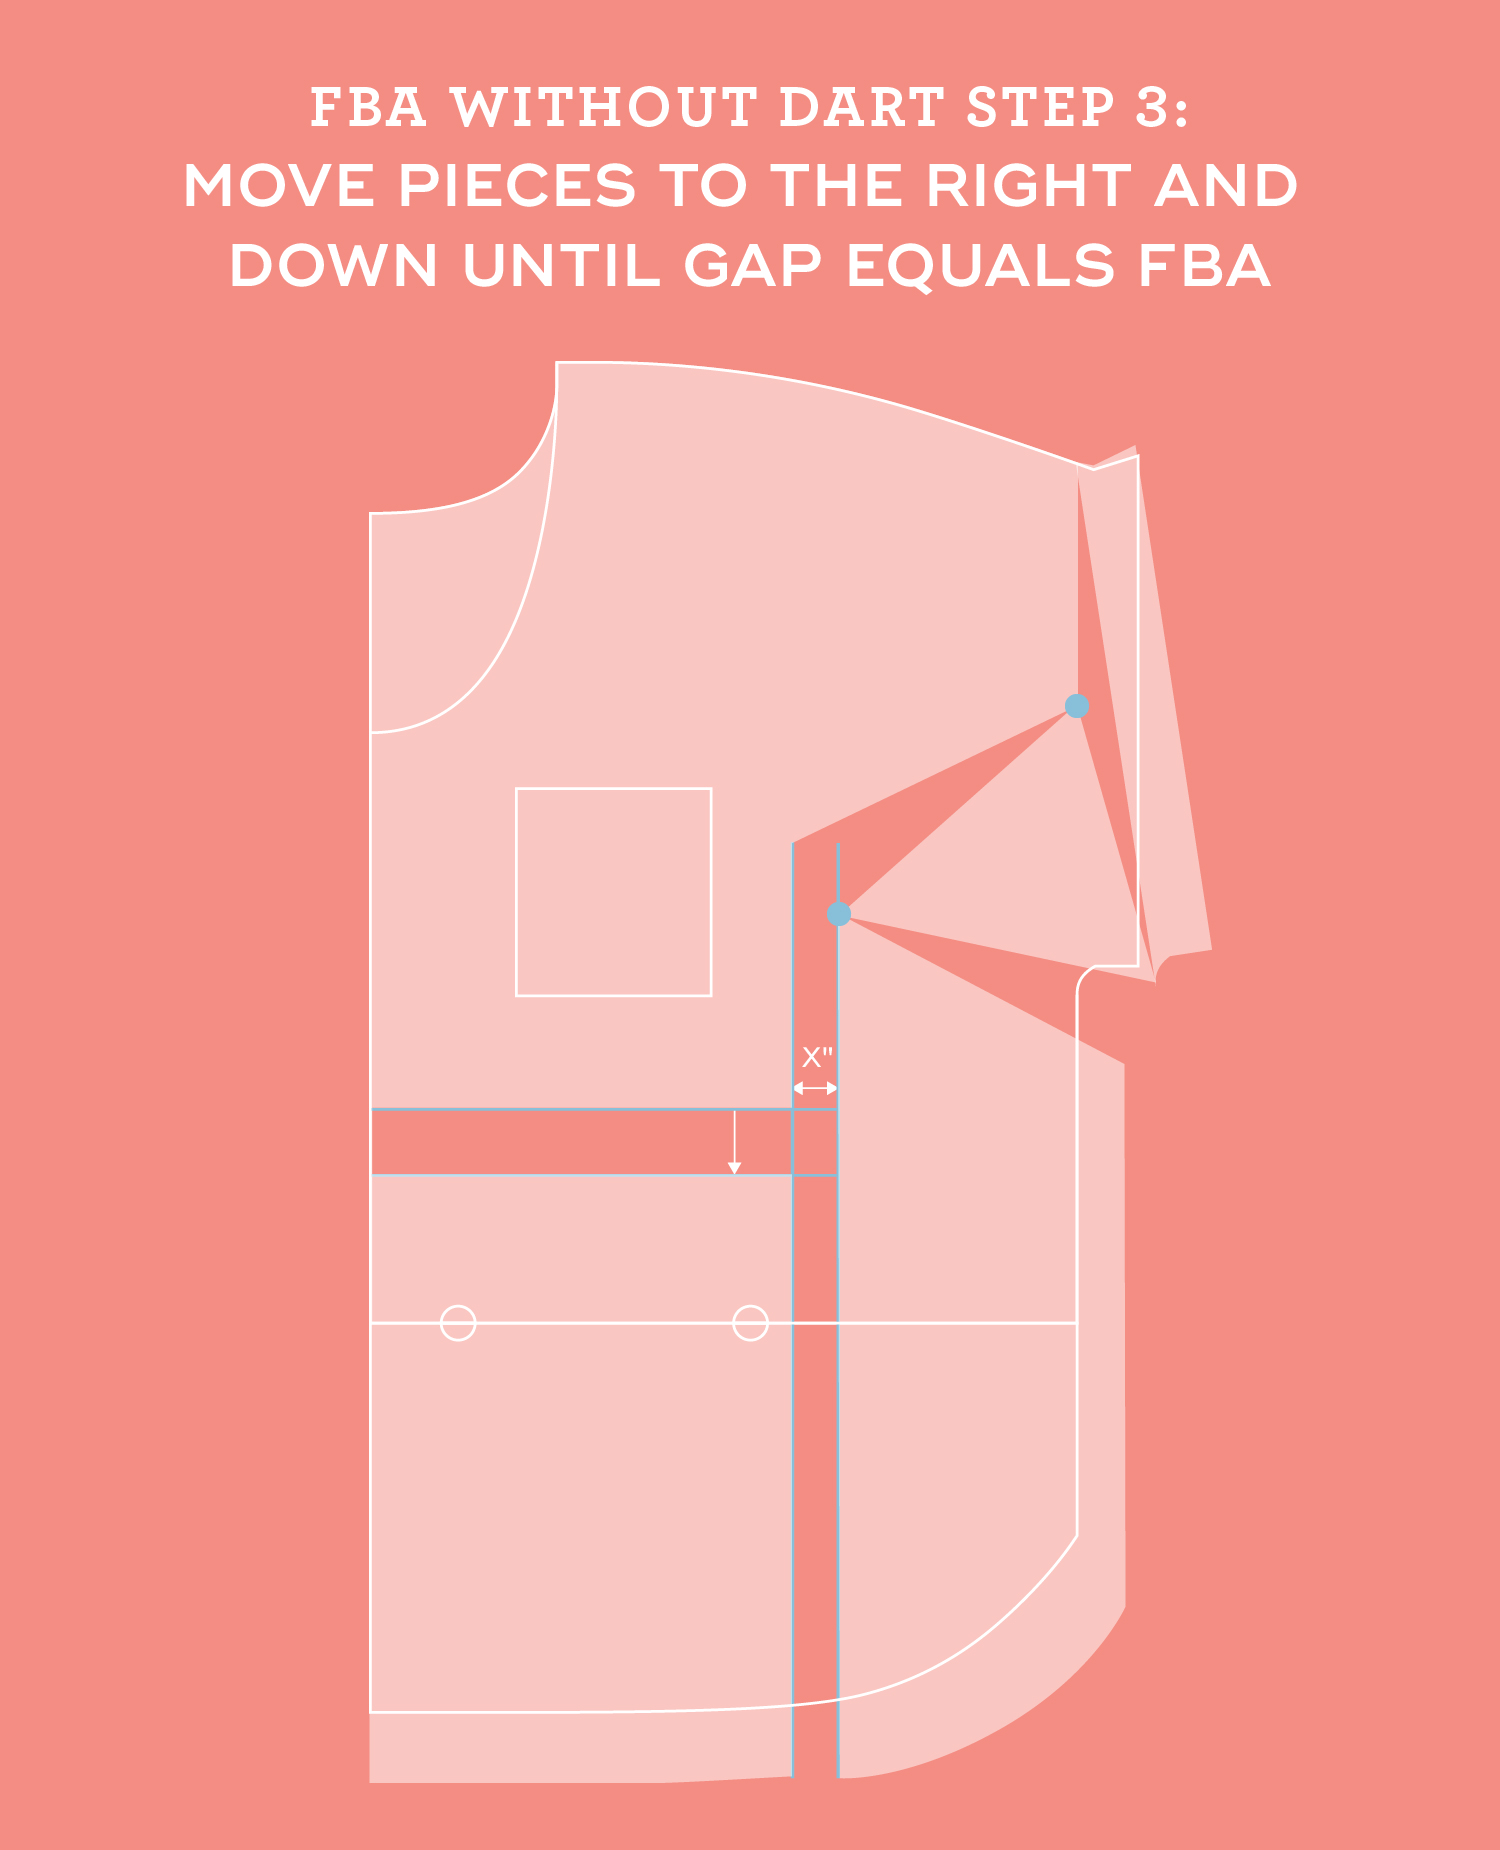
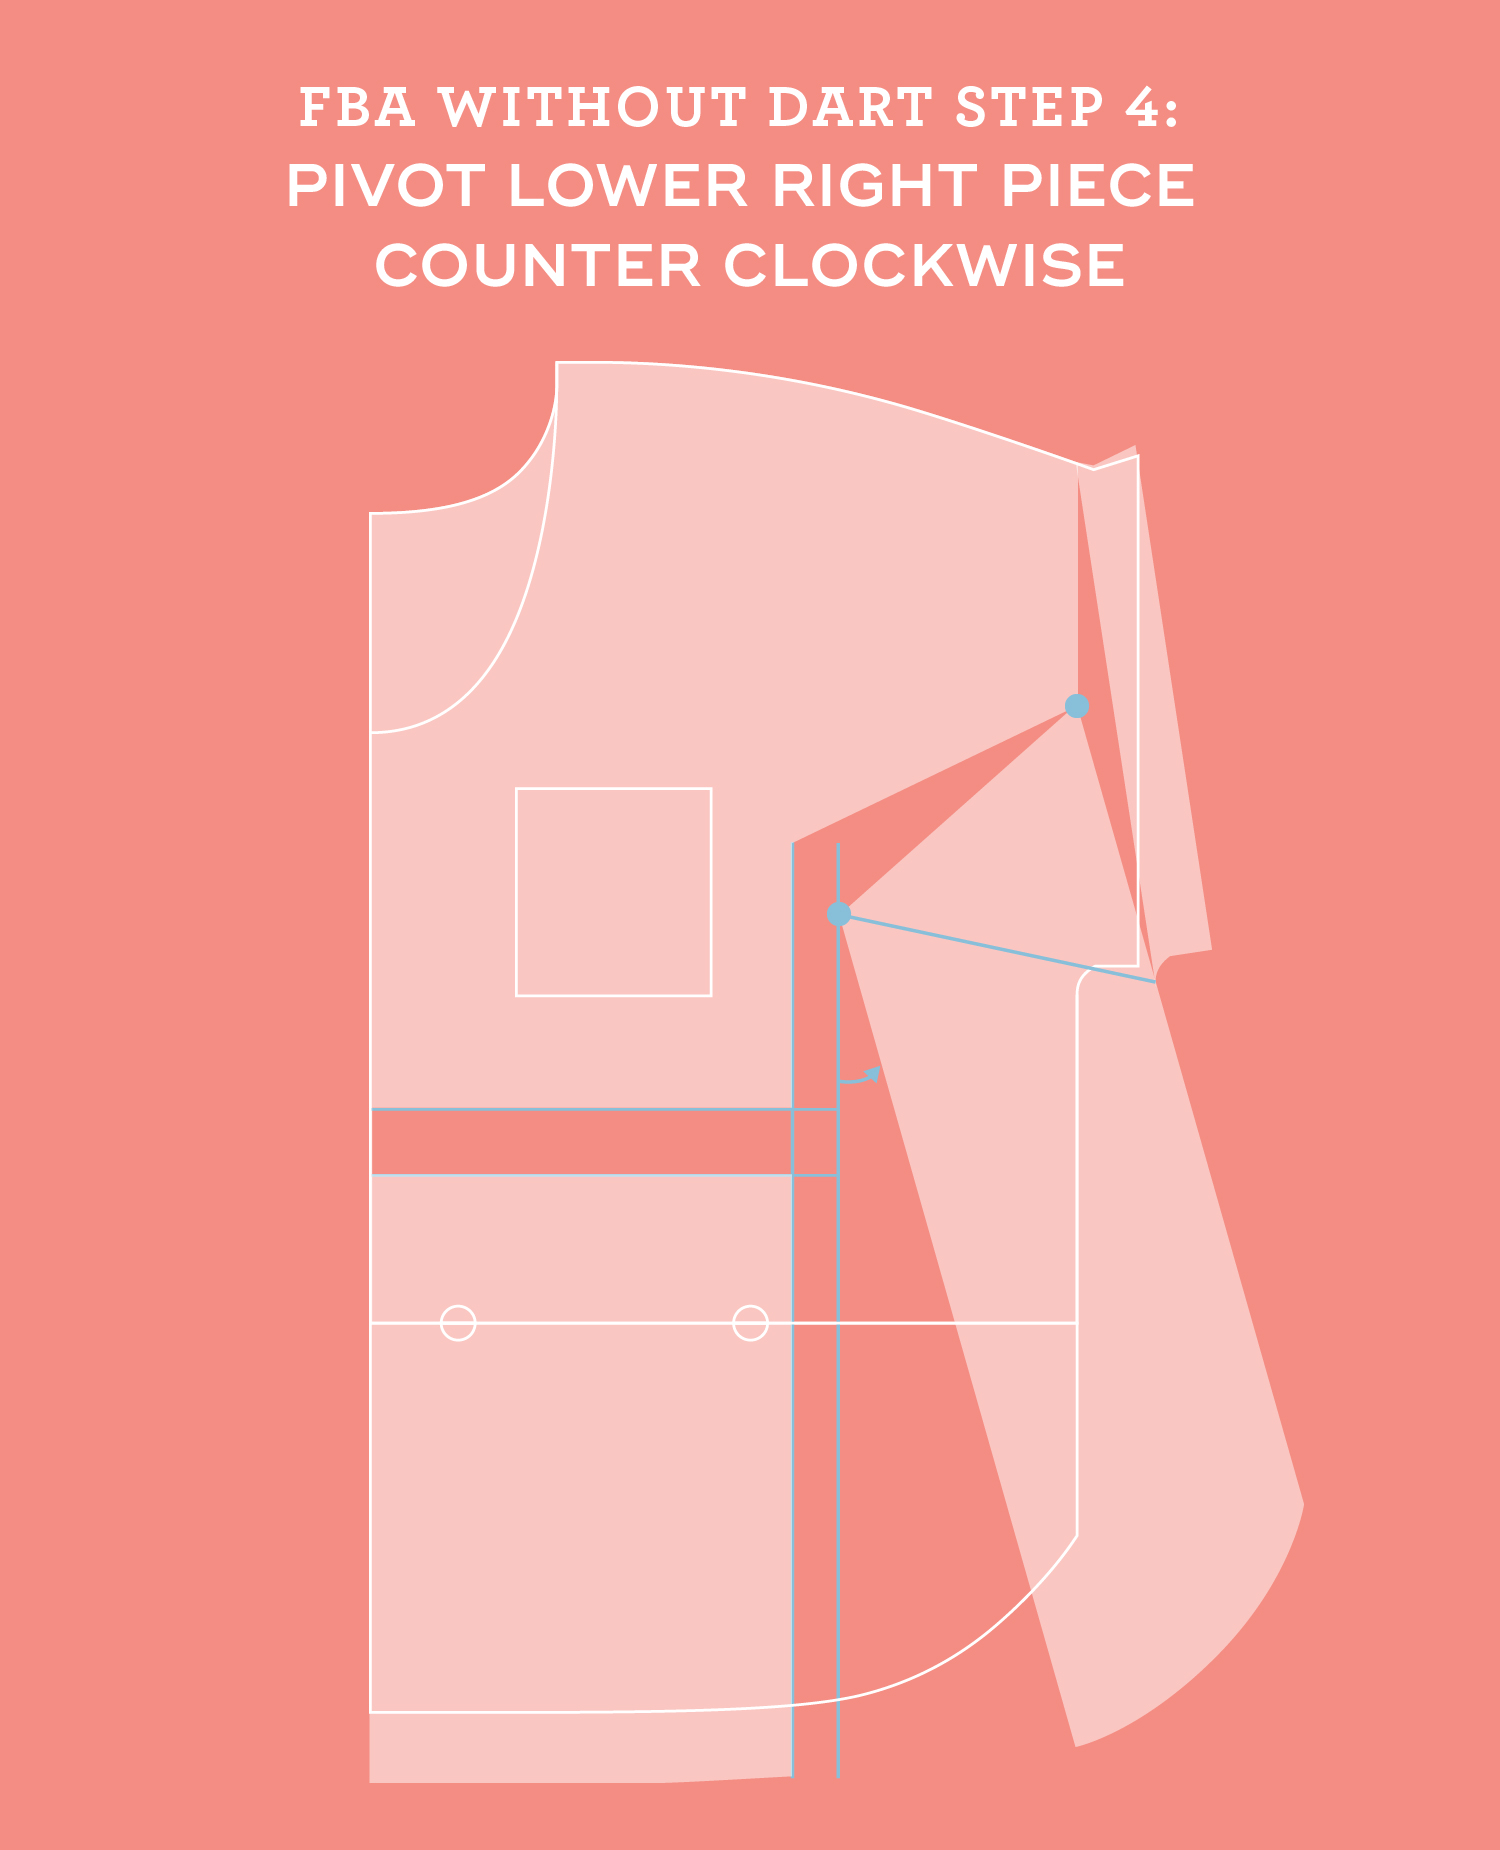
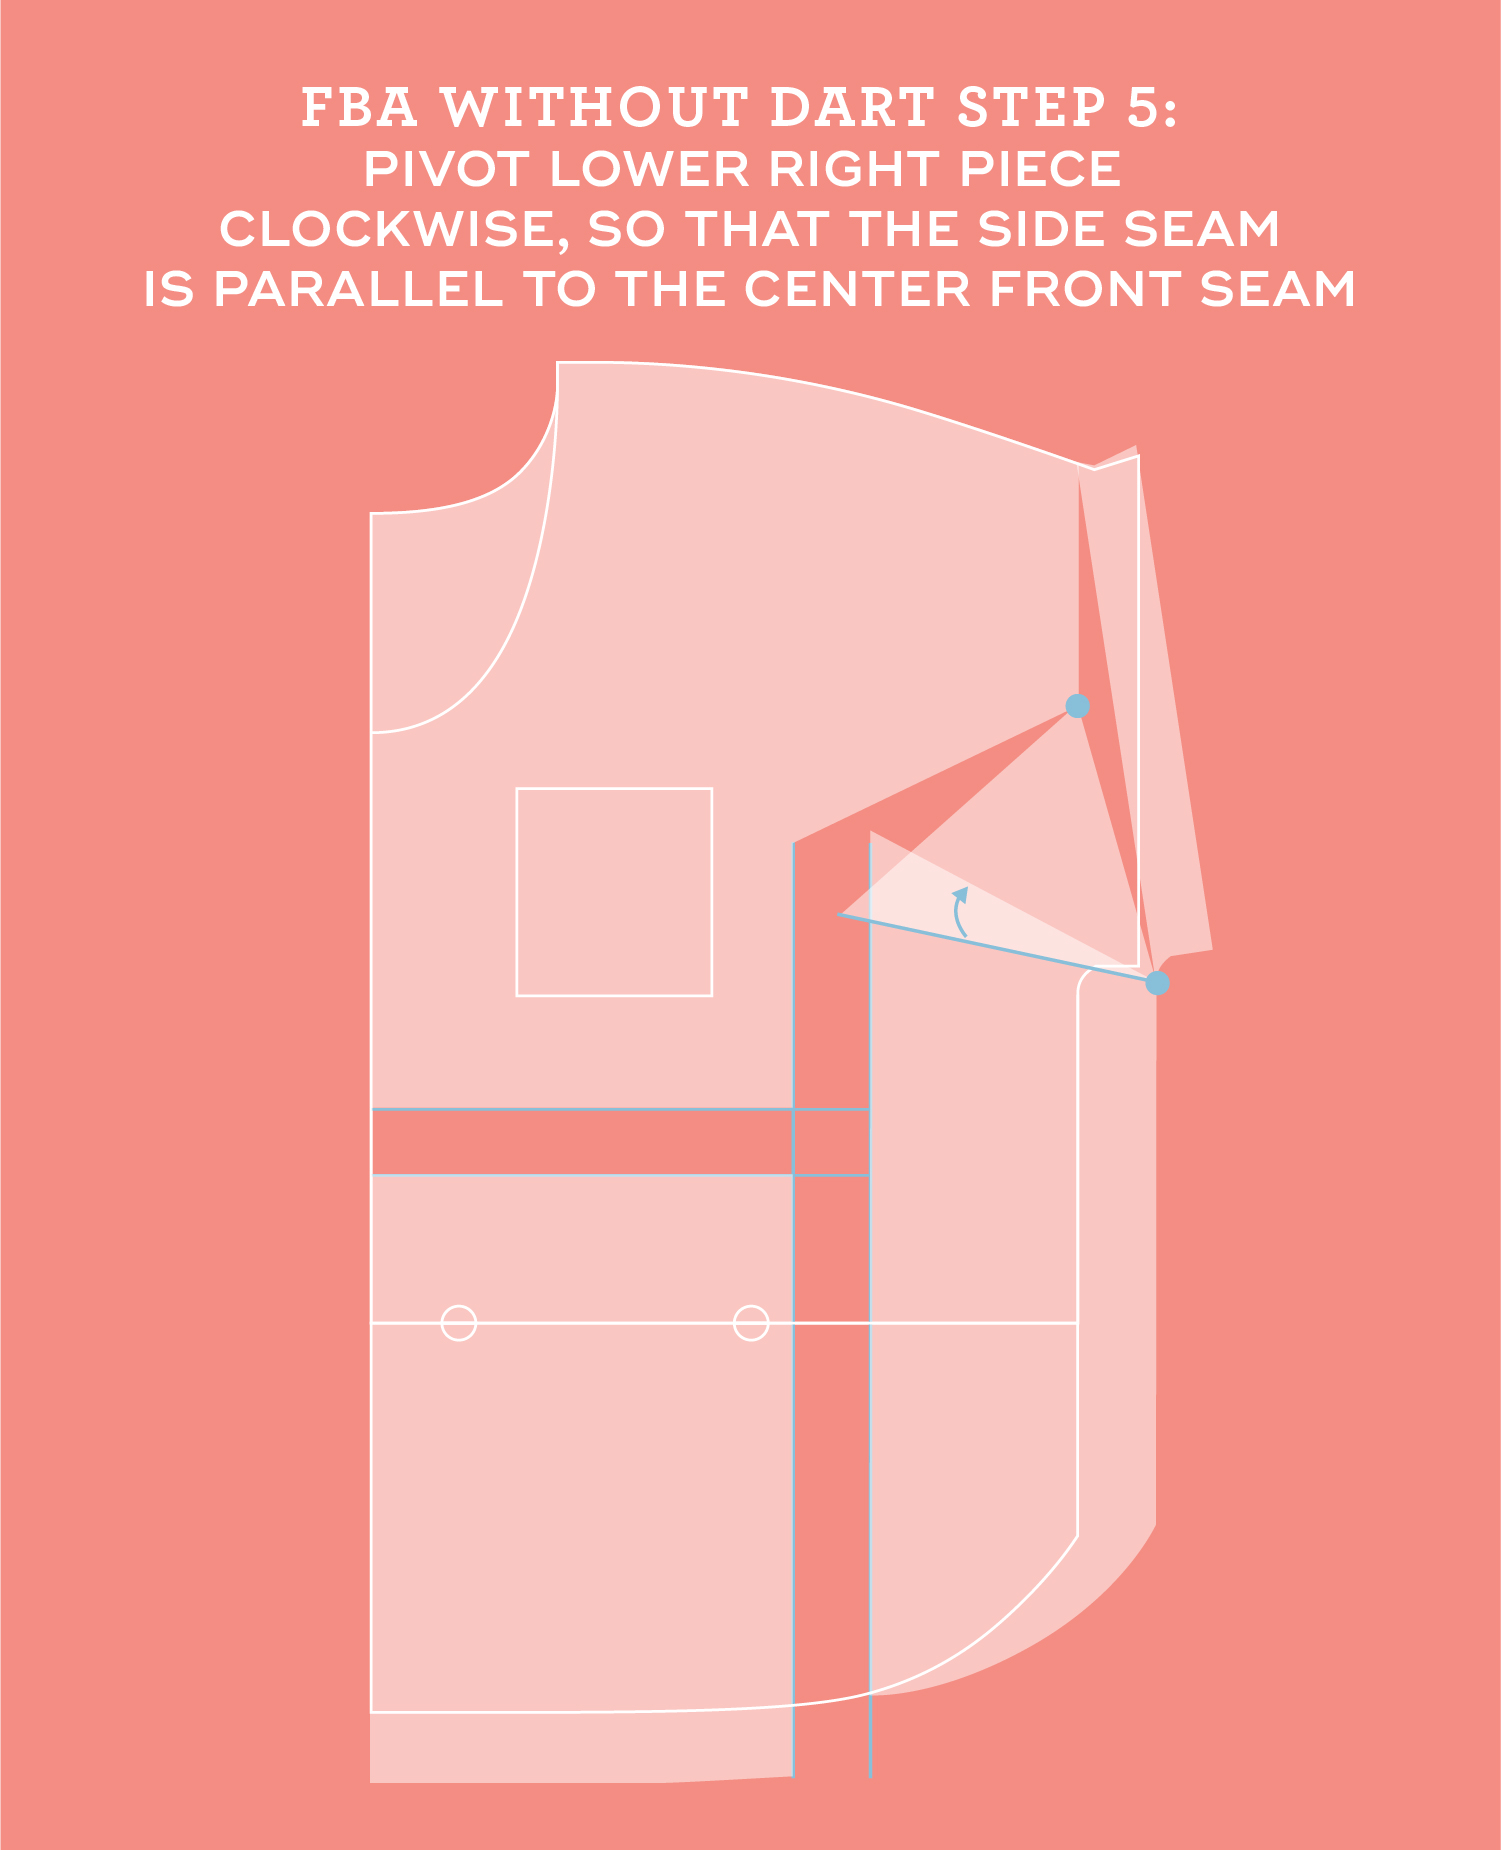
How to make a full bust adjustment method 2 – without a dart


The full bust adjustment is a really useful skill to learn and it’s easy to master with a little practice. If you want to stay up to date on all of our videos, you can subscribe to our YouTube channel or sign up for our newsletter.