Welcome to the fifth installment of the Sew DIY Eva sewalong. Today’s video is a more minimalist take on the sewalong video. Instead of voiceover, there is a music audio track with captions for the steps. This is a great video, if you just want to see the process without a lot of extras. Or, if you just like to watch fabric transform into a garment, this is a great video for you too!
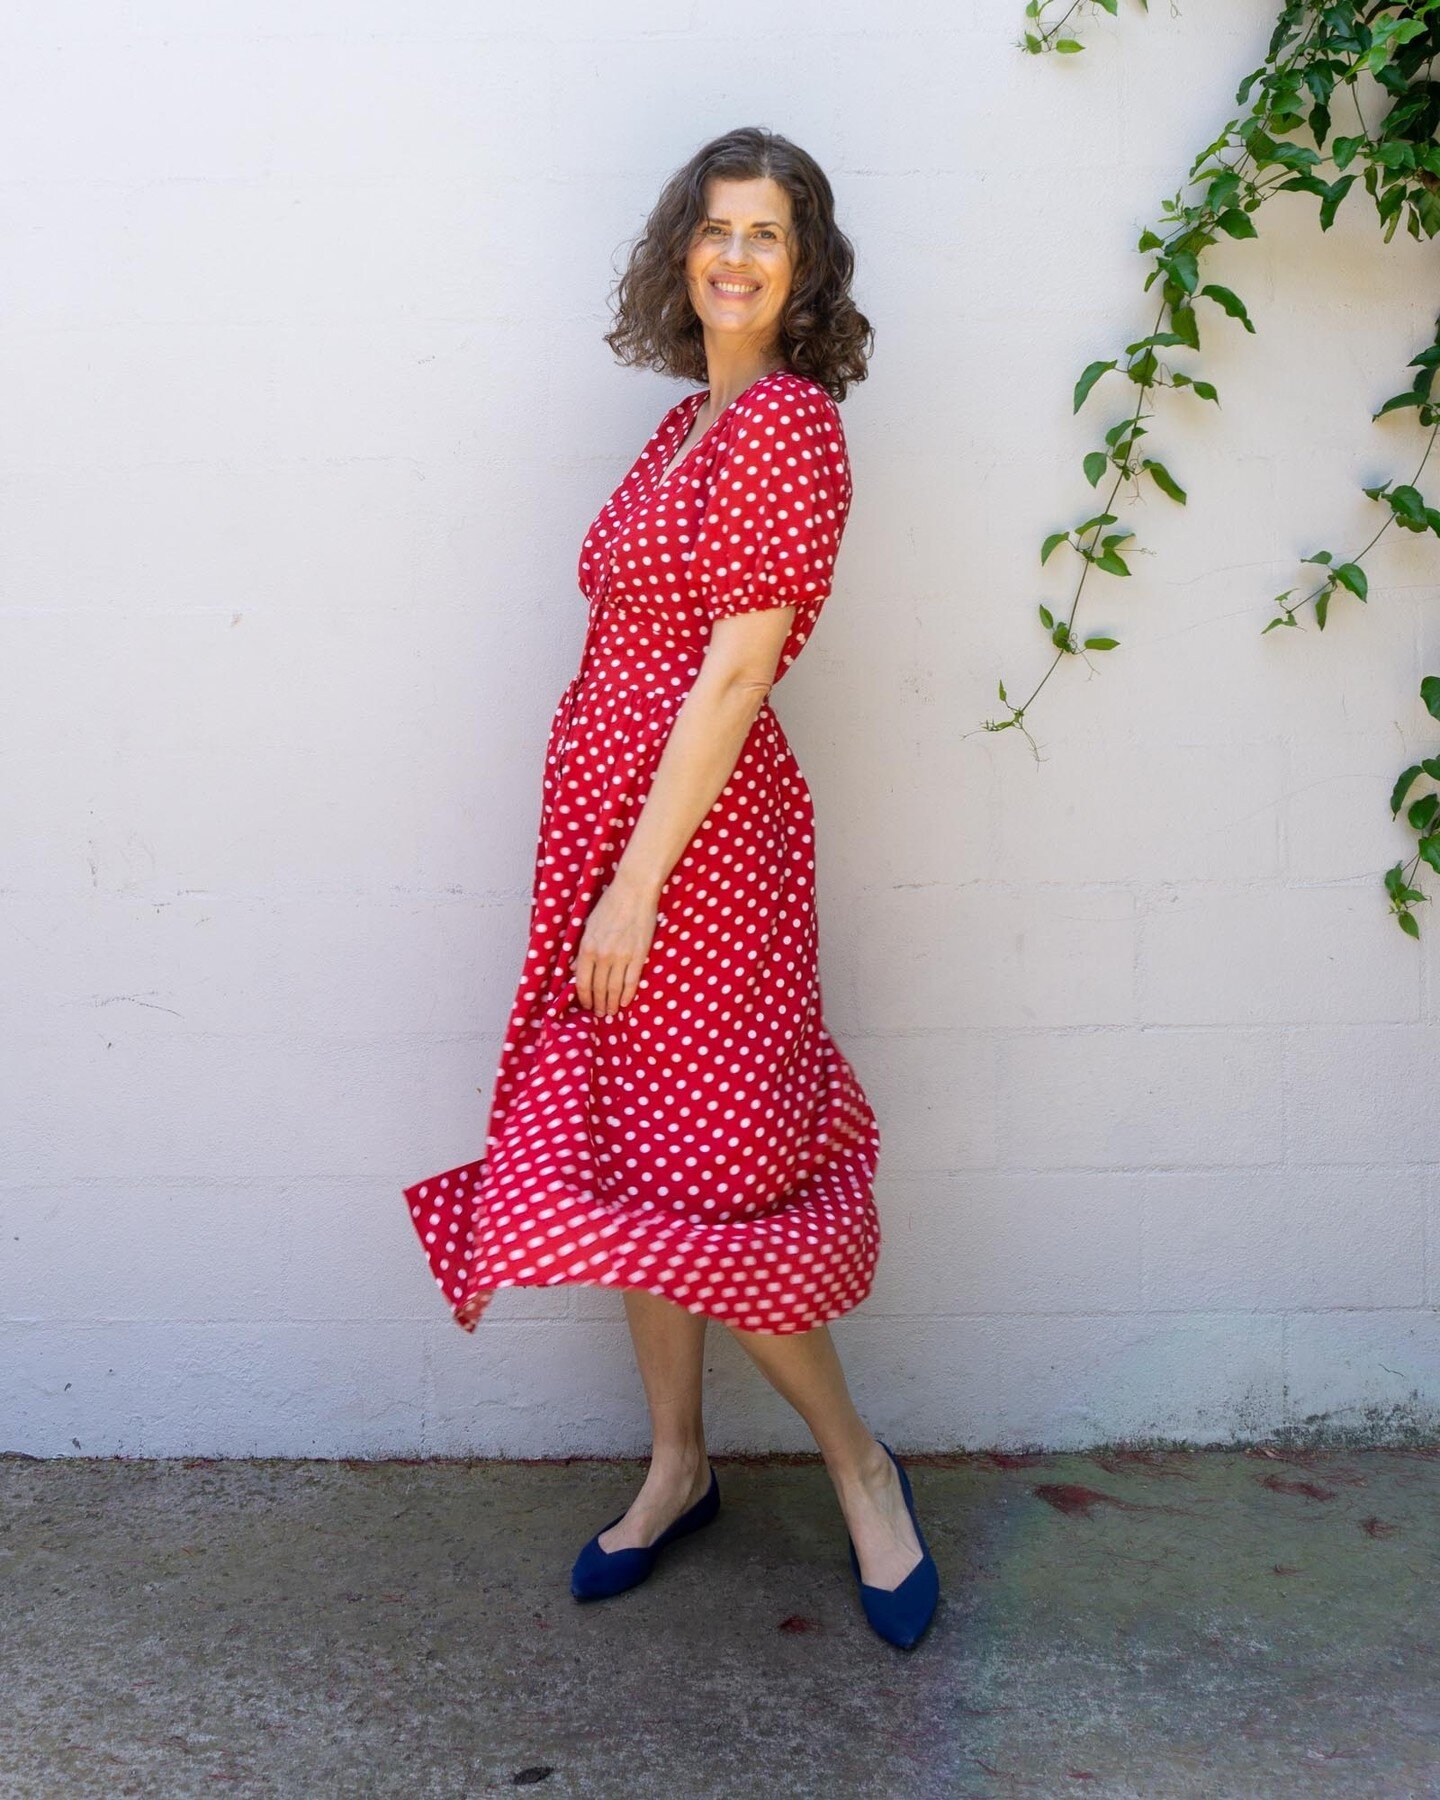
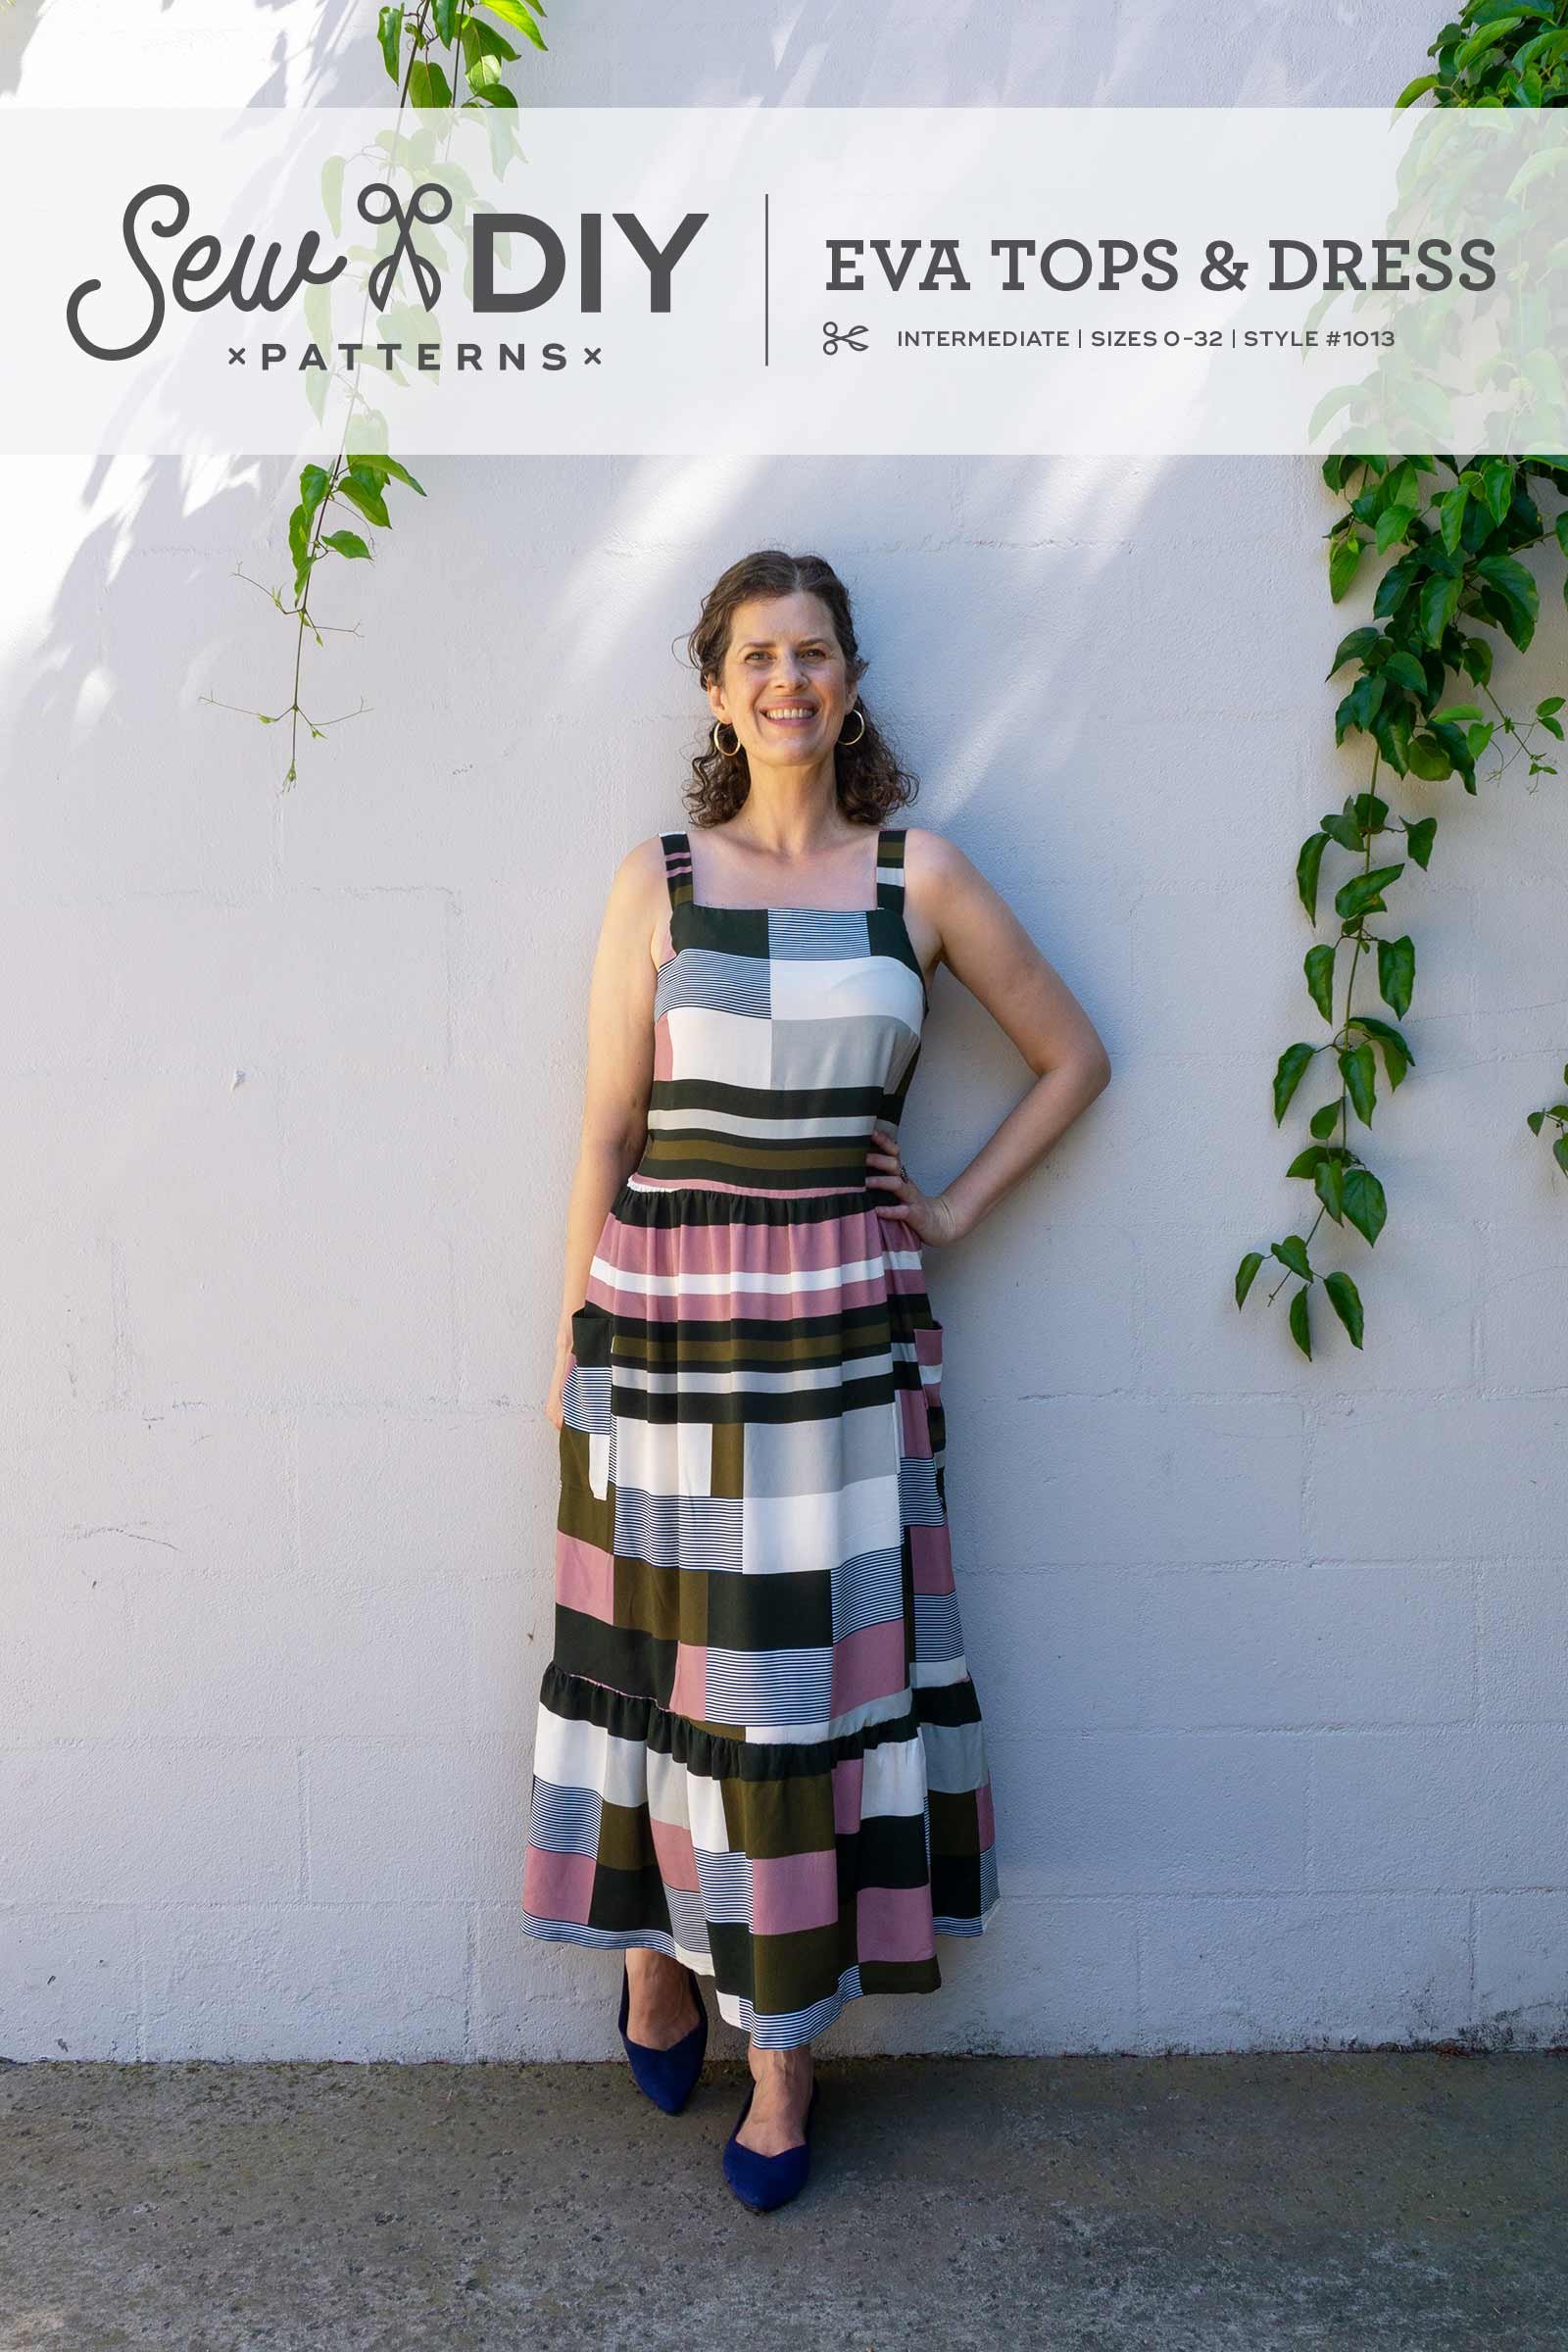
If you're not familiar with this pattern, it is a zero-waste friendly crop top, peplum top and sun dress. The pattern features a square neckline, bust darts at the side seams, shoulder straps and is fitted at the back with narrow elastic and loops and ties. The peplum and skirt are both gathered at the waist and the skirt has options for a gathered ruffle and patch pockets. Check out the link below to get your own copy of the pattern or learn more in our intro post.

Watch the video above (or on YouTube) for a step-by-step process of sewing the crop top view of the Eva Tops and Sundress. The crop top is relatively quick to sew but I did speed up the footage about 4x for most of the video. If you want a more detailed video sewalong, check out part 3 of this series. And of course, the pattern includes detailed, illustrated instructions.
TIME STAMPS FOR VIDEO
00:11 Cutting the fabric and interfacing
01:39 Staystitch
01:52 Sewing the darts
02:35 Make the ties and loops
03:59 Assemble the back pieces
05:48 Sew the side seams
06:05 Make the straps
07:03 Assemble and attach the facing
09:42 Stitch the casing and insert elastic
10:53 Add the lacing
The crop top is a mix of simple sewing techniques like adhering interfacing and sewing dart combined with more complicated steps like sewing rouleau loops. For this reason, I’ve rated it at an intermediate sewing level. But, I think if you’re an adventurous beginner, you could have success with this pattern.
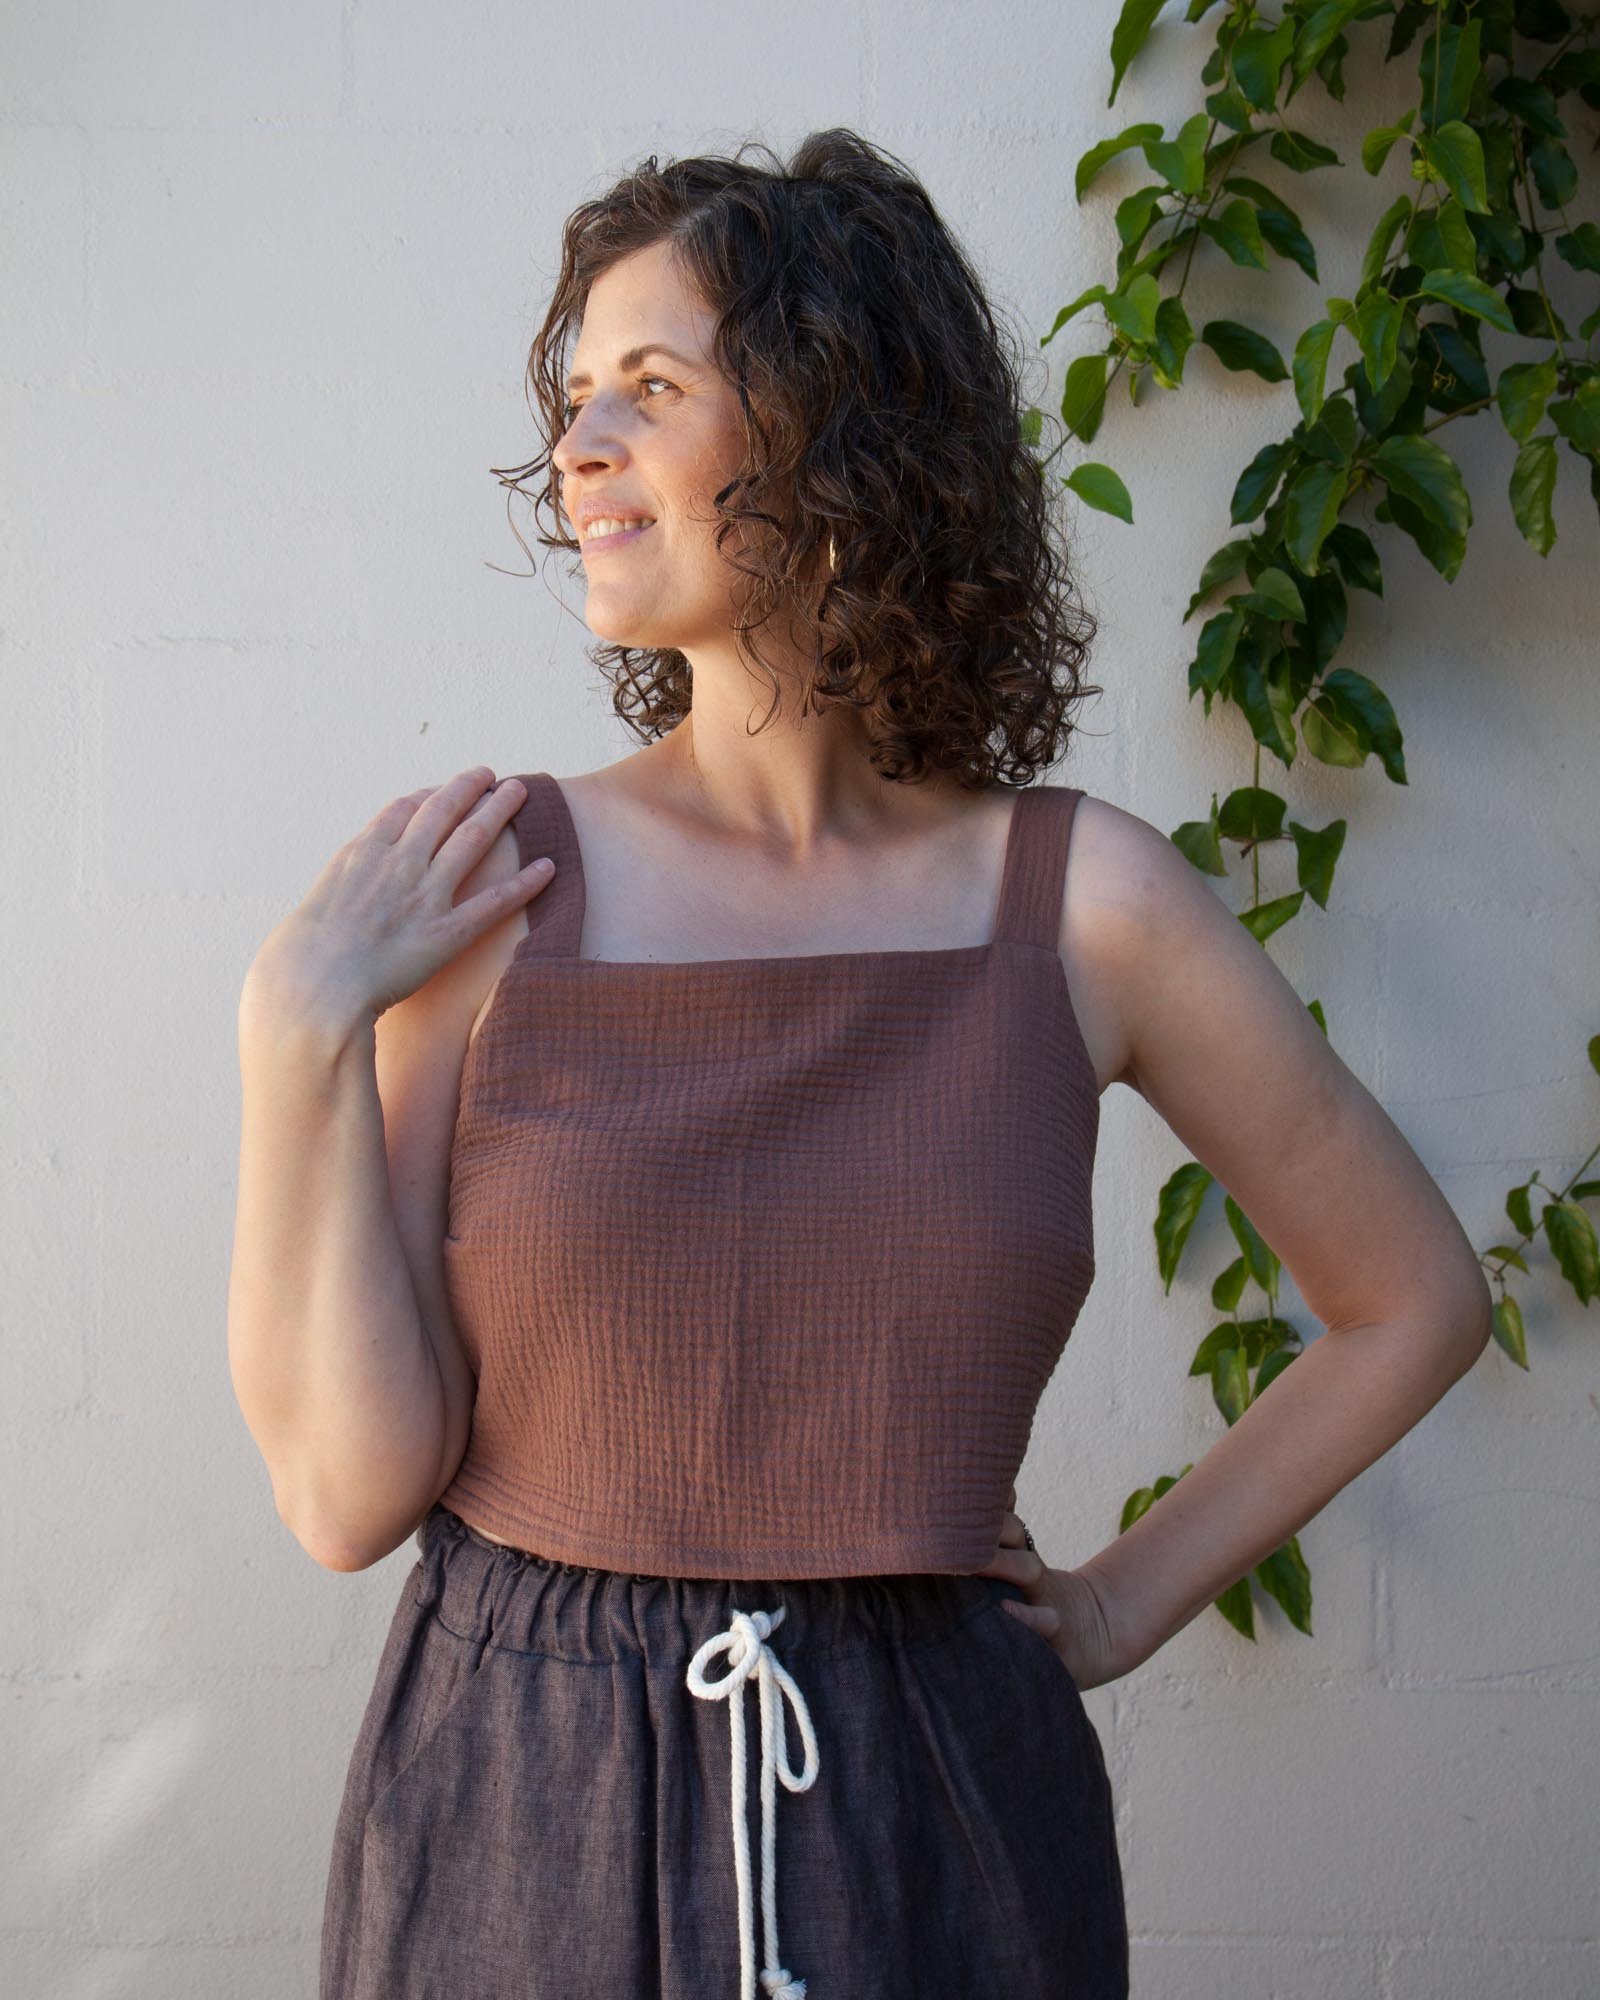
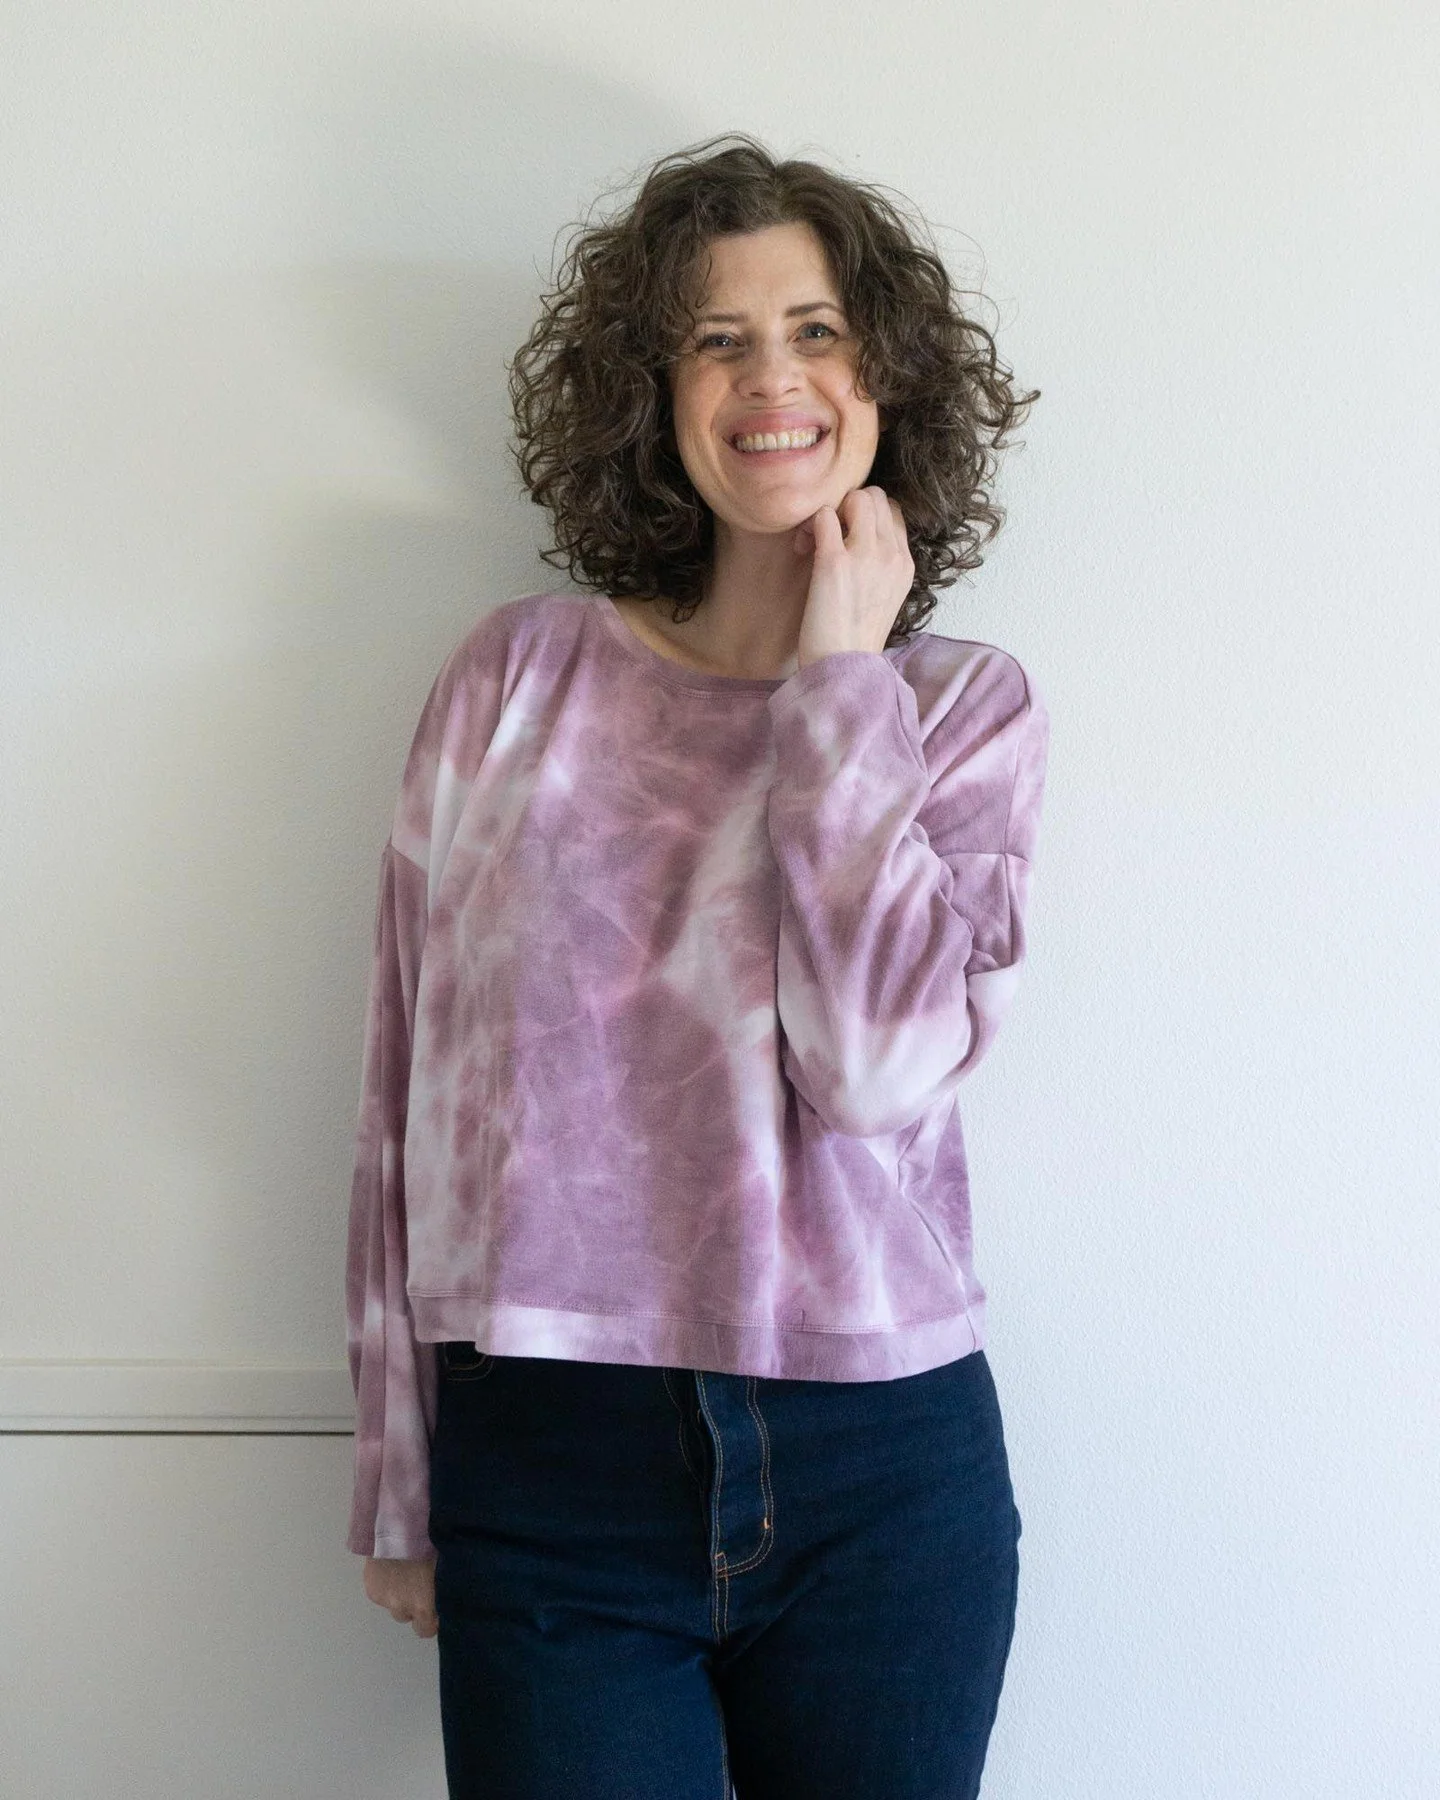
For this crop top sample of the Eva pattern, I used a piece of double gauze that I bought from Joann. They have a number of colors available and while I don’t see the exact color I used, they have a similar one. I love how soft double gauze is and I think the slightly thicker fabric works well in the crop top view.
If you decide to use double gauze or a similar fabric for your Eva, I recommend triming down the seam allowance before you turn the loops and ties right side out. Even with trimming, my ties were nice and plump.

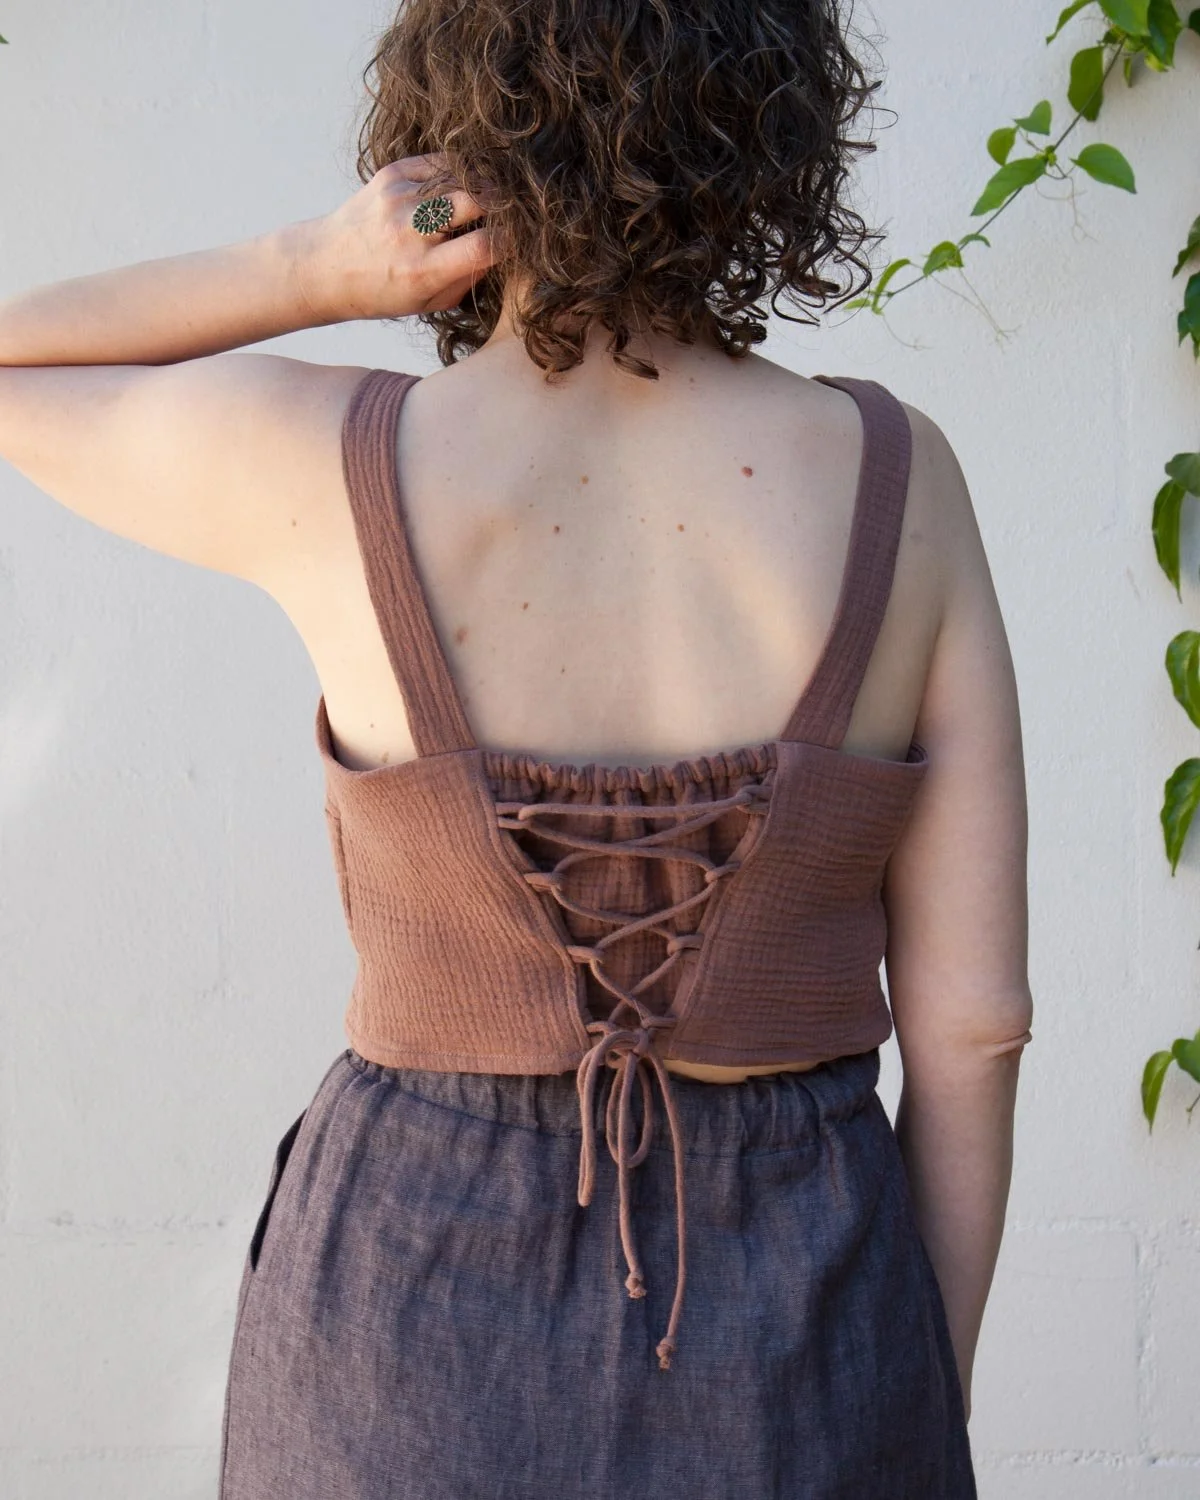
One of the best things about this pattern is that it comes in three cup sizes for all sizes 0-32. So, you’ll be much closer to achieving a great fit right off the bat. Plus, the elastic and lacing at the back will help give you a great fit. The pattern includes cup sizes A/B, C/D and E/F. The instruction booklet includes tips for selecting a size, making a quick muslin and evaluating the fit.
I hope that you found this video helpful. I think this really is such a fun pattern, with unique details. And I love that so much of it is made using rectangles. Happy sewing!
Catch up with the previous sewalong posts here:
Introduction to the Eva Tops and Sundress
Day 2: Preparing to Sew the Eva Pattern
Day 3: Sewing the Eva Pattern Bodice
Day 4: Sewing the Eva Pattern Peplum and Skirt
And check out the Eva Sewalong Page for more sewing skills and tutorials related to this pattern.

About the Sew DIY Eva pattern:
These semi-fitted tops and sundress feature a square neckline, side bust darts and are fitted at the back with a combination of narrow elastic and criss-crossed lacing. View A is a crop top that ends at the waistline. View B has a ruffled peplum and ends at the high hip. View C is a dress with a calf-length skirt and ruffle at the hem.
The pattern is a hybrid of a traditional pattern that you need to print and a zero-waste style pattern. You will need to print (or project) the front bodice and front facing pattern pieces. The remaining pattern pieces are rectangles that you can draw directly on your fabric (or paper) and then cut out, saving you paper and fabric.


Pin the image below to save this post for later. Happy sewing!