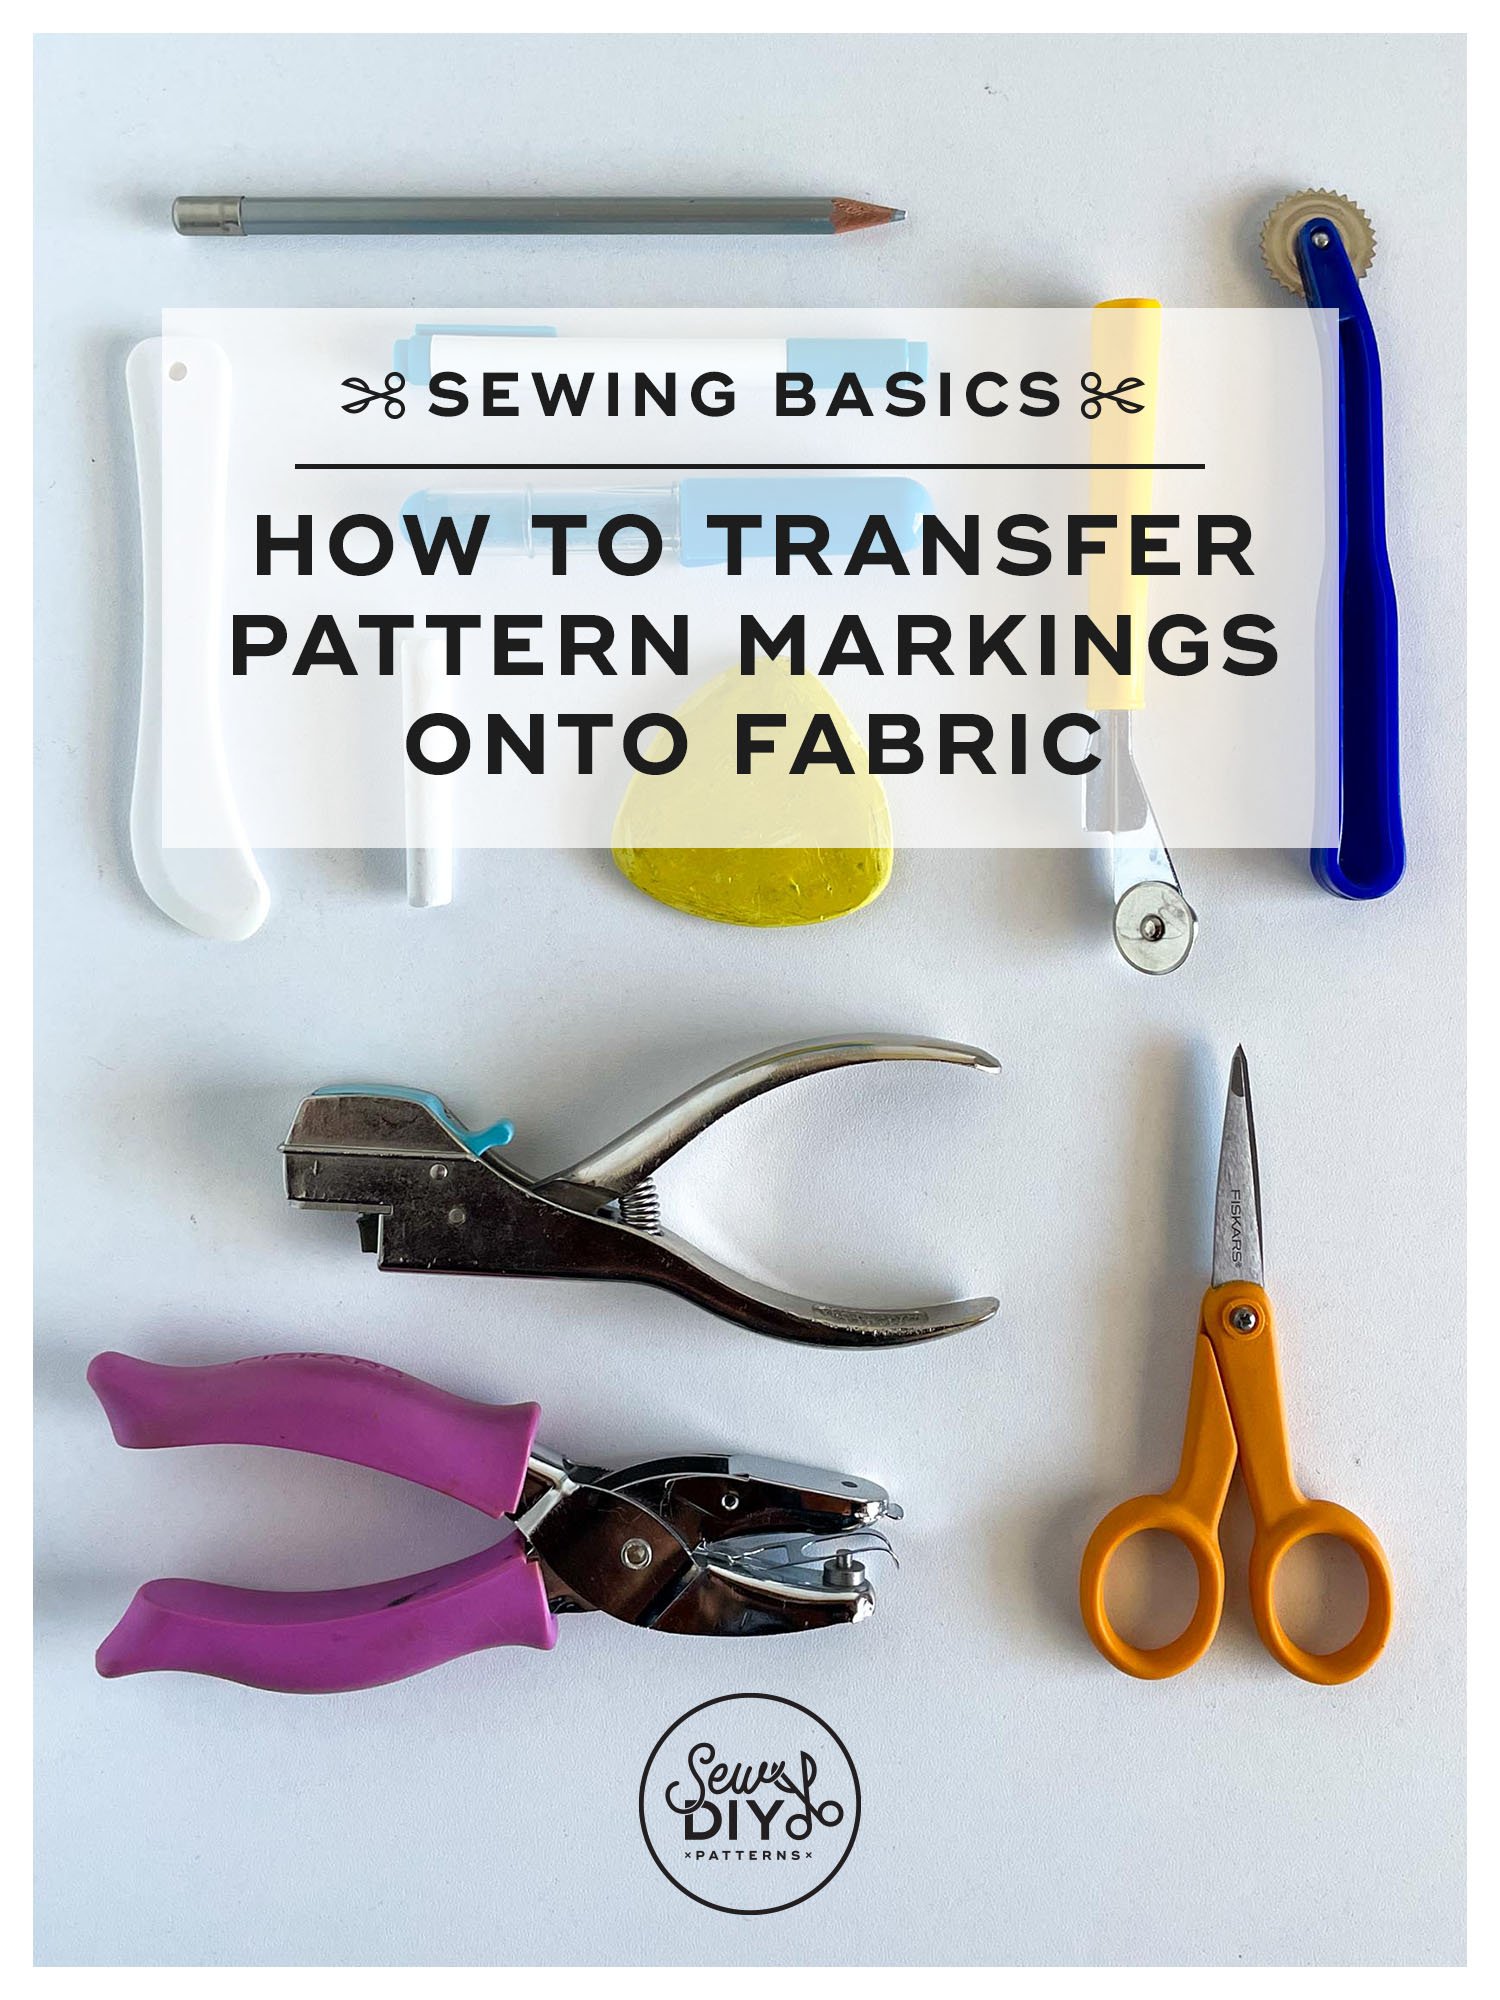
Hello sew-friends! Today's video is taking a deep dive into marking tools for fabric. After you cut out your fabric, the first thing you need to do is transfer all the pattern markings from the pattern to the fabric. Trust me, you don't want to skip it! In this post, I'll chat briefly about pattern markings and why they're important. Then, I'll share a variety of tools that can transfer marks to fabric and the pros and cons of each. Plus, I'll demonstrate how to mark a dart using a tracing wheel and transfer paper and how to mark a dart using a hole punch and chalk. Let's get started!
Watch the video above for all of my tips, or if it's not working, you can watch it on YouTube here. Time stamps are below if you want to skip to a different section.
TIME STAMPS
Intro 00:00
Types of pattern markings 00:33
Why it's important to transfer markings 00:55
Marking tools 02:05
Pressure-style marking tools 04:58
How to use a hera marker 05:04
How tracing wheels work 05:45
How to use a tracing wheel to mark a dart 06:47
How to use a hole punch and chalk to mark a dart (my favorite method) 08:44
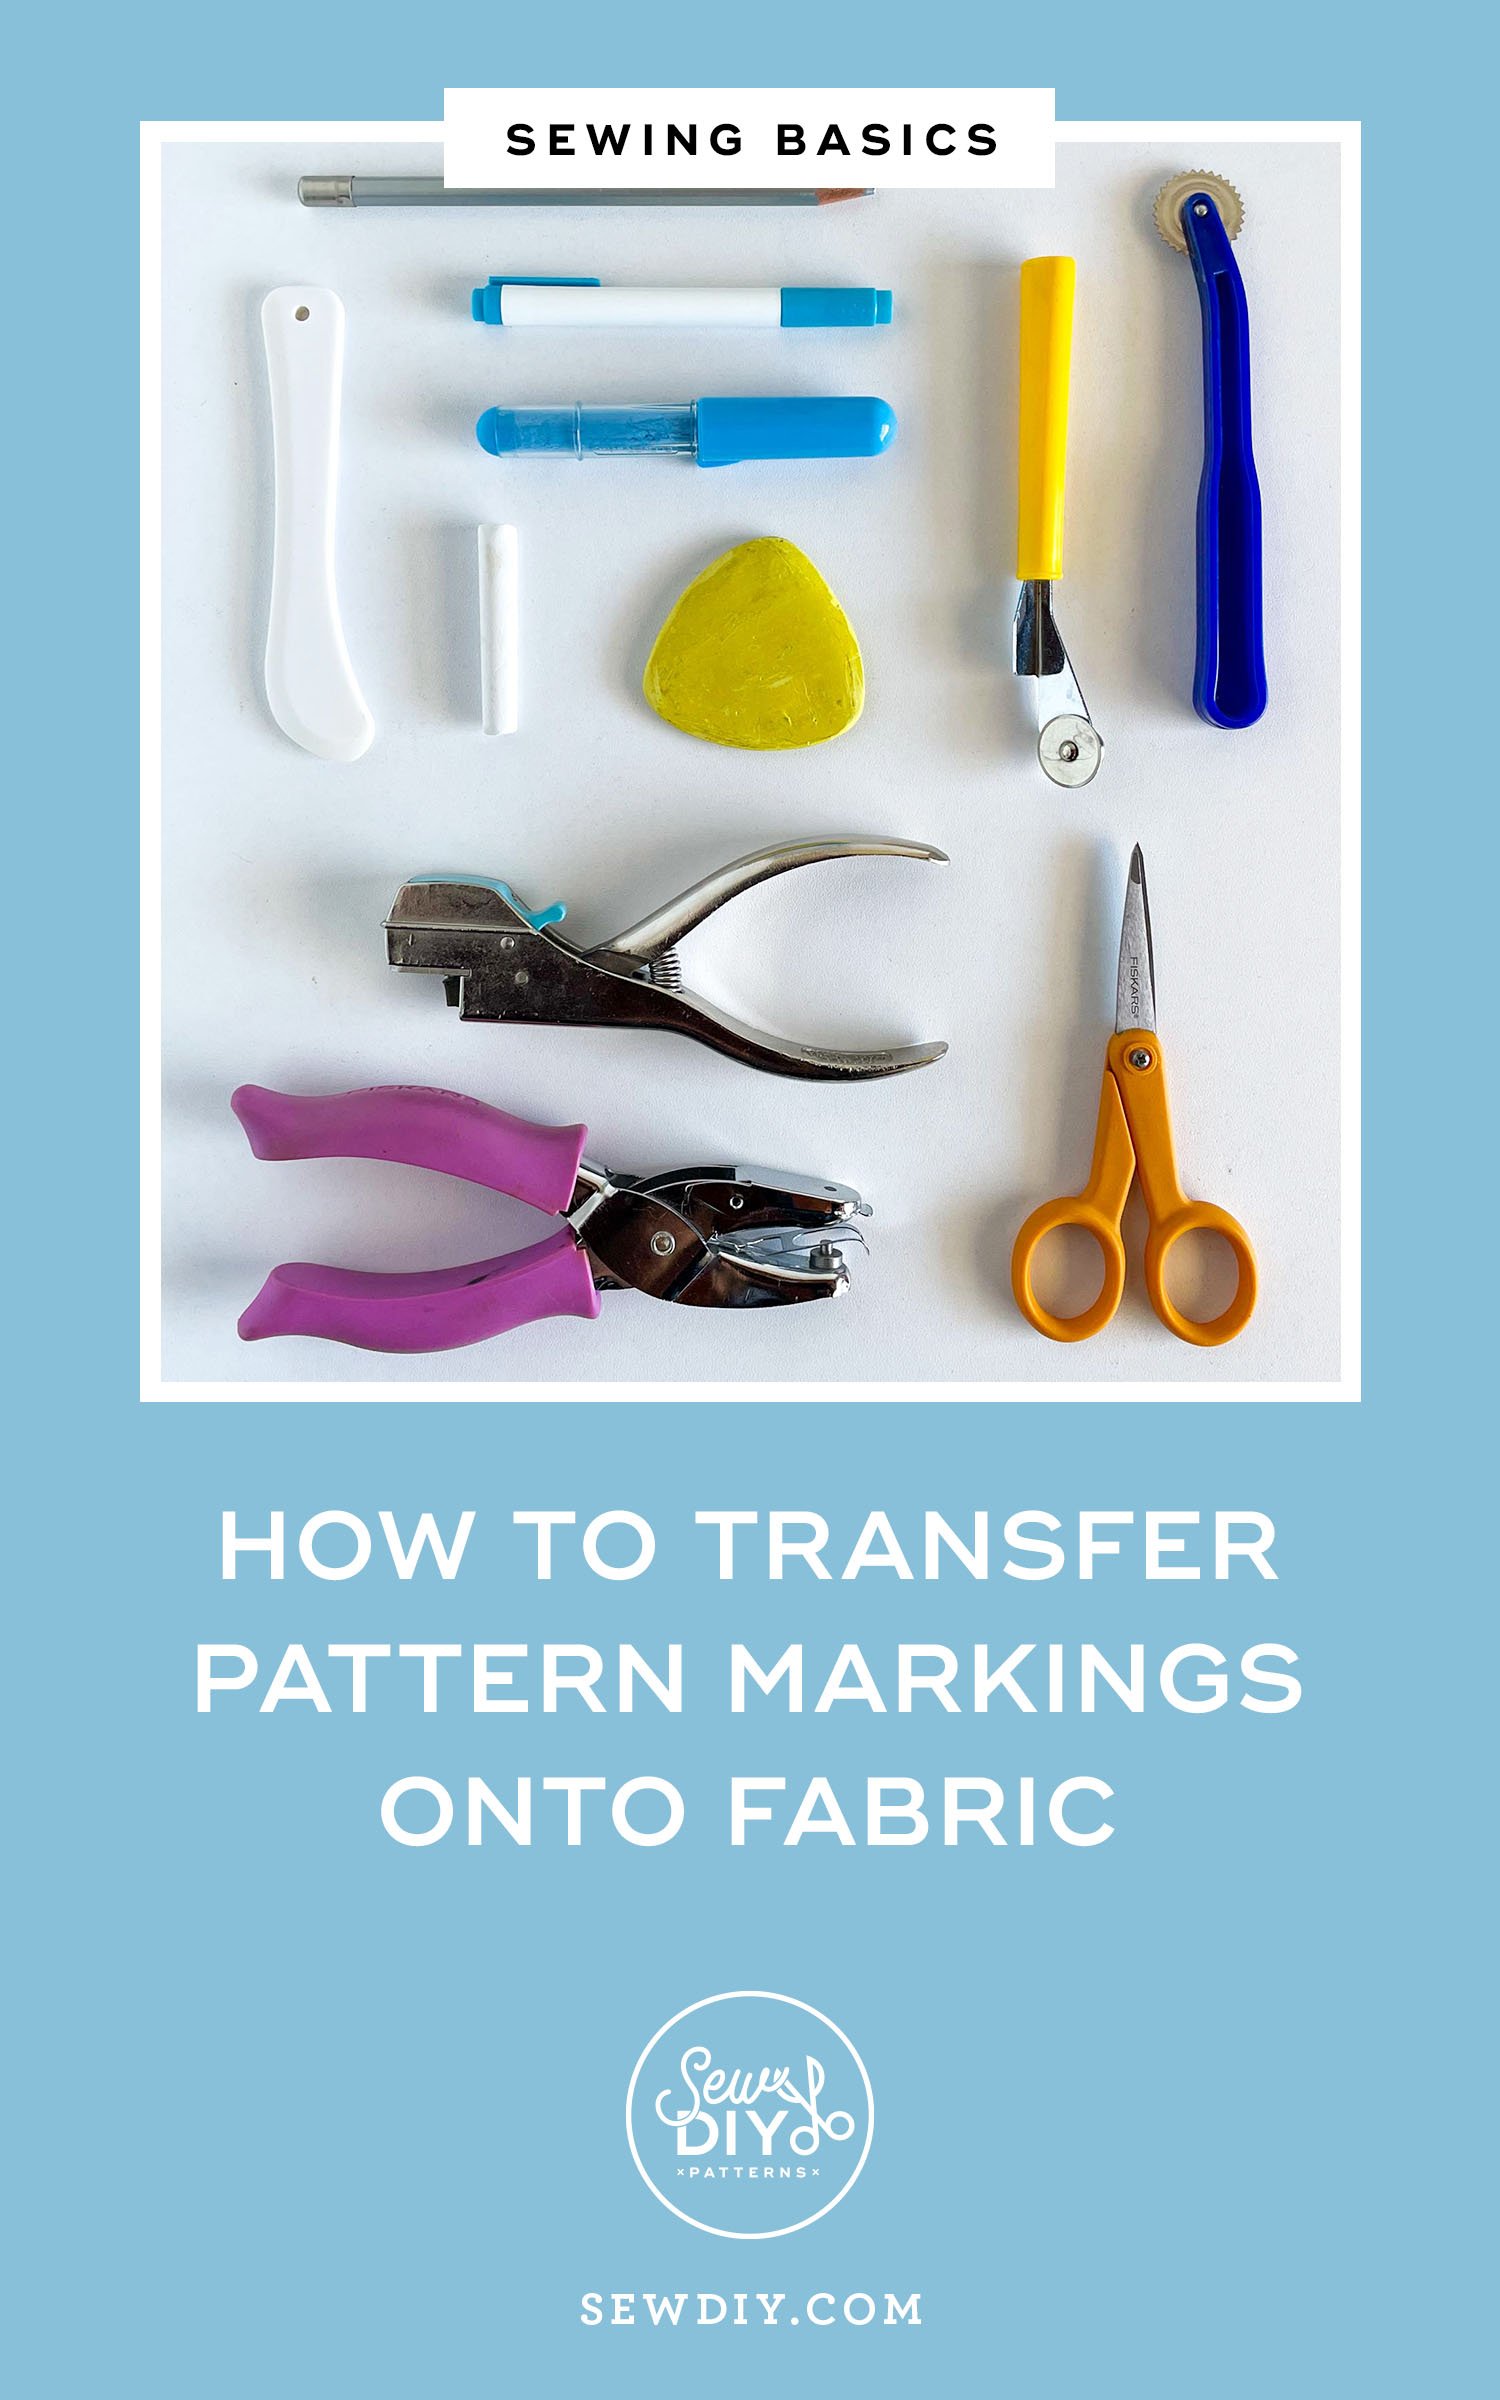
Tools for marking
I've divided the tools into two categories—those that directly mark onto fabric and those that use pressure to create a mark. Disclosure: The links below are affiliate links, meaning if you buy via one of the links, I may earn a small commission. The price for you will be the same.
There are a variety of pencils that can be used to create marks on fabric. I have only used pencils that do not necessarily wash away so I use them only on the seam allowance or cutting edge of the fabric. But, in my research, I did find some pencils that are water soluble. The only annoying thing with pencils is that they need to be sharpened
This is a classic dressmaking tool. In my experience, this waxy chalk makes nice marks and is inexpensive. You can use a blade to sharpen it for a finer line.
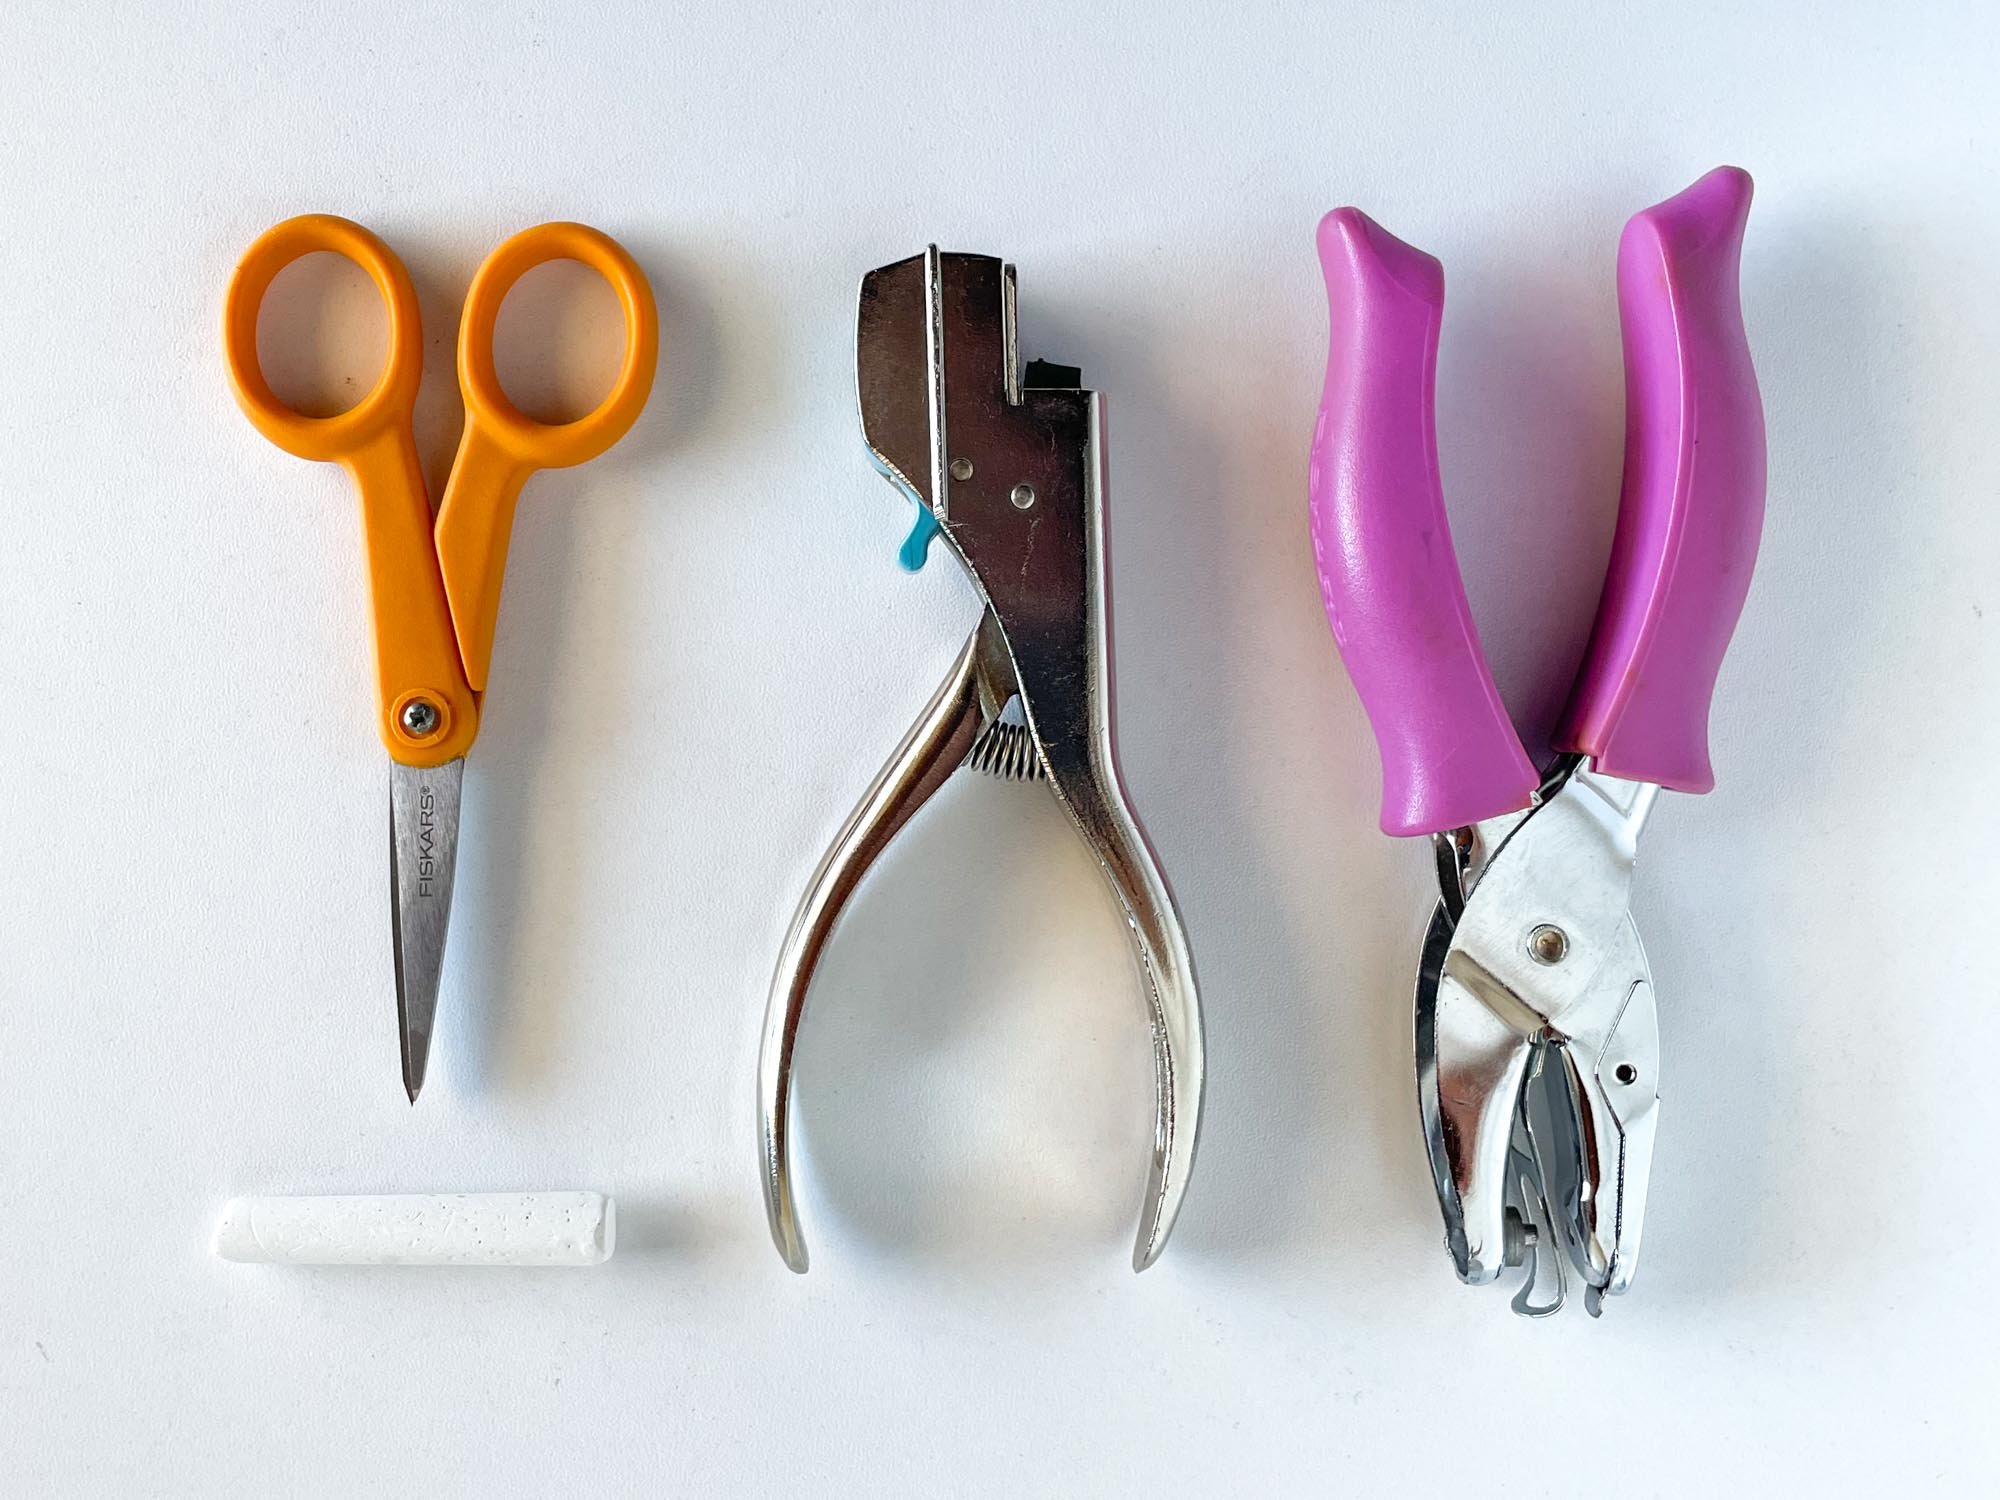
Chalk
This is probably my most used marking tool. Yep, just regular old chalkboard chalk. I love that it's affordable, plastic free and gets the job done. In the video, I share how I use it to mark precise dots.
This tool is new to me and I honestly don't feel totally comfortable with it yet. It's like a pen with a serrated wheel at the end and filled with chalk instead of ink. The great thing about it is that it creates a very fine line that can be brushed away. I've also found that I need to press a little harder than I normally would with other tools
Another one of my go-to tools. These ink from these fabric pens washes away with water.
This tool is commonly used in quilting to mark stitching lines. Layer the fabric over batting and then run the hera marker against the fabric to create a temporary crease.
This tool is used in conjunction with transfer paper. Read on for more details.
A variation of the smooth tracing wheel, this tool is used in conjunction with transfer paper. Read on for more details. One drawback of the serrated wheel is that it punches holes in the paper pattern, which with repeated use will degrade the paper.
This tool can also be used trace paper patterns (without transfer paper) or to trace existing garments to copy a pattern (see this blog post by the Creative Curator).
Transfer paper is similar to carbon paper in that it's coated with a substance that will transfer to the fabric when pressure is applied (in this case with a tracing wheel). The transfer paper will come folded so that you can easily sandwich the fabric in the middle. It also comes in a variety of colors for use on different colors of fabric.
Wherever I need to mark a circle, I cut a small hole in my pattern using a hole punch. I can then use that hole like a stencil to mark a dot in chalk on the fabric.
This tool cuts a U-shaped hole in the edge of the paper. I use it wherever my pattern has a notch.
Not exactly a marking tool, but I use my micro-tip scissors to snip into the fabric's seam allowance and mark notches and the ends of dart legs. Super quick and easy.
How to use a tracing wheel to mark a dart
When I first learned to sew, this is the way that I would transfer all my pattern markings. My favorite thing about it is that when you cut your garment out of two layers of fabric, you can easily transfer markings to both sides of the fabric at once. To watch this section in the video, go to time stamp 06:47.
Step 1:
Cut out the fabric with the WRONG side of the fabric facing out. Make sure that the fabric is on a work surface that can be cleaned, like a cutting mat, in case the paper transfers marks to the work surface.
Step 2:
Gently lift up the fabric and pattern piece at the dart. Slide the bottom side of a piece of transfer paper under the bottom piece of fabric. Put both pieces of fabric down. Then, put the top layer of transfer paper on top. The fabric should be sandwiched in between the transfer paper. Finally, replace the pattern piece on top.
Step 3:
Run the tracing wheel over the lines of the dart. Use the tracing wheel to mark X's at all of the dots. Press hard enough that the paper will transfer onto the bottom piece of fabric too.
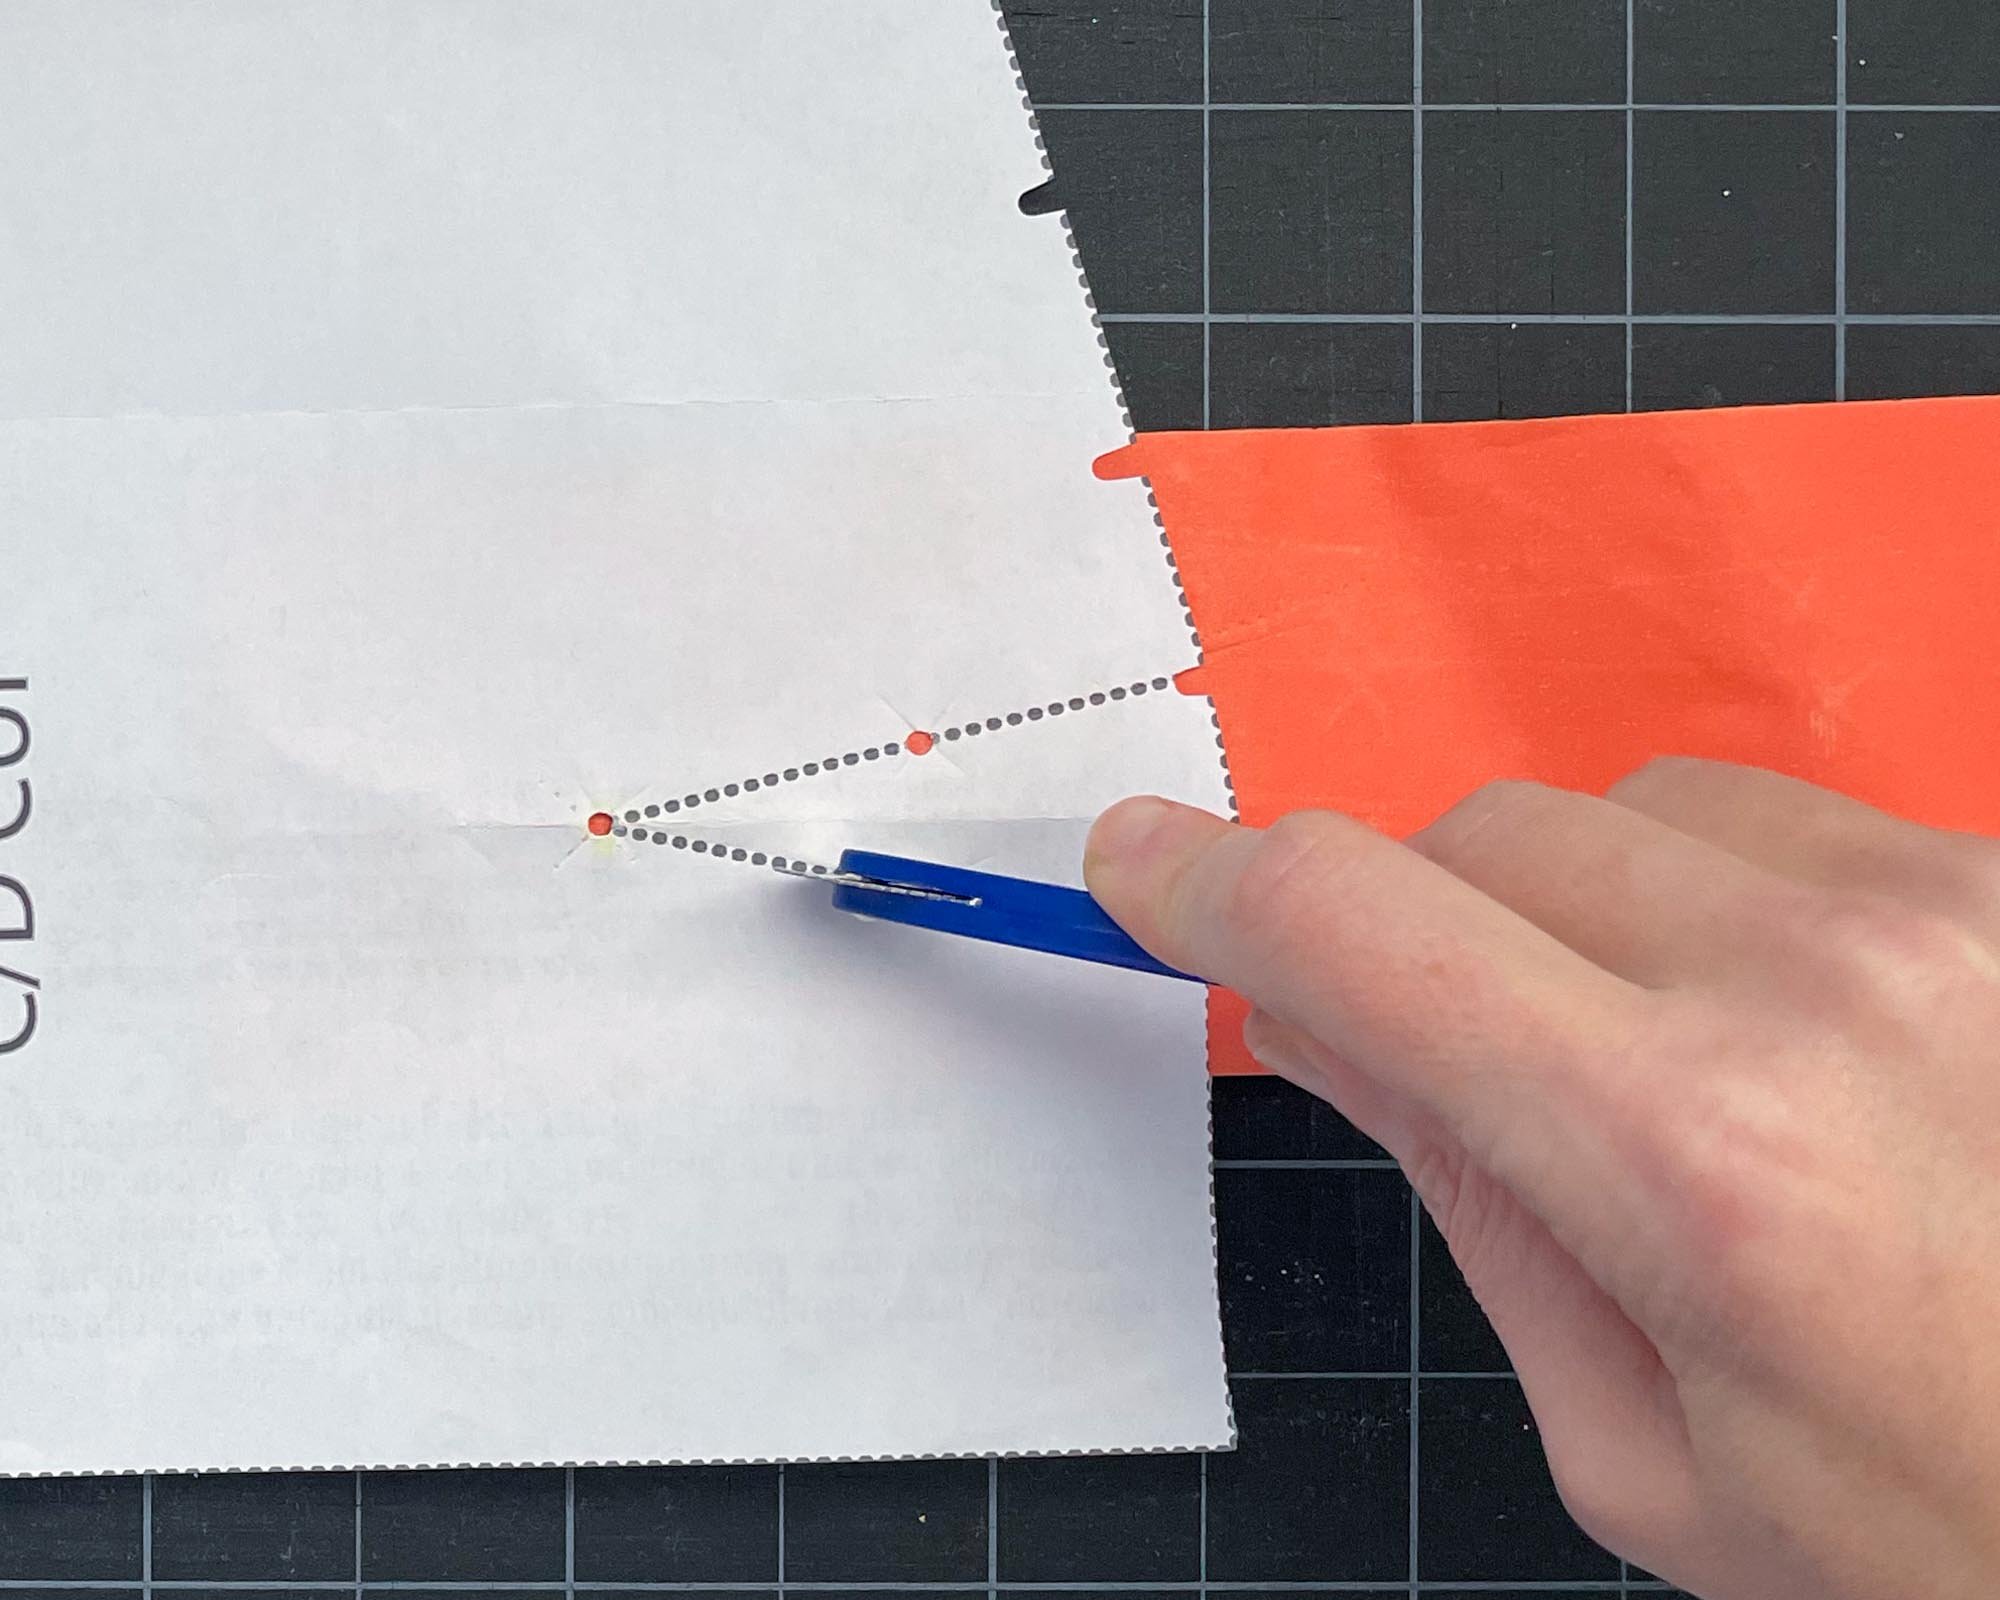
How to use a hole punch and chalk to mark a dart
This is now my preferred method for transferring dots and darts to fabric. It's quick, accurate and has just enough information transferred. The tools I use in this method are a pattern notcher, small hole punch, micro-tip scissors and chalk. To watch this section in the video, go to time stamp 08:44.
Step 1:
Prepare the pattern. Use a pattern notcher to cut the ends of the dart legs. Fold the dart in half and use the small hole punch to punch holes at the dart tip and dart circles.
Step 2:
Using the prepared pattern piece, cut out fabric. (Make sure that the WRONG side of the fabric is facing out.) Before removing the pattern piece, snip into the notches at the dart ends (the edge of the fabric). Then, rub the chalk over the holes to mark the circles. (The hole in the paper acts like a stencil.)
Step 3:
Gently flip the fabric over. Turn the pattern piece over and place it on top of the fabric with edges aligned. Mark the dots on the reverse side.


I hope that this post was helpful for you and gave you some new ideas and options for creating marks on your fabric. I share a lot of opinions in this post and while that comes with experience, it is personal. So, please, try things out and do what works best for you. Ultimately, I want you to have a good experience sewing, so if different methods work better for you, or you enjoy them more, then thats’s what you should do.
If you want to support this content, you can pin the image below, or check out the shop for beginner friendly sewing patterns. Happy sewing!