Hello sew-friends! This jumpsuit is the second time I've used the Rowena Jumpsuit pattern by Victory Patterns. Using a pattern more than once is a very good sign that it's an awesome pattern. I loved my first Rowena Jumpsuit (blogged here) so when found yards and yards of this fabric, I couldn't resist making it again.
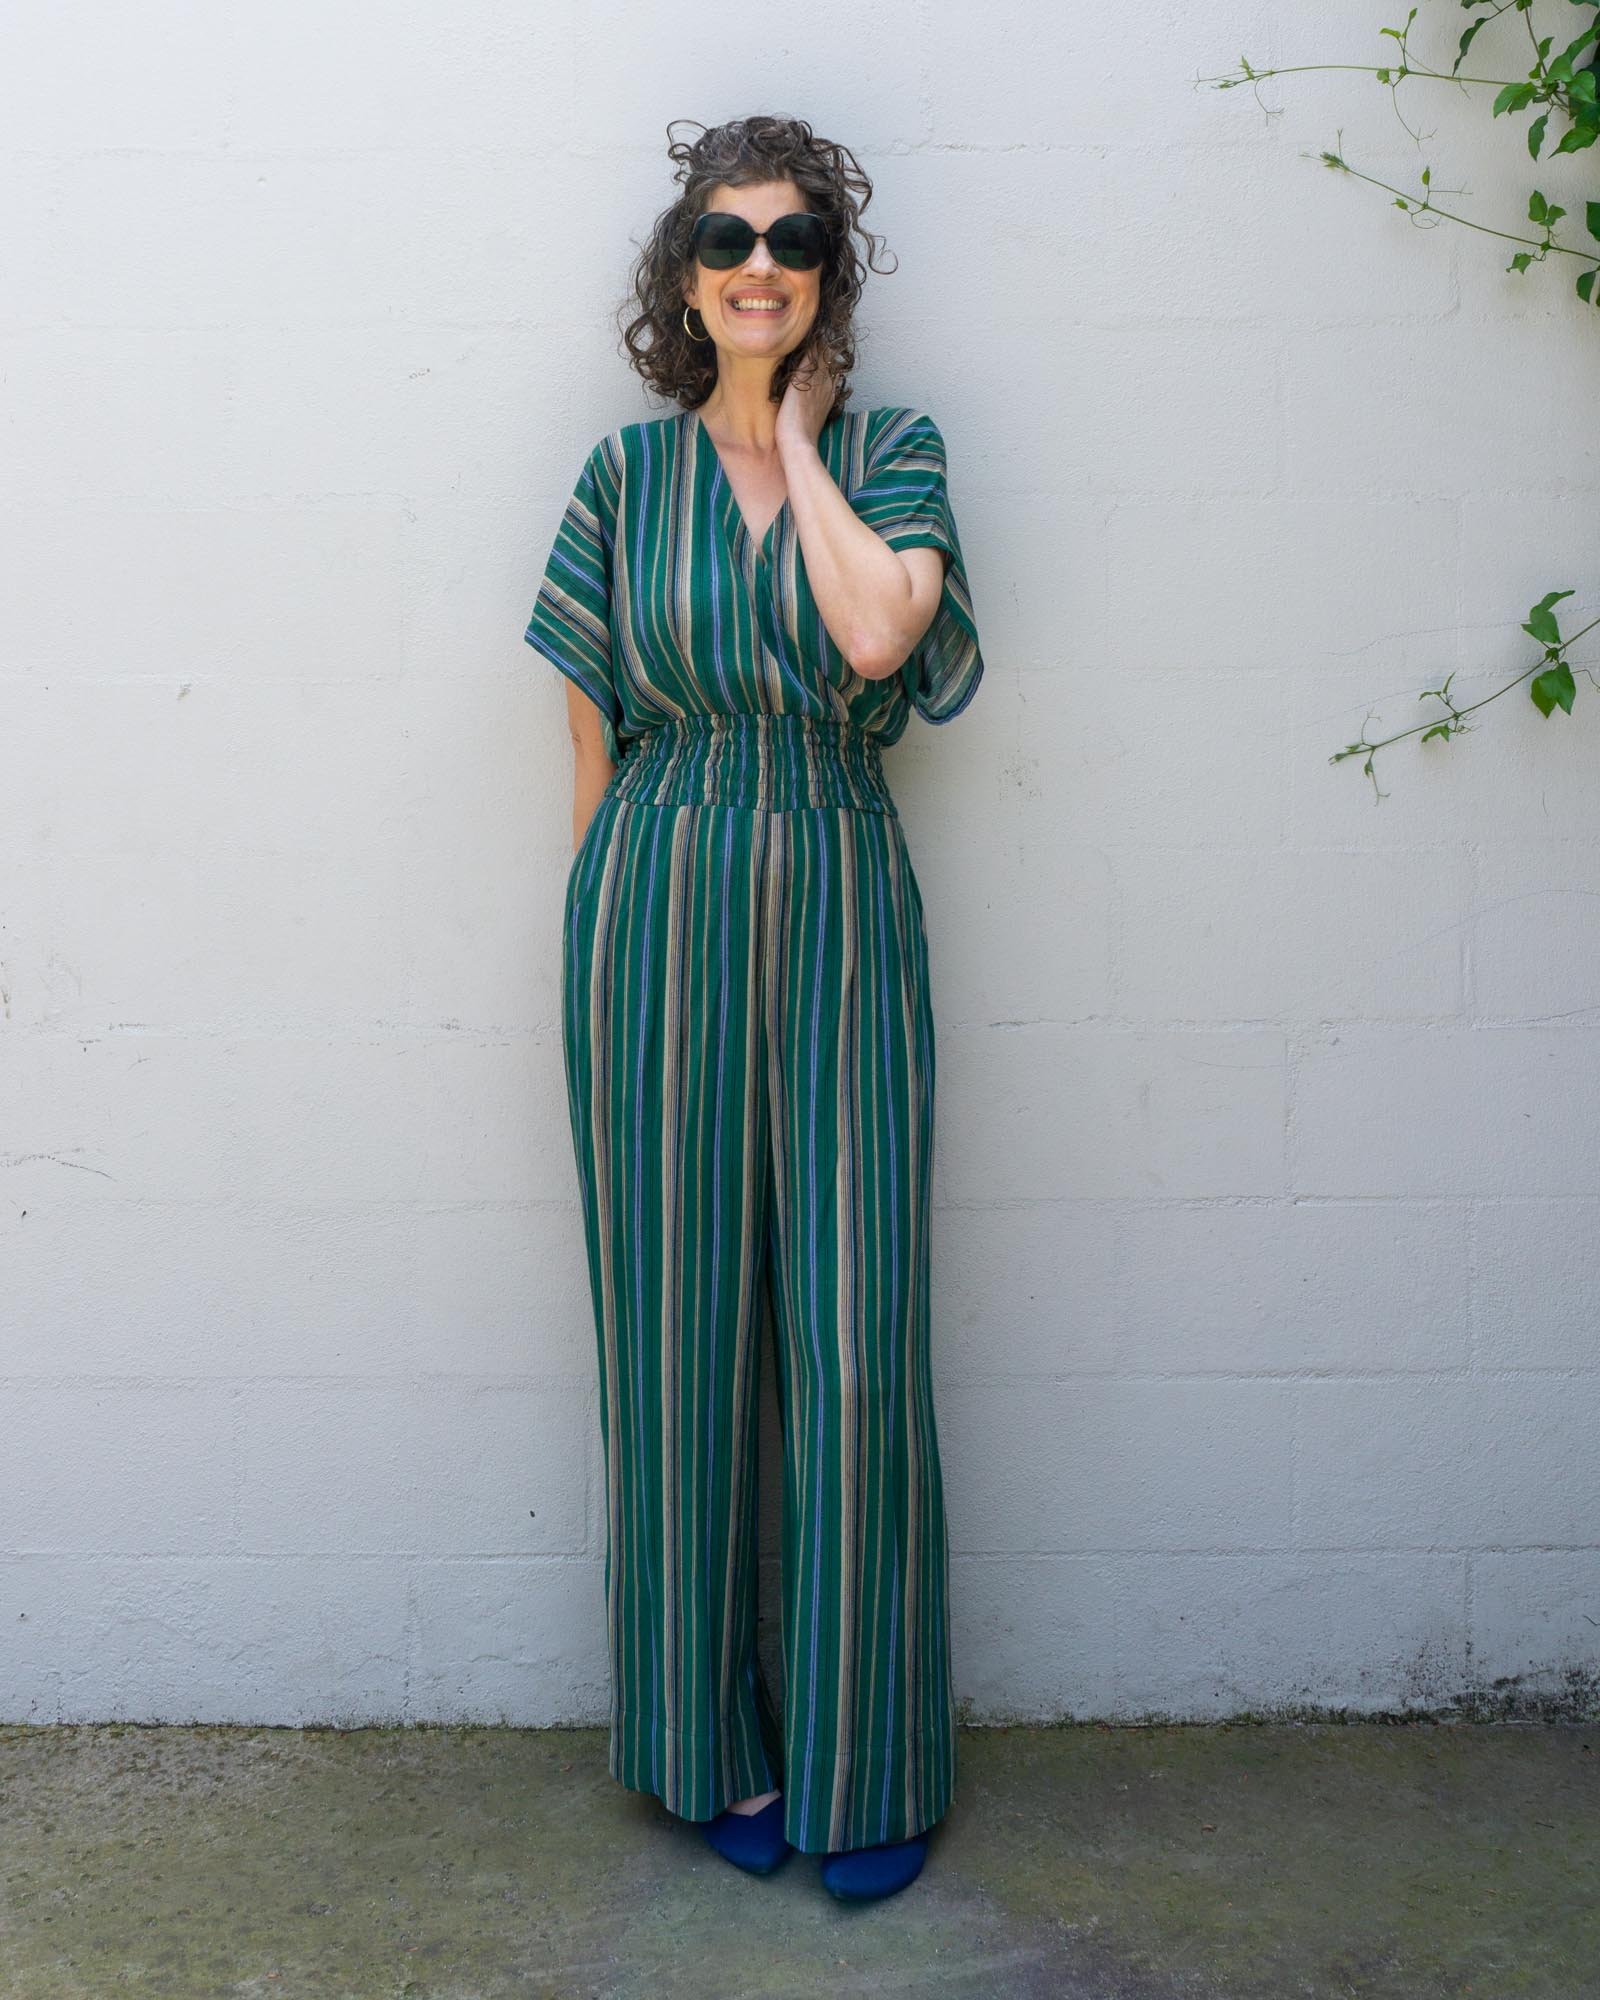
The pattern is the Rowena Jumpsuit by Victory Patterns. The pattern comes in two size ranges, 0-18 and 14-30 and goes up to a 58" bust/60" hip. This jumpsuit features overlapping front and back pieces that create a V at the front and back. To keep it all in place, there are ties at the back neck opening. The pants are a wide leg style and the waistband has shirring for a comfy yet fitted look.


I made a size 10, just like last time, but I added a little more length to the bodice and pants rise. (Last time, I ended up using smaller seam allowances to give myself more ease.) I did make a hand full of changes and there are a few minor things that I'd do differently next time. First off, my measurements. I'm 5'11" with a long torso. My measurements are currently upper bust 35.5", full bust 38.5", waist 29" and hips 40.25". I started with a size 10, based on my waist and hip measurement. See my first blog post for more details.

Like last time, I applied interfacing to the neck edges of the bodice front and back, to prevent stretching. I've had a number of garments stretch out at the neckline in recent years so I I like to be cautious and reinforce that bias cut edge as much as possible. If you don't want to add interfacing to the bodice, you could use a traditional facing (with interfacing), instead of bias strips to finish the raw edge.


Ok, now that we've got those little sizing and construction notes out of the way, let's talk about this statement fabric. I found this fabric in a pile at Angel Textiles in downtown LA. It was only a few dollars per yard, but only if I bought the entire length, which turned out to 8 yards. Did I want 8 yards of this green striped fabric? Not particularly. But, it was cheaper to buy all of the fabric at the discounted price than to cut it and pay full price. So, I went ahead and bought all 8 yards. After this jumpsuit, I still have about 5 yards left, and I'm planning to make another version of this Vogue dress because I love the pattern and it uses a lot of fabric.

I think this fabric is probably a rayon, maybe a polyester. It has a little bit of texture to it and the feel of it makes me think it's rayon. As I said, it came from a pile on the ground, so its origins are a mystery. This fabric is thinner and softer than my first version of the jumpsuit, making it feel a more slinky. When I first put on the jumpsuit, the fabric and stripes, really reminded me of pajamas. Not totally sure why I was getting pajama vibes but it has made me a little less likely to wear this jumpsuit, because it really feels like a statement piece.

If you’d like extra help sewing this jumpsuit, make sure to check out these tutorials for skills I used while sewing this garment.
Skills used to make this JUMPSUIT:

Overall, I really like the jumpsuit and I’m glad that I made it. It’s super comfy and I love the ease of wearing a jumpsuit. It’s just so easy to throw it on and be done. And, if I ever need a green outfit for St. Patrick’s Day, I’d say I’m ready! I definitely recommend this pattern and love both of the jumpsuits that I’ve made using it.