A few weeks ago, the lovely folks over at Klum House asked if I’d like to try out an advance copy of their Maywood Totepack kit. I’ve been a fan of their patterns and kits for a while and love the look of the Maywood so I of course said "yes please!”. This bag has all the features that I look for in a travel bag. First, it is actually a tote and a backpack in one bag; a design that I love to carry when traveling because backpacks not allowed in some locations and because it’s nice to be able to change your bag’s position when your shoulders get tired. The bag is big enough to fit a laptop and has some extra space so that I can put the laptop in a protective case. And, last but not least, the main part of the bag is zippered so that things won’t fall out.
Psst: if you get all the way to the bottom of the post there’s a discount code :)
I love all the metal and leather details of the Klum House designs but sourcing and cutting leather (as well as sourcing the waxed canvas) is a daunting tax. When you order the kit, you get to choose the colors of waxed canvas that you’d like, the color of leather and finish of the rivets. I selected grey and navy fabric with brown leather and antique brass rivets. It was really hard to decide what color I wanted and I even photoshopped different color combos. Ultimately, I just chose my favorite colors, navy and grey. The kit arrives in a long tube with all the fabric cut out and marked. Even the leather is cut out and punched at the locations you need to make this tote. Having everything prepared makes the construction so much easier (and faster). By the way, the Klum House branding is on point. It’s all thoughtfully done and just beautiful.
I used my new Janome machine with a size 16 universal needle and the stitching was just smooth and easy. I was a little concerned because the waxed canvas is very thick but I did not have any problems stitching it at all. The bag came together fairly quickly. There’s not a lot of sewing to do and I think I may have spent more time hammering in the rivets than actually sewing. Setting the rivets was not as challenging as I was afraid it might be. These tubular rivets are actually MUCH easier to set than the rivets that are used in jeans making. For a hard surface, I used my mini anvil from Blackbird Fabrics. I seriously love that mini anvil (see it in the photo below). This is not a super hard project to sew but if you have sewn a bag before that will be helpful experience to have under your belt. I also found the Klum House videos to be very helpful.
A couple notes on tools, as this is not your ordinary sewing experience. When you order the kit, you can also order the rivet setting tool, punch tool and magnetic snap setter. I definitely would not have been able to put together this tote if I didn’t have those tools. To use the rivet setting tool and punch tool, the instructions call for a mallet. I do not have a mallet, just a trusty hammer. So to make my hammer act like a more gentle mallet, I put a felt pad on the end. You can see it in the photo above. The felt pad is one of those sticky pads that you can buy to put on the bottom of your furniture to prevent it from scratching the floor. It worked perfectly for softening up my hammer.
Also, it’s quite challenging to put pins in the waxed canvas so you’ll need some sort of clip. I used binder clips to hold the fabric together when necessary as I don’t have a specific fabric clip such as wonder clips. I do wonder (hee hee ;) if the wonder clips are superior though.
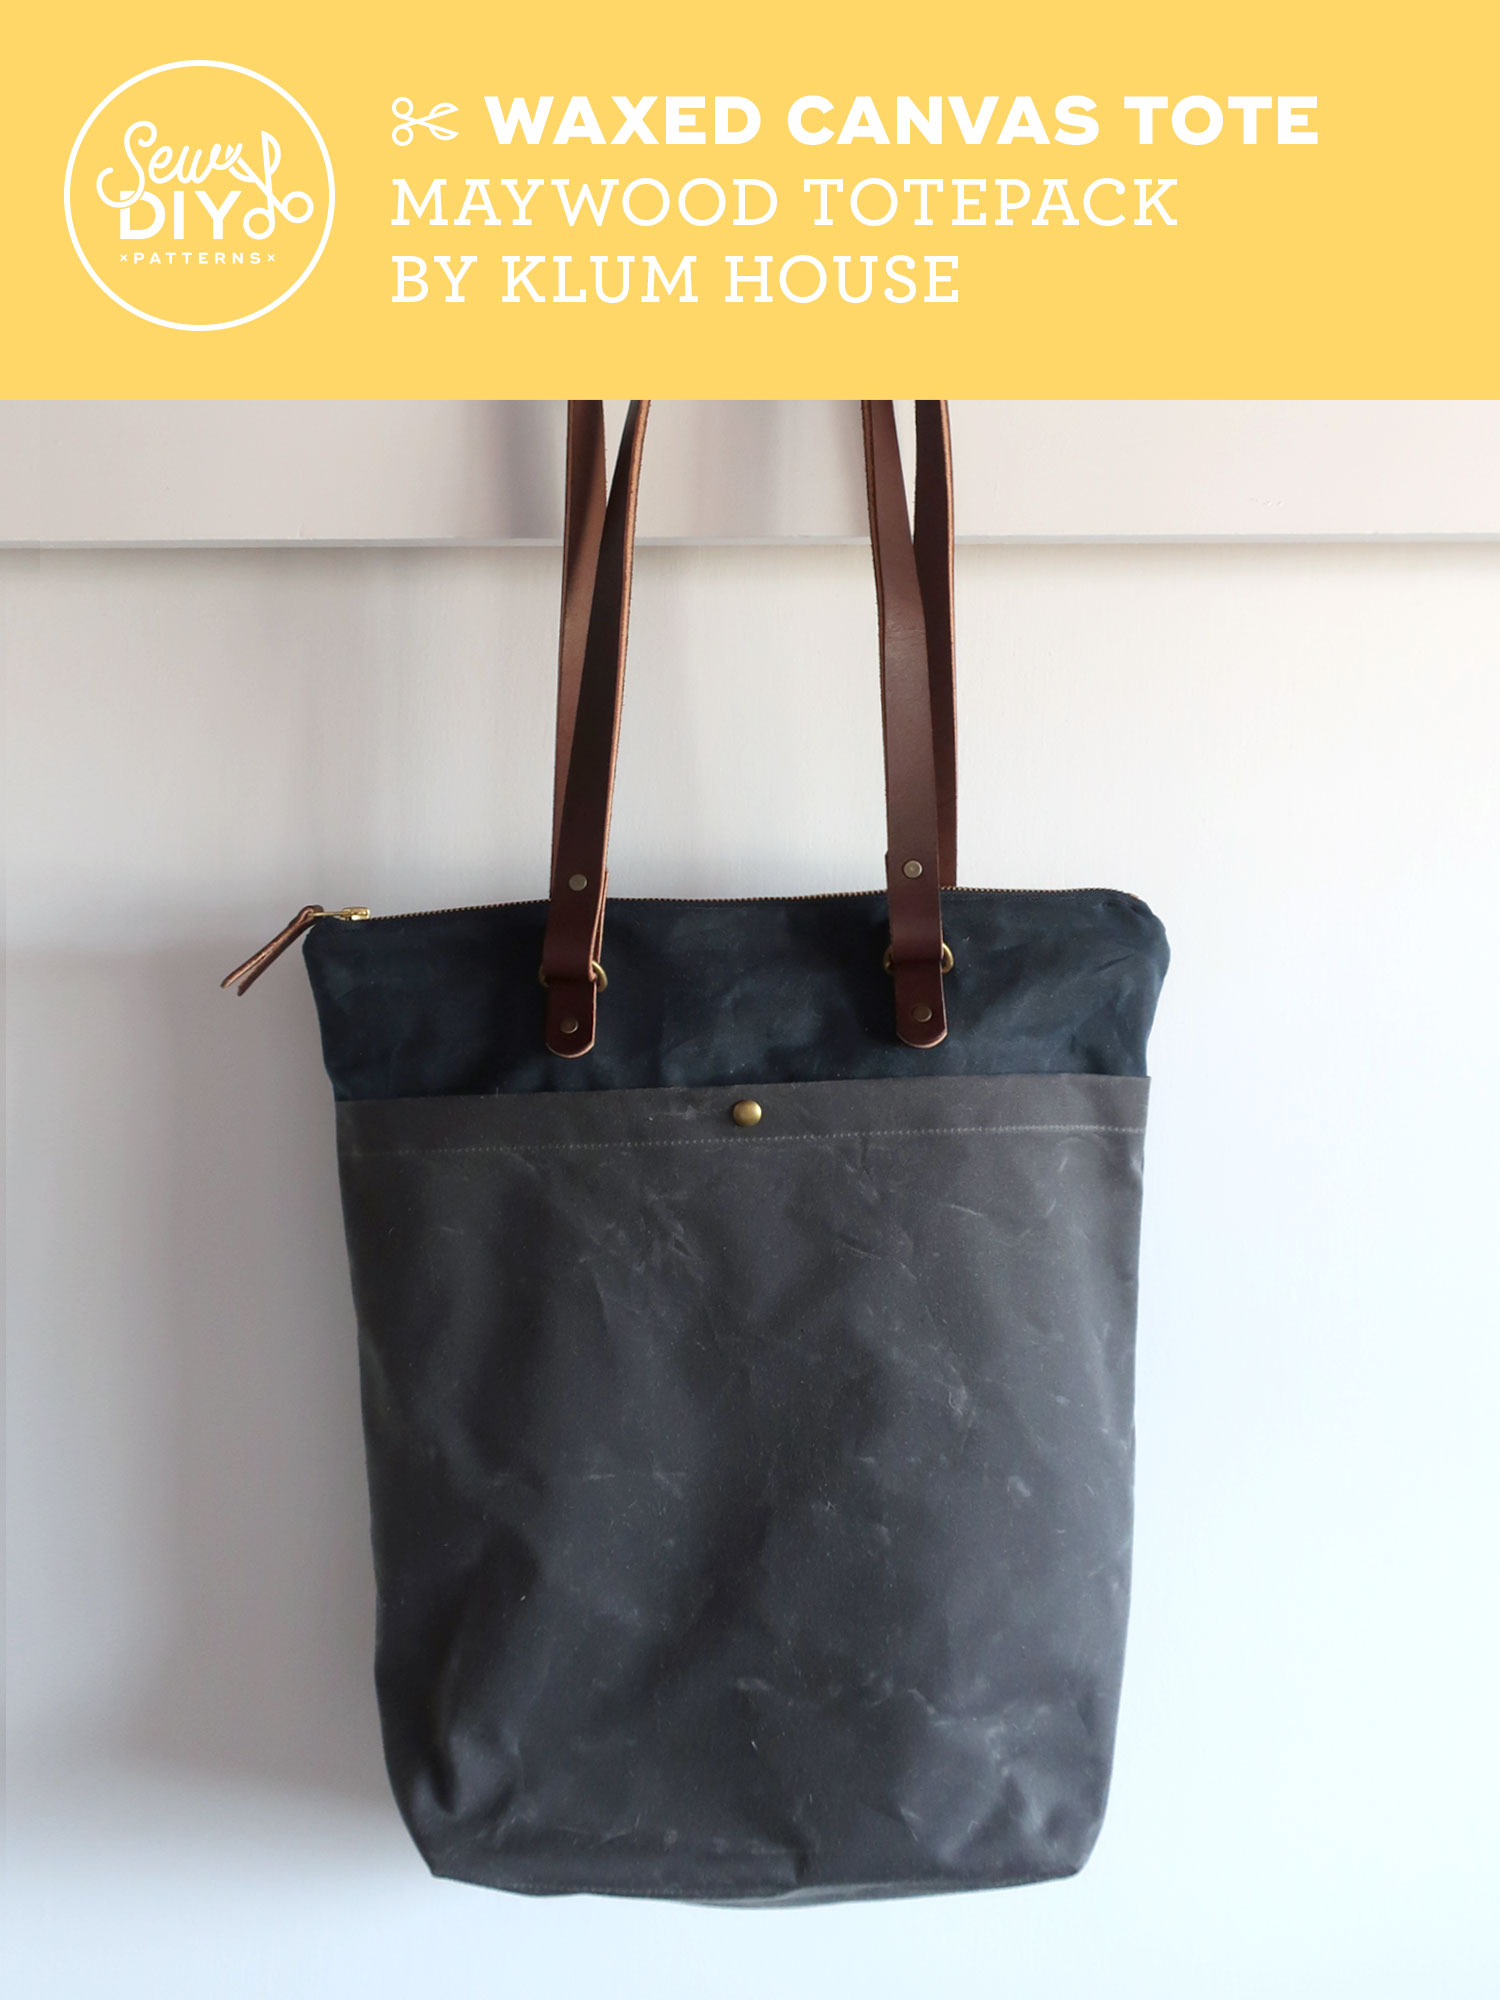
And now for the photos! The front of the totepack (above) has a large pocket with a magnetic closure. When you convert to backpack use, you just slip that front handle inside the front pocket.
And here’s the back. Look at all that beautiful leather!! In the photo above, the handles are set up to use as a tote. To convert to backpack, you just pull down those two back straps and tuck the front strap into the front pocket.
And the backpack in action! The fabric is a waxed canvas so it is easily scuffed and scratched which I think makes it look lovely and worn in. Mine got most of it’s scuffing when I turned it right side out during construction.
And look how nicely my laptop fits in this bag! Still plenty of room to spare. Oh and there’s an interior pocket too.
I’m really excited to try out this bag on my next trip or small jaunt about town. Currently the leather is pretty stiff but I’m sure that with use it will loosen up and become beautifully worn in and soft. If you would like to order your own Maywood Totepack kit you can click right here. You can get 10% off the purchase of any Maywood products between now and Monday, April 22 at midnight with code MAKEMAYWOOD. And if you order before April 22 you can join their Live Virtual Maywood Class on Sunday, April 28. (There will also be a replay of the class available until the end of May.)
Disclosure: I received this kit for free but all thoughts and opinions are my own. If you use the above link to purchase a Maywood product, I will receive a small commission from the sale. The cost to you remains the same. Thank you for supporting Sew DIY and its partners.