
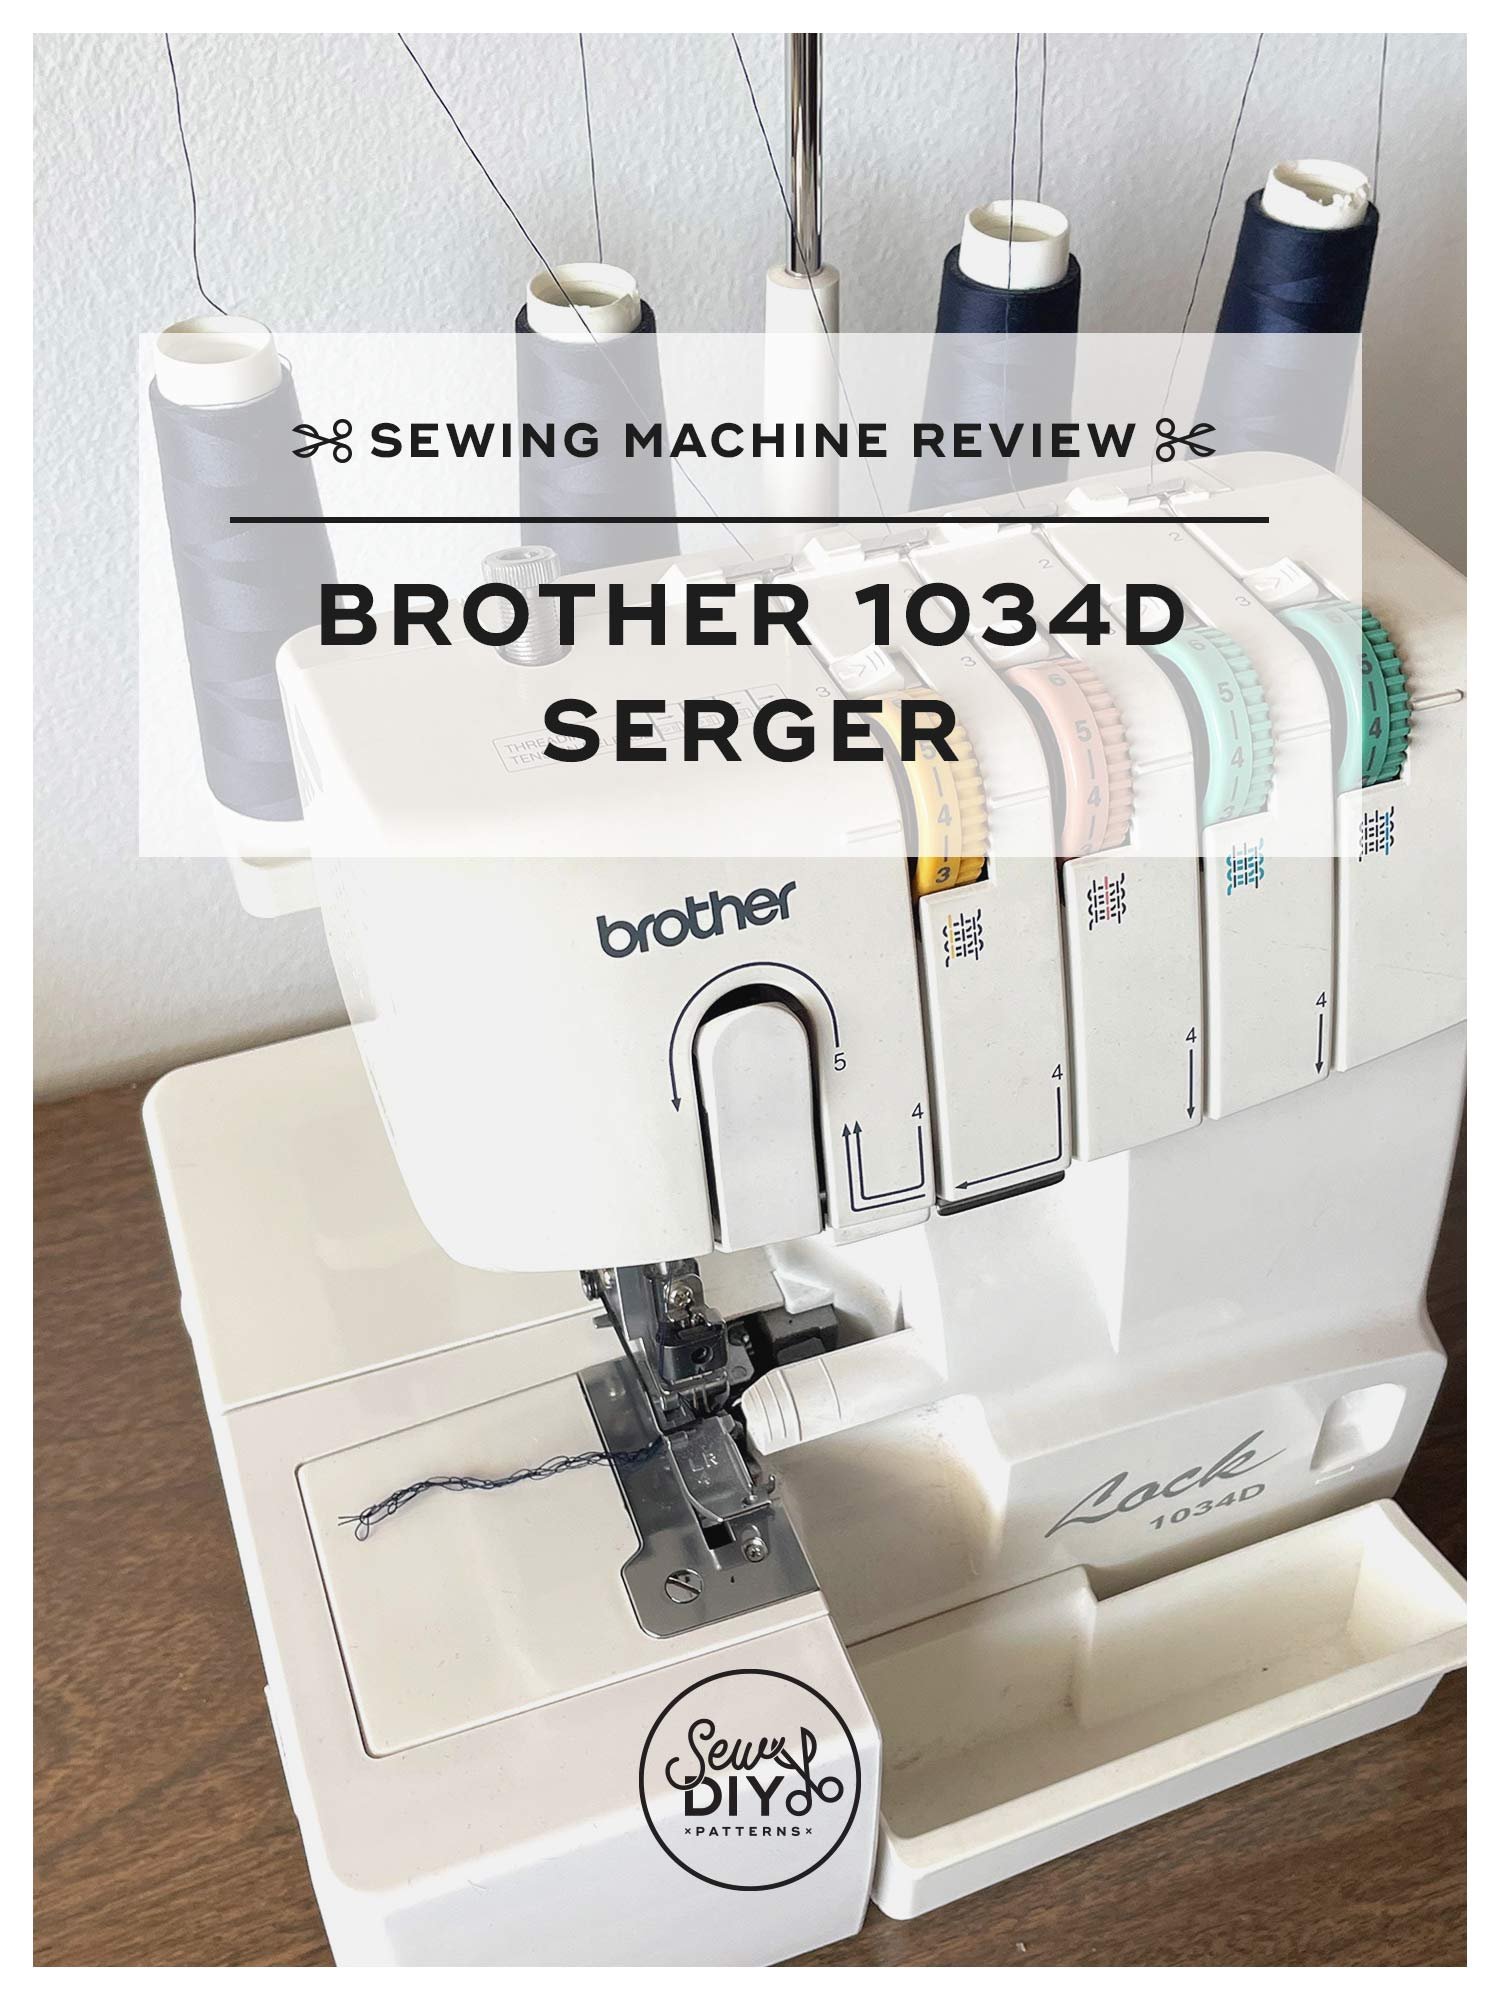
This is the third and final video in my series about my sewing machines. Today, I'm talking about my Brother 1034D serger/overlocker. I’ve had this machine for 13 years now and it’s become one of the tools that I use most often. I share about why I like the machine, how I use it and my tips for using a serger with success. I hope you enjoy it!
What is a serger (aka overlocker)?
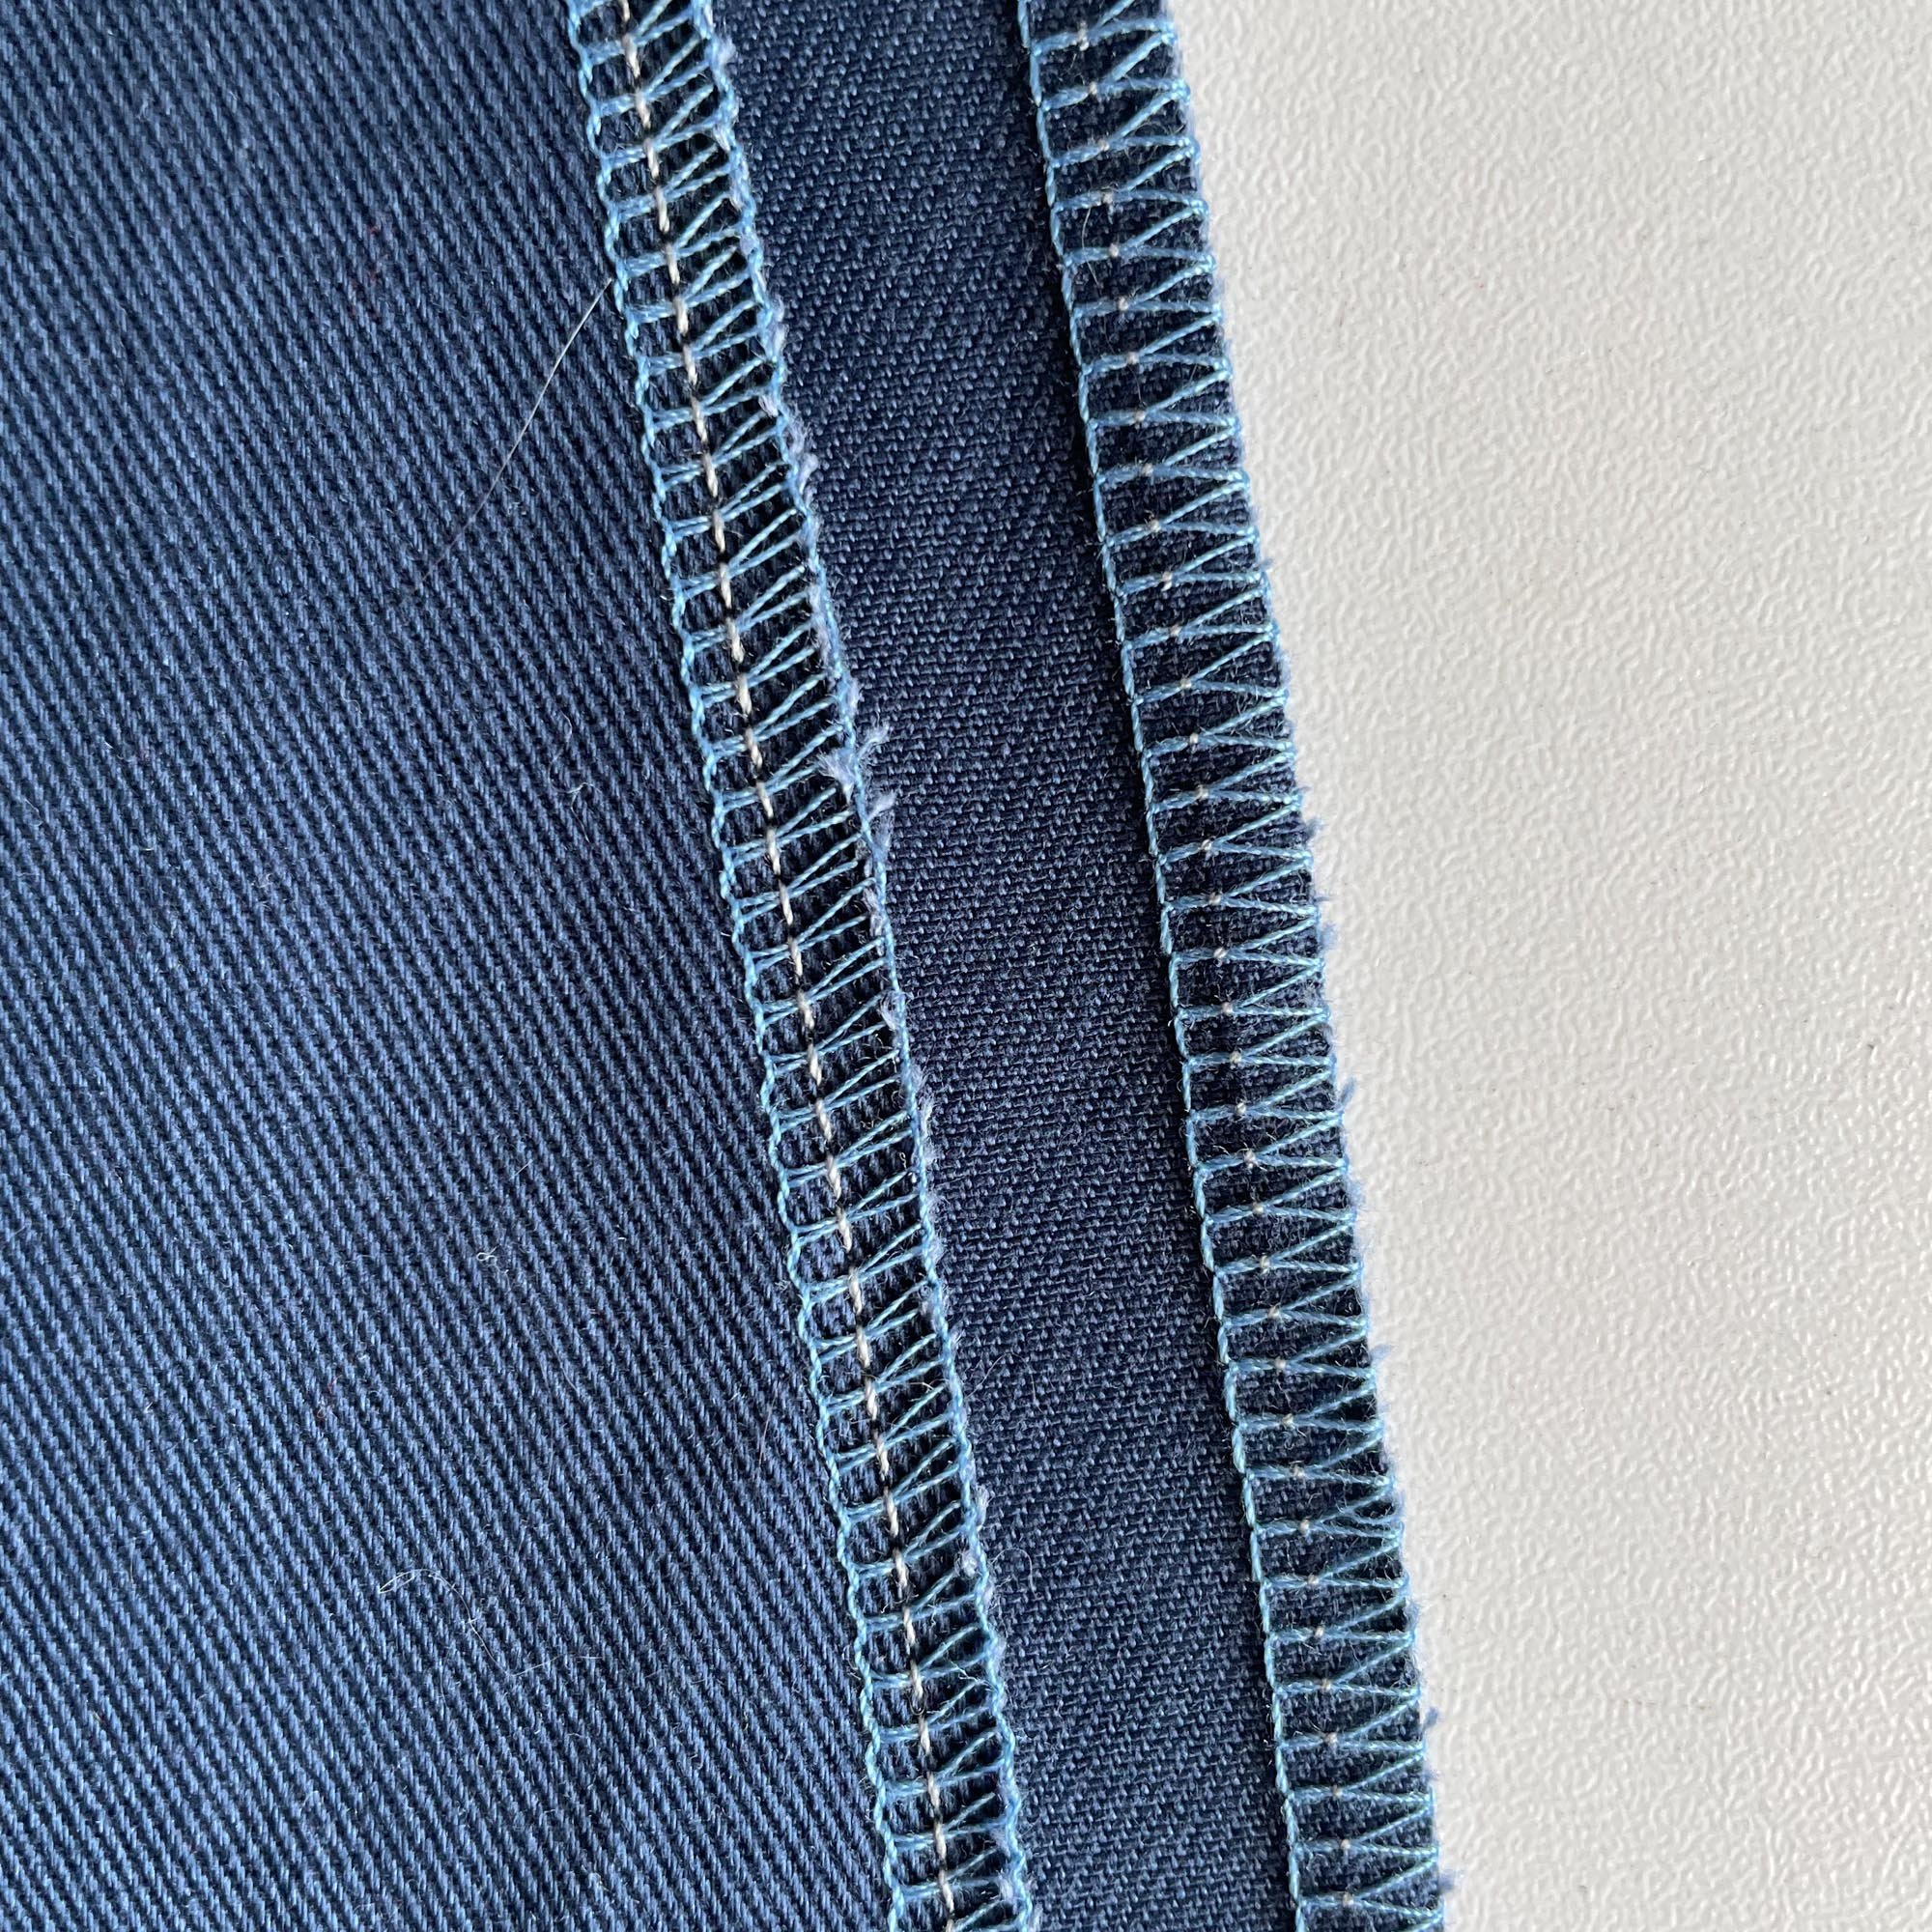
A serger is a type of sewing machine that stitches a looped overcast stitch on the edge of a piece of fabric. It can use one needle and three threads or two needles and four threads. The stitching is very secure and creates a really professional appearance. Above, is an example with four threads. The top side of the stitching is on the left and the bottom side is on the right.
A serger will also have a knife or blade that when engaged, will cut away any excess seam allowance.
About my serger
I have a Brother 1034D serger. These machines are pretty ubiquitous/popular and that's for good reason. They are affordable, reliable, easy to use and they get the job done. I bought this machine on Amazon in 2009 for $229. (As of writing this blog post, it’s about $259.) This machine still works great and surprisingly, I've never had it serviced.

Watch the video above for all the details and some video of the machine in action, or if it's not working, you can watch it on YouTube here.
When to use a serger
I personally have two main uses for my serger. First, I use it to finish seams on both woven and knit fabrics. This stitch is used instead of using a zig zag stitch or pinking shears to finish a seam.
Second, I use the serger to sew seams and finish the edges at the same time on knit fabrics. If I’m sewing a seam that will undergo a lot of stress during wear (like with leggings), I prefer to use a lightning stitch. A lightning stitch is very tight yet still has stretch to it. The big drawback of it is that it’s much harder to unpick than serger stitches.
three tips for getting started with your serger
Practice stitching and threading the machine to get comfortable using it.
It can be really intimidating to use a serger when you’re first starting out because there are so many threads (and a knife!). But practicing and taking things slow will help you build the confidence you need to start sewing with ease.Turn off the knife for risk free seam finishing
My favorite way to use the serger is to finish the raw edges of a garment with the knife disengaged before stitching the seams. It keeps the entire seam allowance intact and prevents fraying during the construction process.For safety, pin parallel to the raw edge.
When pinning layers together to stitch on the serger, place pins parallel to the raw edge and out of the way of the needle. This will prevent you from accidentally stitching over any pins with the knife.
I hope that this information was helpful. The first video in this series was about my Janome MemoryCraft and you can watch it here. The second video is about my vintage Singer Featherweight and is available here. Happy sewing!


