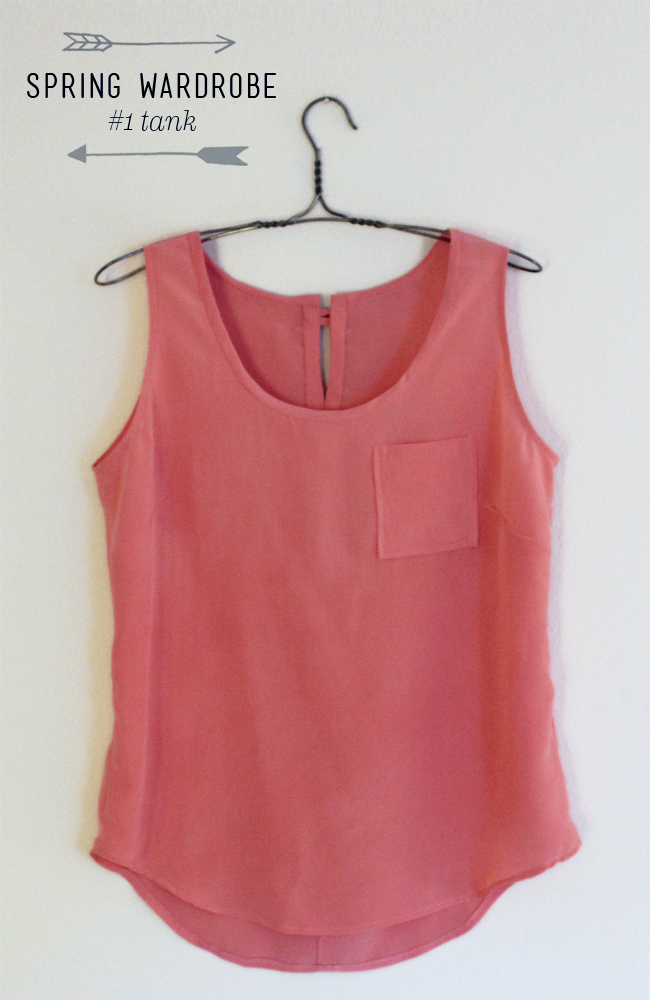
It's finally here! My first finished piece from my Spring Wardrobe. I started planning my Spring Wardrobe back in January and it took a little while but after much planning and thinking, it's full steam ahead on actually making them. First up is this simple tank top made from salmon colored silk (or silk-like) fabric. I did make a few changes from my plans. (It happens and it's ok. Plans often change in the process of making and it's usually for the better.)
After a little digging in my blog archives, I realized that the pattern I wanted to use as a base is actually a variation on Simplicity 2599. I altered that pattern to make my Bias Stripe Top With Braids and it's a great tank silhouette. The main difference between my tank and the Simplicity pattern is that I cut down the width of the shoulders be removing fabric from the outer edge. I also created a curved, baseball tee hem that's a little longer in the back than the front.

After cutting my pattern pieces, I did a little testing on scrap fabric to make sure I had the right needles and thread. A regular size 11 needle worked the best. Interestingly, a ball-point needle skipped stitches and/or had horrible tension. You can see some of my notions in the photo above, I had a regular thread for seams and overcasting, a shiny embroidery thread for topstitching, 1/4 inch topstitching foot, overcast foot and regular foot.
To finish the neck edge and armholes I used bias strips of the fashion fabric. For the armholes, I cut 1 inch wide bias strip, turned it all the way under and topstitched. For the neckline, I cut 1.5 inch wide bias strip and used it to encase the raw edge. I tried to topstitch the neck edge but it was a little messy so I decided to hand-stitch it in place.
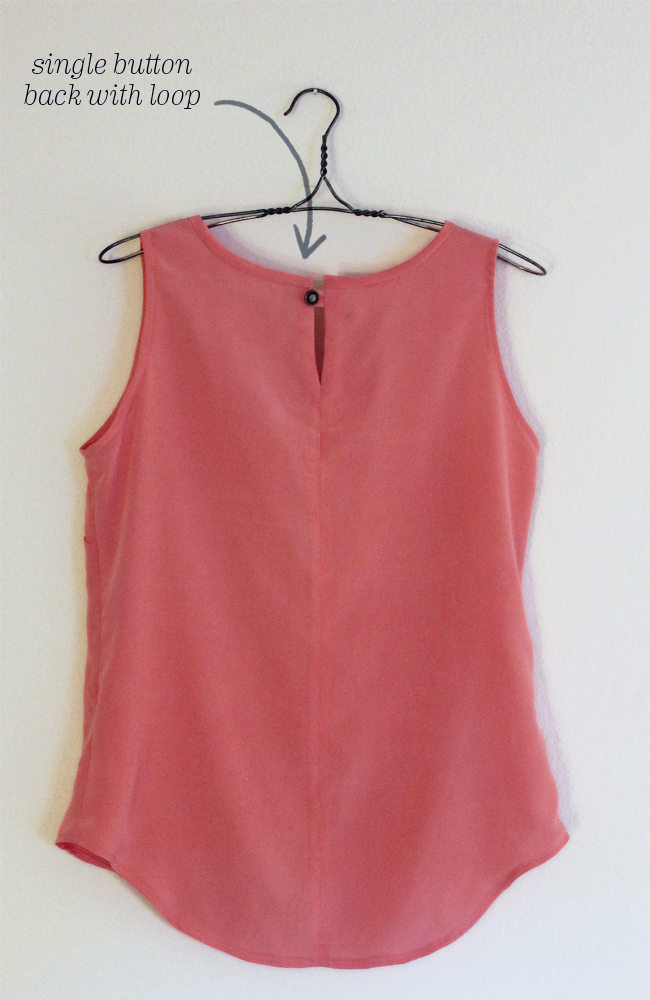
The back opening closes with a single button and loop. The loop is made with a small tube of fabric that complements the bias binding of the neckline. Below are a few the buttons that I considered. Confession – I have a lot of buttons. I love my vintage colored buttons (1st and 3rd below) and my pearlescent buttons (2nd). The ivory one is very nice too and matches the fabric. But none of them were quite right for this blouse. I needed a button that not only look good with this blouse but also fit the vibe of my whole wardrobe. So, I chose the metal button because it fits the clean design of the tank, accents the fabric and is just a little bit tough. There's only one button on the blouse, actually only one thing that is not salmon pink, so rather than blending in, I chose to make it stand out.

Last but not least, I decided to add a pocket. I went with a simple square pocket that contrasted with the curved shape of the hem. The pocket makes the tank a little more special without making it frilly or fussy like a ruffle would. The silhouette remains clean with just some lines added. Come back tomorrow for a new pocket related tutorial!
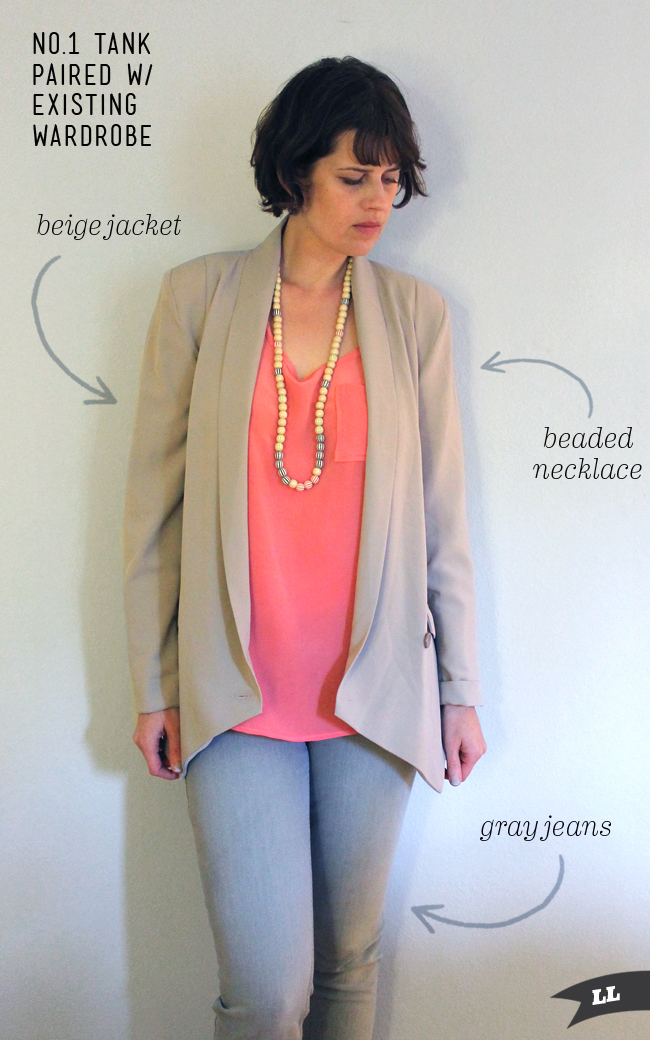
The next step of any new wardrobe item is seeing how it fits in with the rest of the wardrobe. Here, as I had planned, I'm pairing the No. 1 Tank with a beige jacket and gray jeans already in my closet. You might recognize the necklace from this post.
I'm really excited to keep adding to the wardrobe and see how it all comes together. The first day of spring is Wednesday, March 20. I might not have all six pieces done and posted by then but my goal is to have them all done by the end of March. Fingers crossed!! I hope that you come back and visit soon!
Check out the earlier posts in this series here:Spring Wardrobe Inspiration
Spring Wardrobe Planning Part 1
Spring Wardrobe Planning Part 2
Spring Wardrobe Sewing Plans
Spring Wardrobe Planning Part 1
Spring Wardrobe Planning Part 2
Spring Wardrobe Sewing Plans
--
Follow along with me here: