

Hello friends! This post is for all of you with the Draft-it-Yourself Tasi Robe and Jacket pattern. I’ve been making a variation of this pattern for years and this month, I decided I wanted to make a really classic robe for my Dad for Father’s Day. I haven’t been to a fabric store since February so I shopped my stash and found a navy gingham cotton. I also had some braided navy piping which I decided to use to create classic piped edge robe.
CHECK OUT THE TASI PATTERN IN THE SHOP
To get that really classic robe with a piped edge look, you’ll want to add piping to the center front opening, the seam between the cuffs and sleeves and to the pockets. Adding piping to the cuffs is pretty straightforward but you’ll need to do some adjustments to the drafting for the front band and the pockets. If you’ve never sewn with piping, make sure to check out this blog post to learn how.
EXCLUSIVE FOR THOSE WHO HAVE PURCHASED THE PATTERN: As a special thank you for those who have purchased the Tasi pattern, I’ve created a supplemental pdf workbook to help you draft the front band and the self-lined pocket. The workbook is just for people who have purchased the pattern and is password protected. You can find the password at the bottom of page 4 of your pattern booklet. CLICK HERE TO DOWNLOAD THE WORKBOOK. If you haven’t gotten your copy of the pattern yet, you can find it here in the shop.

Adding piping to the sleeve
You can sew the piping to the end of the sleeve before OR after sewing the underarm sleeve. To see how to attach piping in the round (the second option), check out my piping tutorial video.

Adding piping to the front band
To add piping to the front band, you’ll need add a seam to the edge that would usually be folded. So, you’ll need to adjust the drafting slightly. You can fold your existing pattern piece on the fold line and then add a seam allowance to the folded edge. Or, download the workbook above for the formulas to draft a new front band.

Cut four from this pattern piece. To sew the front band, first stitch the center back seam (one short end) for each pair of pattern pieces.
Next, baste piping to one long edge of the front band. Stitch second front band to first along piped edge.
Proceed as instructed in the instruction booklet.
Self-lined pocket with piping detail
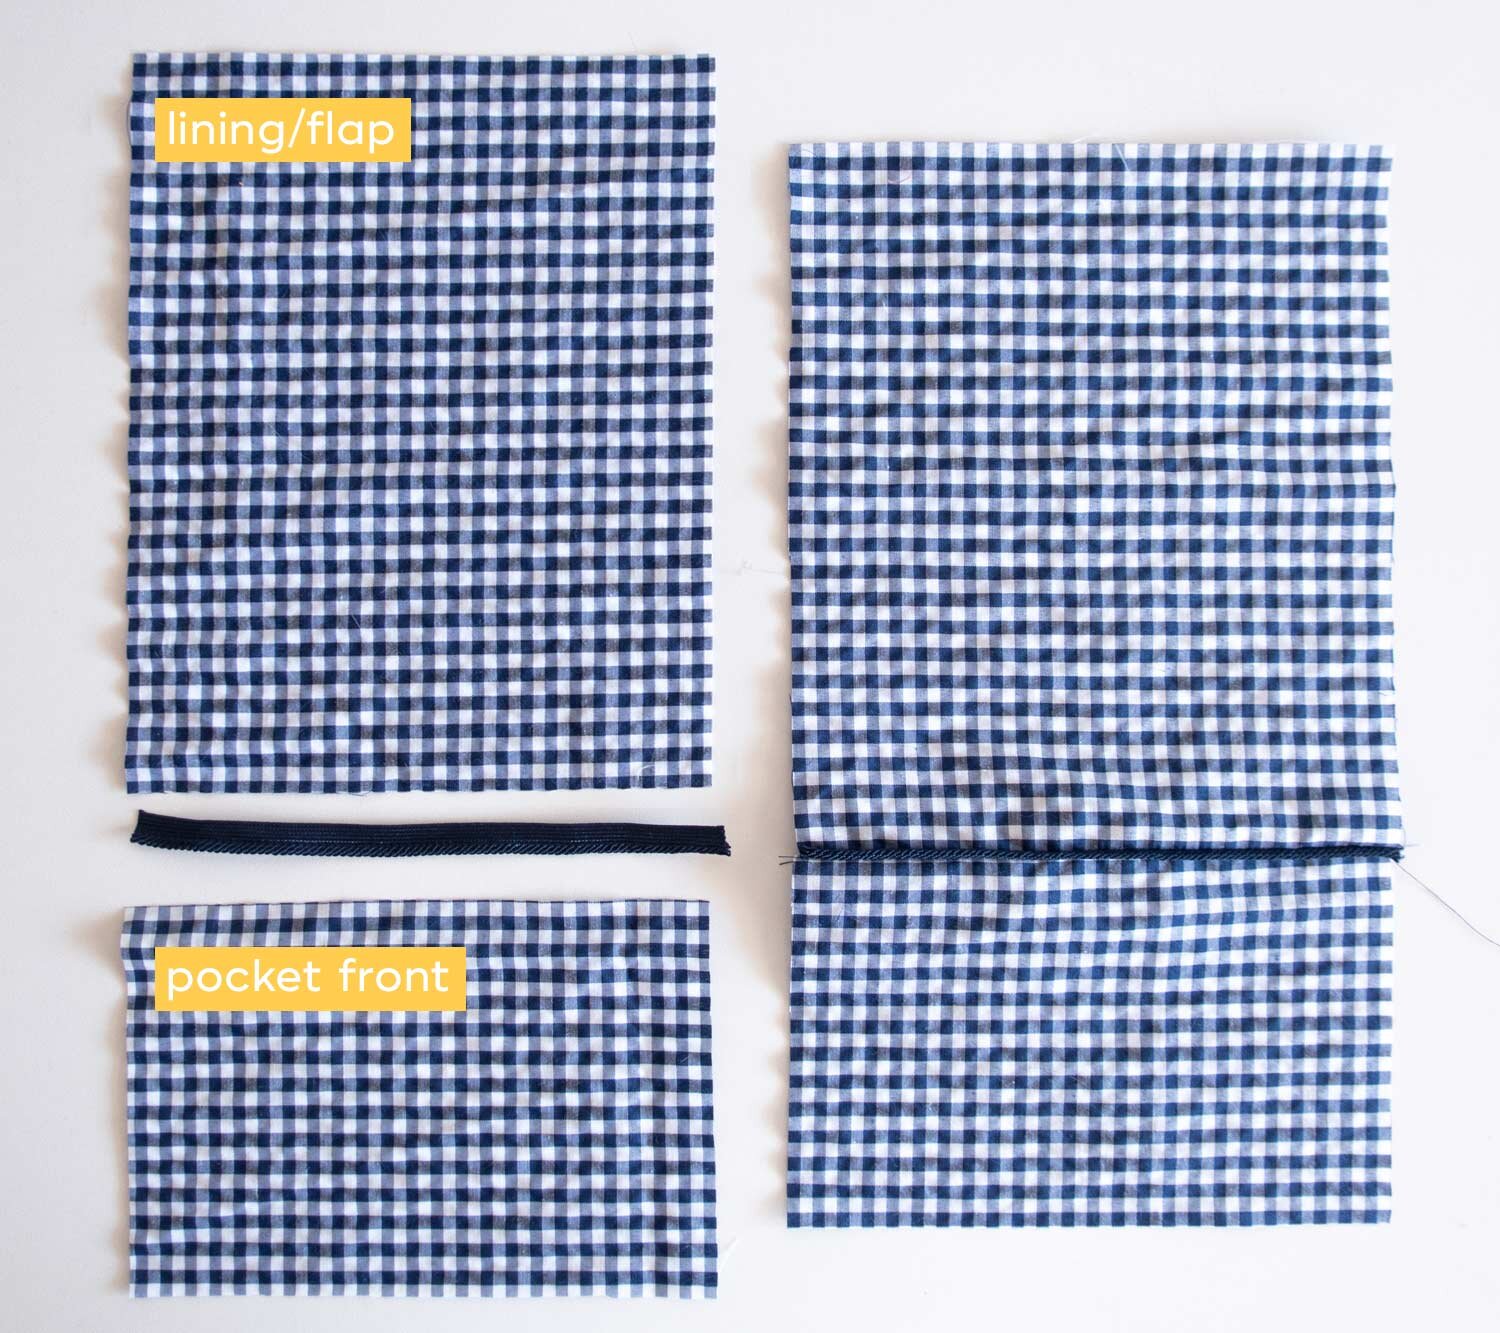
This pocket is self lined and has a piping detail where we’d usually have the topstitching that holds down the fold. To make this pocket, I’m using two pieces of fabric, the pocket front (the part below the piping) and the pocket top/lining (one piece of fabric). For full drafting formulas, download the workbook linked above. I was inspired to design this method by this post from Threads and this from the Aesthetic Nest.
To sew the pocket, start by attaching piping to the seam at the top of the pocket front and bottom of the pocket top/lining.
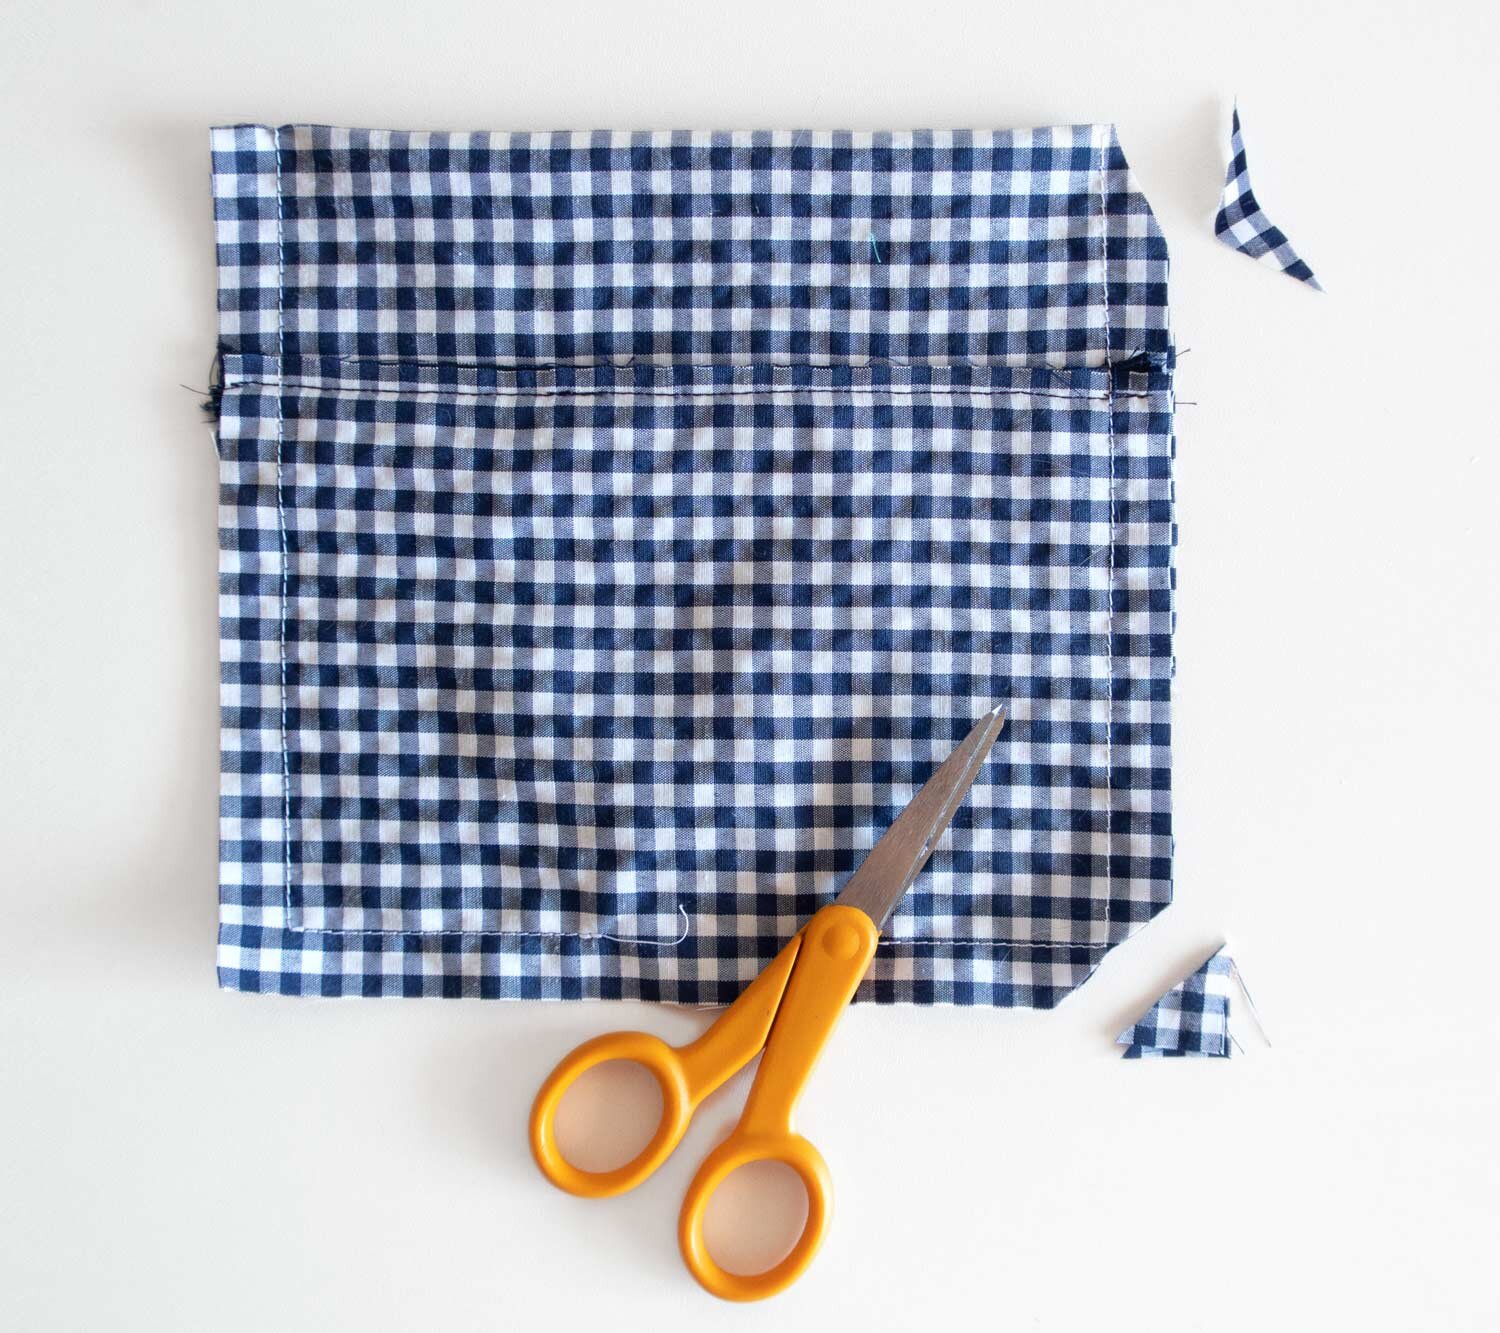
Then, with right sides together, fold the pocket along and align the raw edges of the lining and front pocket. Stitch sides and bottom, leaving an opening at the bottom to turn the pocket right side out.
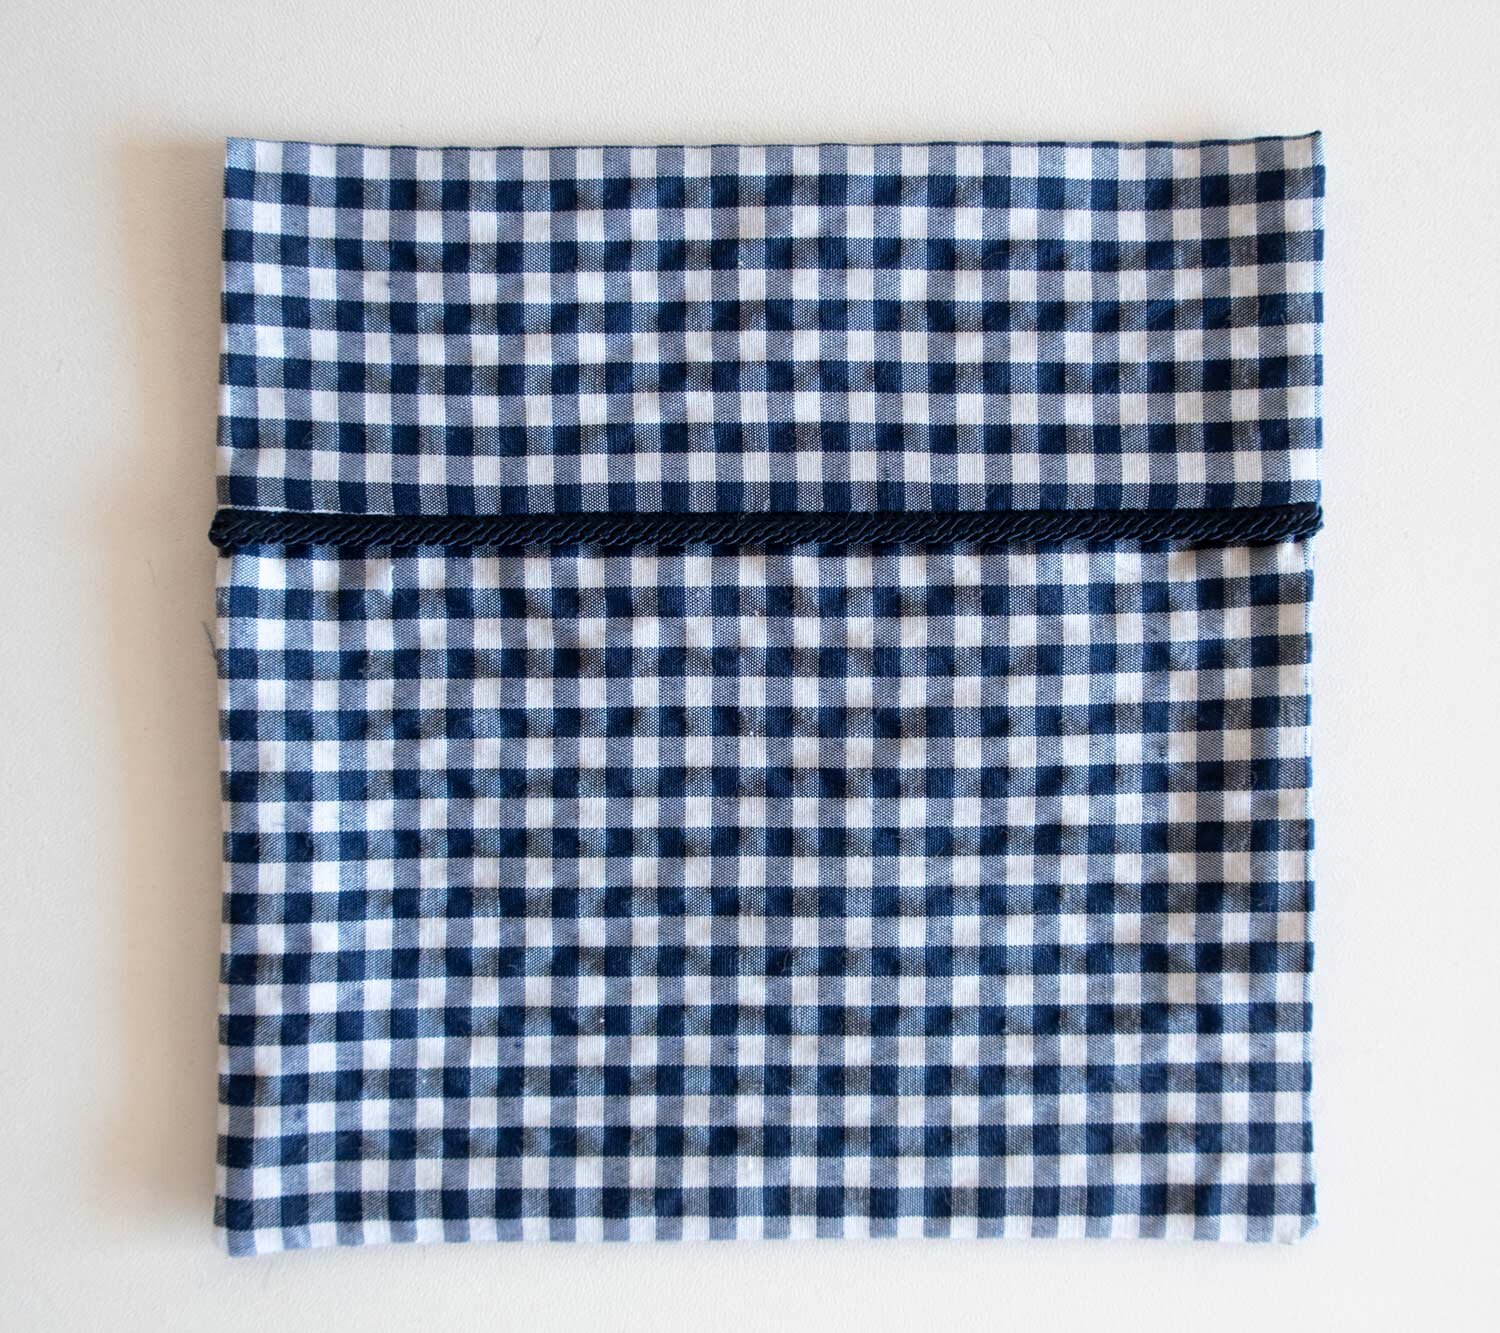
Trim seam allowance and corners. Turn pocket right side out and press. Topstitch the pocket to the robe.
I hope that you found this tutorial helpful. Make sure to check out the Tasi Robe/Jacket sewalong for more posts. This robe is a belated Father’s Day gift for my Dad. I had to estimate the sizing, so hopefully it will fit and he enjoys wearing it. The fabric is a light to medium weight cotton gingham (or perhaps a cotton blend, it’s a bit of a mystery). My Dad doesn’t like to wear anything heavy, so a light robe should be perfect. Robes are a year round garment for me and personally, I like to have a heavy terry cloth robe for cooler months and a light cotton or rayon one for warmer months. Happy sewing!

The Tasi Robe/Jacket is a Draft-It-Yourself pattern for any size human and perfect for dipping your toes into basic pattern making and design. You decide your finished measurements and the detailed instructions will take you step-by-step through creating your own pattern pieces.
This pattern is a fantastically flexible basic that can be used to make a robe, simple jacket or even a cardigan. It’s suitable for almost any fabric from rayon, silk or linen for warmer months to a fleece or sweater knit for cooler months. You can even use up leftover fabrics for a scrappy, color blocked garment.
View A is a classic robe style with patch pockets, a tie belt and carriers. View B is a casual jacket with turned back cuffs, oversized pockets and a hem band. It’s easy to adjust the design of this pattern to suit your personal preferences.
This is a digital pdf pattern that includes illustrated step-by-step instructions and a spreadsheet calculator to create your own custom pattern pieces. PATTERN PIECES ARE NOT INCLUDED.
THIS IS NOT A PHYSICAL PRODUCT. After checkout, you will receive a link to the pattern that will be active for 24 hours after you click it. Prices are in USD.
MORE ABOUT THE TASI DRAFT-IT-YOURSELF ROBE AND JACKET:
This draft-it-yourself pattern will walk you through each step of designing and drafting your own custom fit pattern. You choose the proportions you’d like and we give you the formulas to draft all the pattern pieces. Because you’re starting from scratch, you can make this garment in any size you like for any human body. If you’re not up for doing the calculations yourself, or just want to double check the math, we’ve created a spreadsheet calculator that does the work for you.
View A is a classic robe with patch pockets, a tie belt and carriers. View B is a casual jacket with turned back cuffs, oversized pockets and a hem band. It’s easy to adjust the design of this pattern to suit your personal preferences and we even give you a few ideas for ways you can customize and adapt this pattern.


