
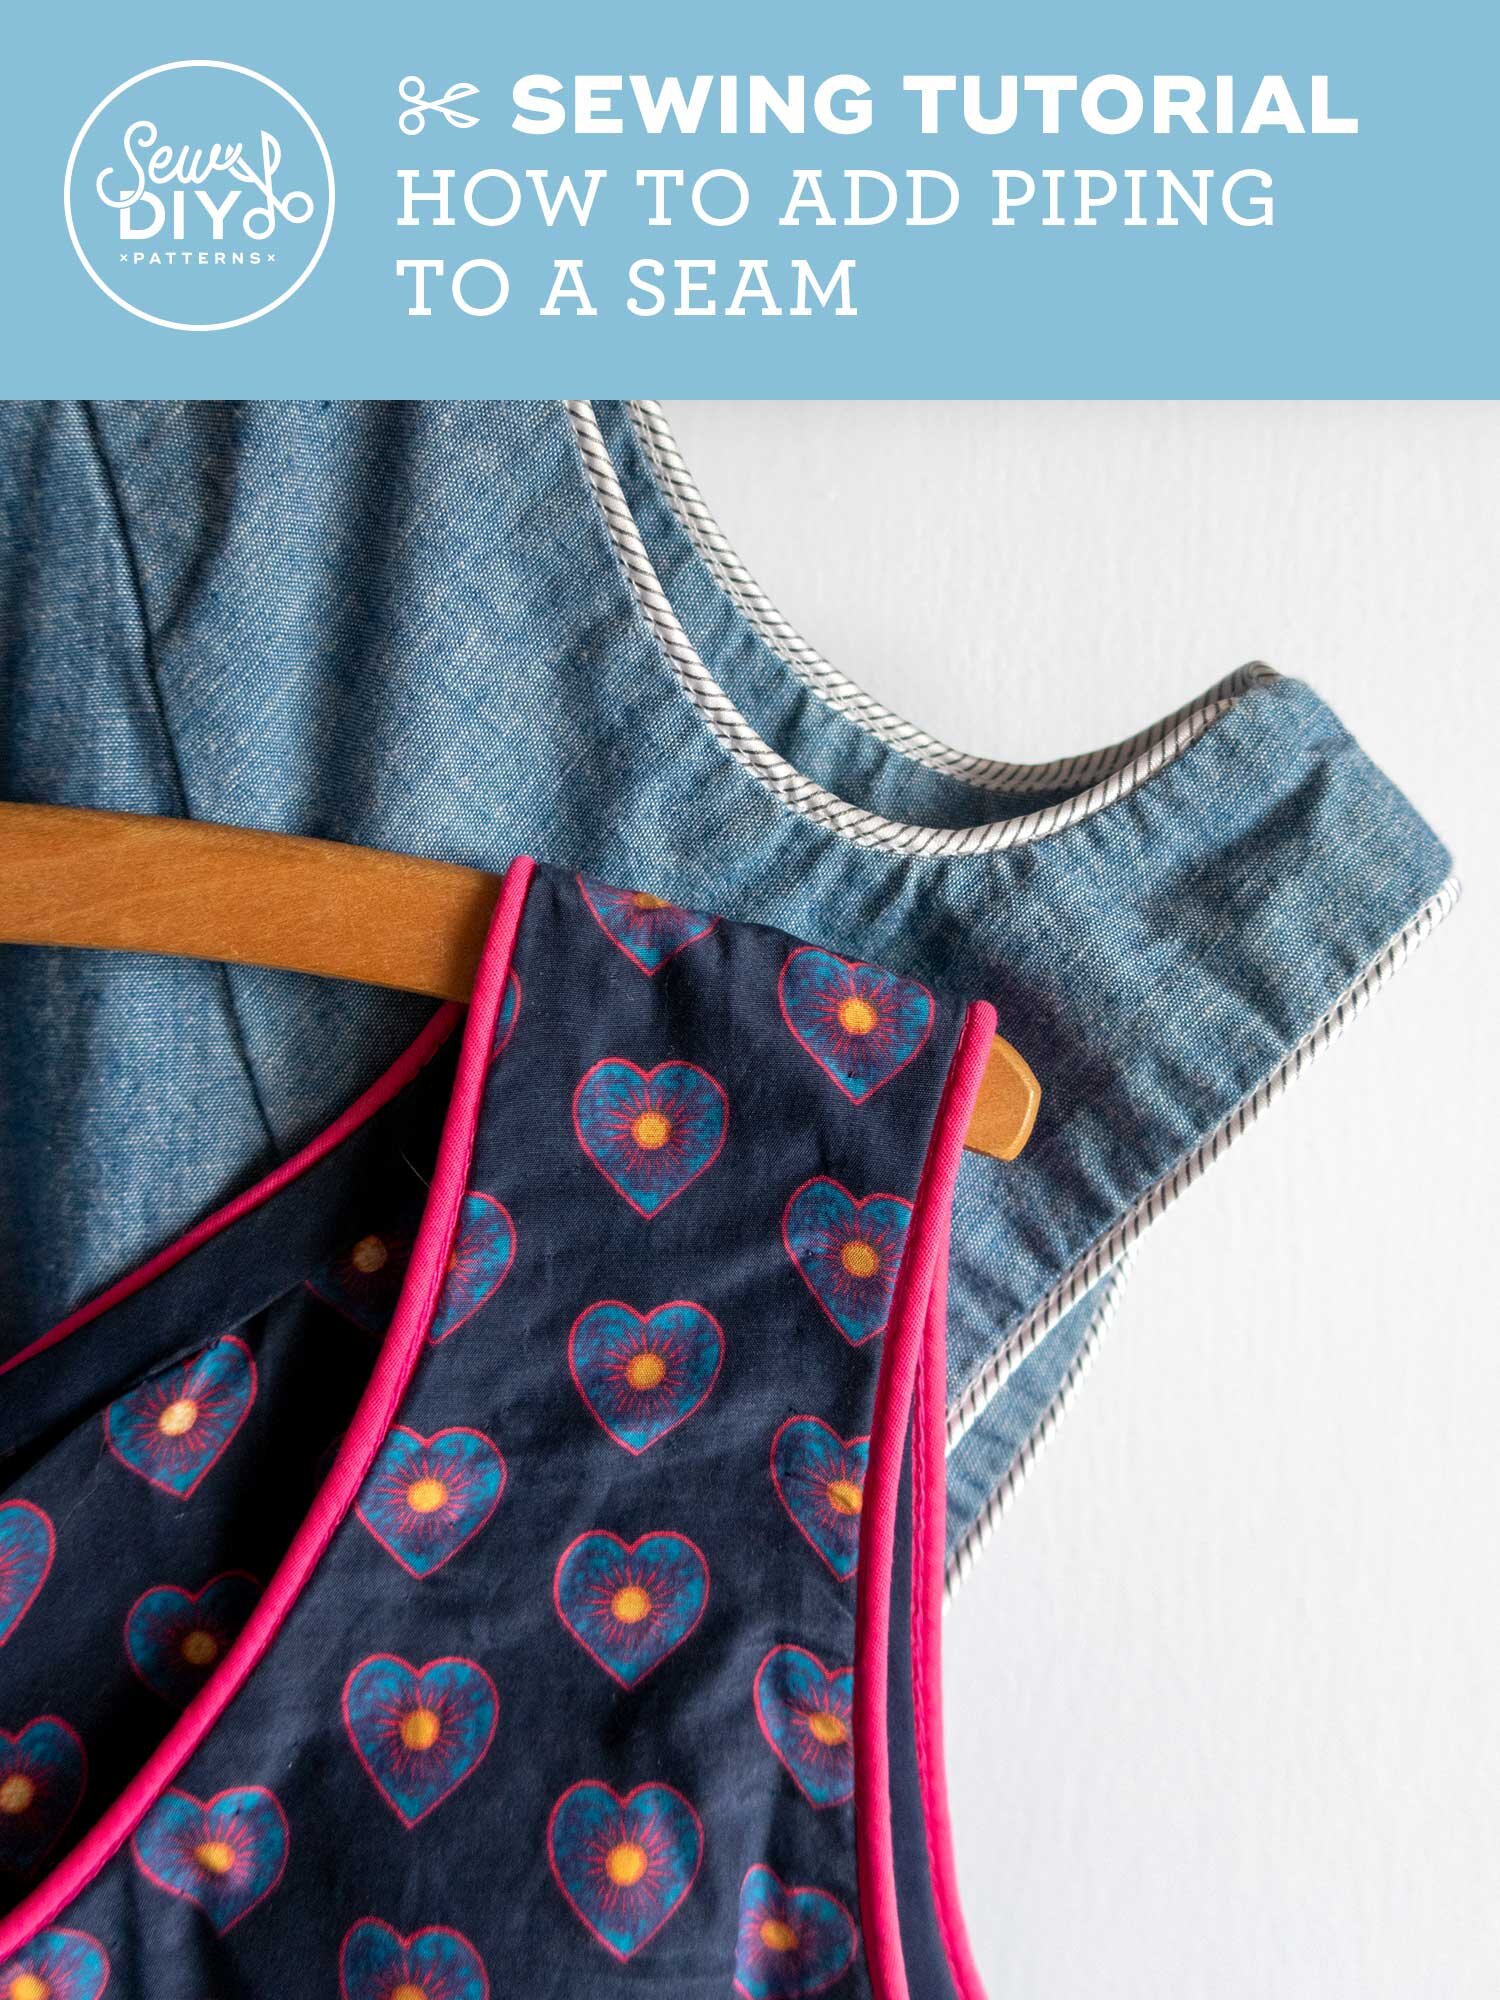
In today’s video, I’ll be showing you how to sew piping into a seam. Piping is a great way to add an extra bit of detail to your garments or home decor items. Plus, it’s fairly easy to do. In this video, I’ll be showing you how to sew piping using a zipper foot to a flat piece of fabric and one that is in the round. Alternately, you may be able to buy a special piping foot to use when stitching piping.

If the video above isn’t working for some reason, you can also watch the video on YouTube.
How to add piping to a straight seam
Step 1:
Determine the seam allowance of your piping. This is the distance from the flat edge of the piping to where the cord begins.
Option 1: With right sides together and the corded part of the piping placed away from the fabric edge, align the seam allowance of the piping to the seam allowance of the project and pin in place. It may be helpful to draw a line on your fabric where you need to place the flat edge of the piping.
Option 2: Alternately, you can trim the seam allowance of your fabric to match the seam allowance of your piping. Pin the piping to the right side of the fabric with the flat edge of the piping aligned to the edge of the fabric. In the video, I demonstrate how to sew both ways.
Step 2:
Baste the piping to the fabric. In the video, I’m using a narrow zipper foot with the needle moved to the left. For this step it’s more important to have the piping is in the correct position than it is to have the seam allowance be super accurate. To make sure this basting is not visible after you sew your seam, you may want to stitch slightly less than your seam allowance.
Step 3:
Place the second piece of fabric right sides together with the fabric and piping. If you trimmed the seam allowance in step 1, make sure you’ve trimmed the same amount from this piece of fabric. Using the zipper foot or piping foot, stitch using a regular stitch length. Be careful to stitch very close to the corded edge of the piping. You can use your fingers to keep the fabric and piping in place under the presser foot.
How to add piping to a round seam
Steps 1 and 3 are the same as above for this situation.
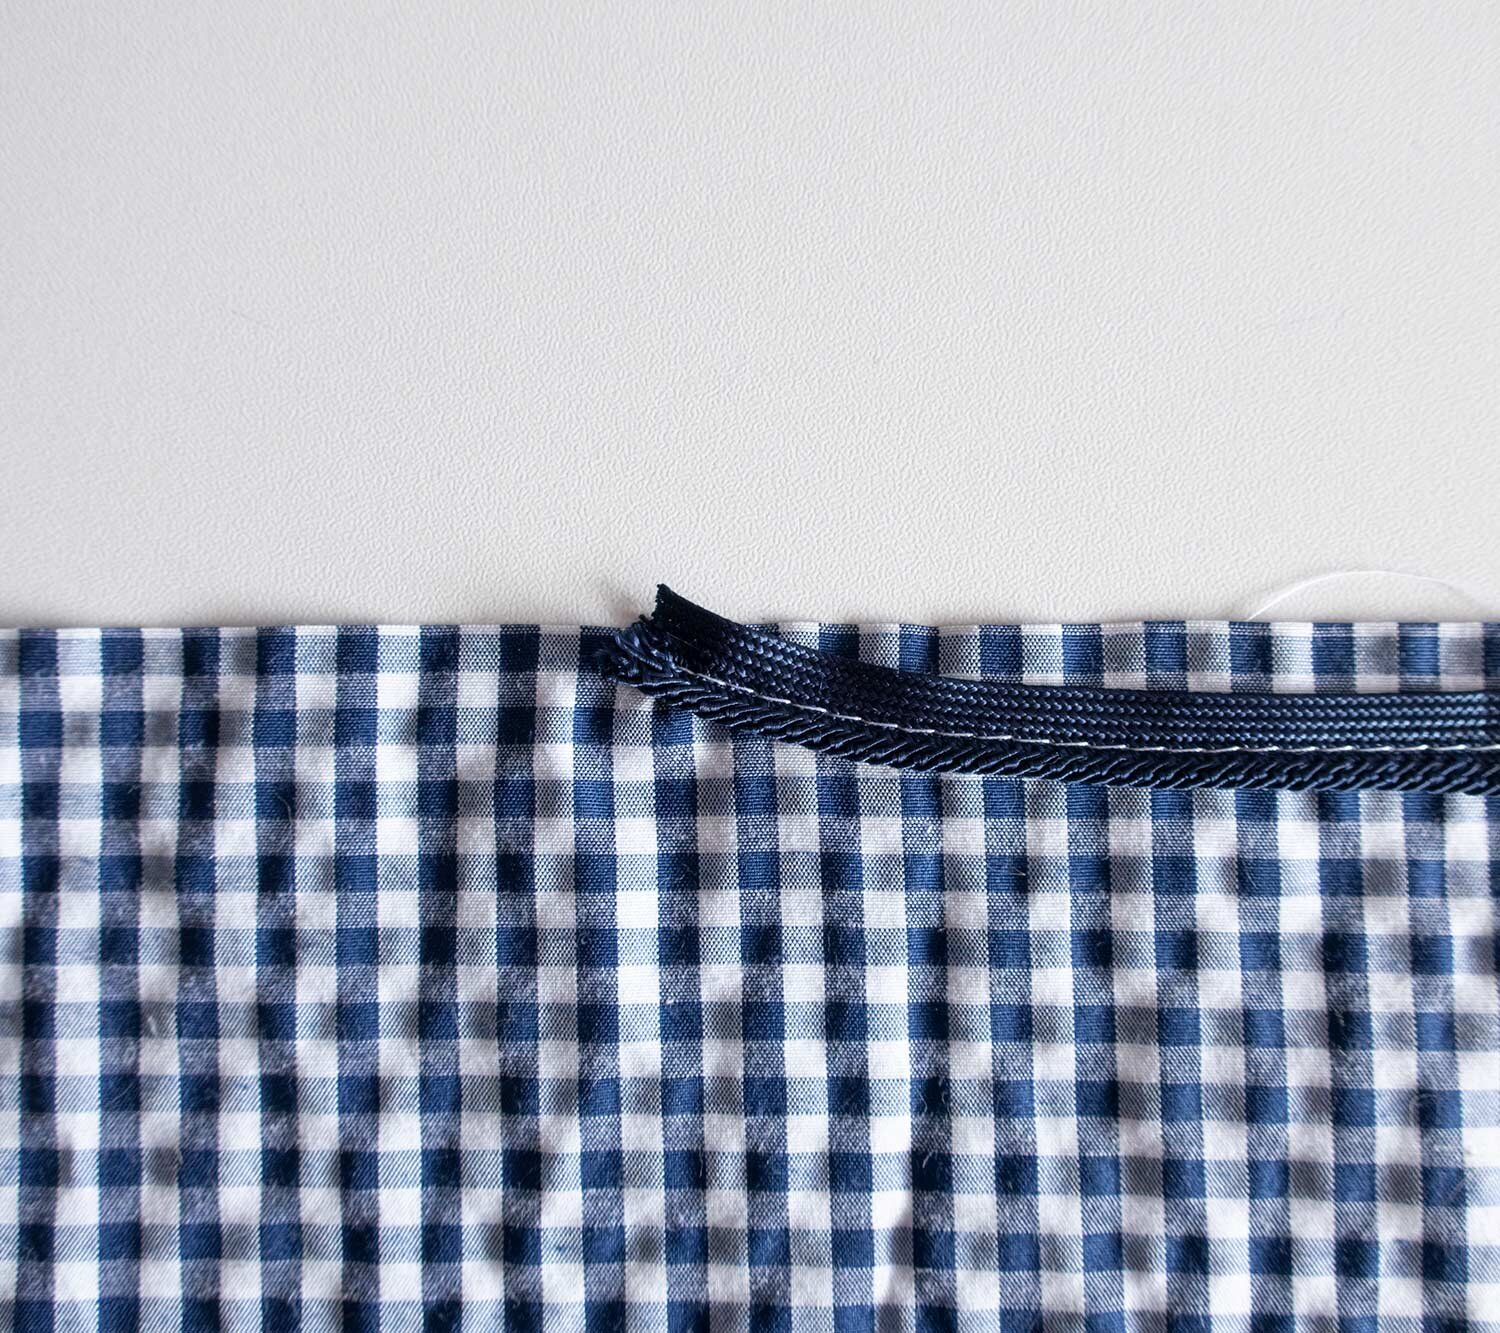
For Step 2, start by positioning the piping at the bottom of the round so that the end of the piping curves off into the seam allowance (first photo above). Stitch around and as you approach the point where you began, overlap the end of piping on top of where you started and again curve the end of the piping towards the raw edge.
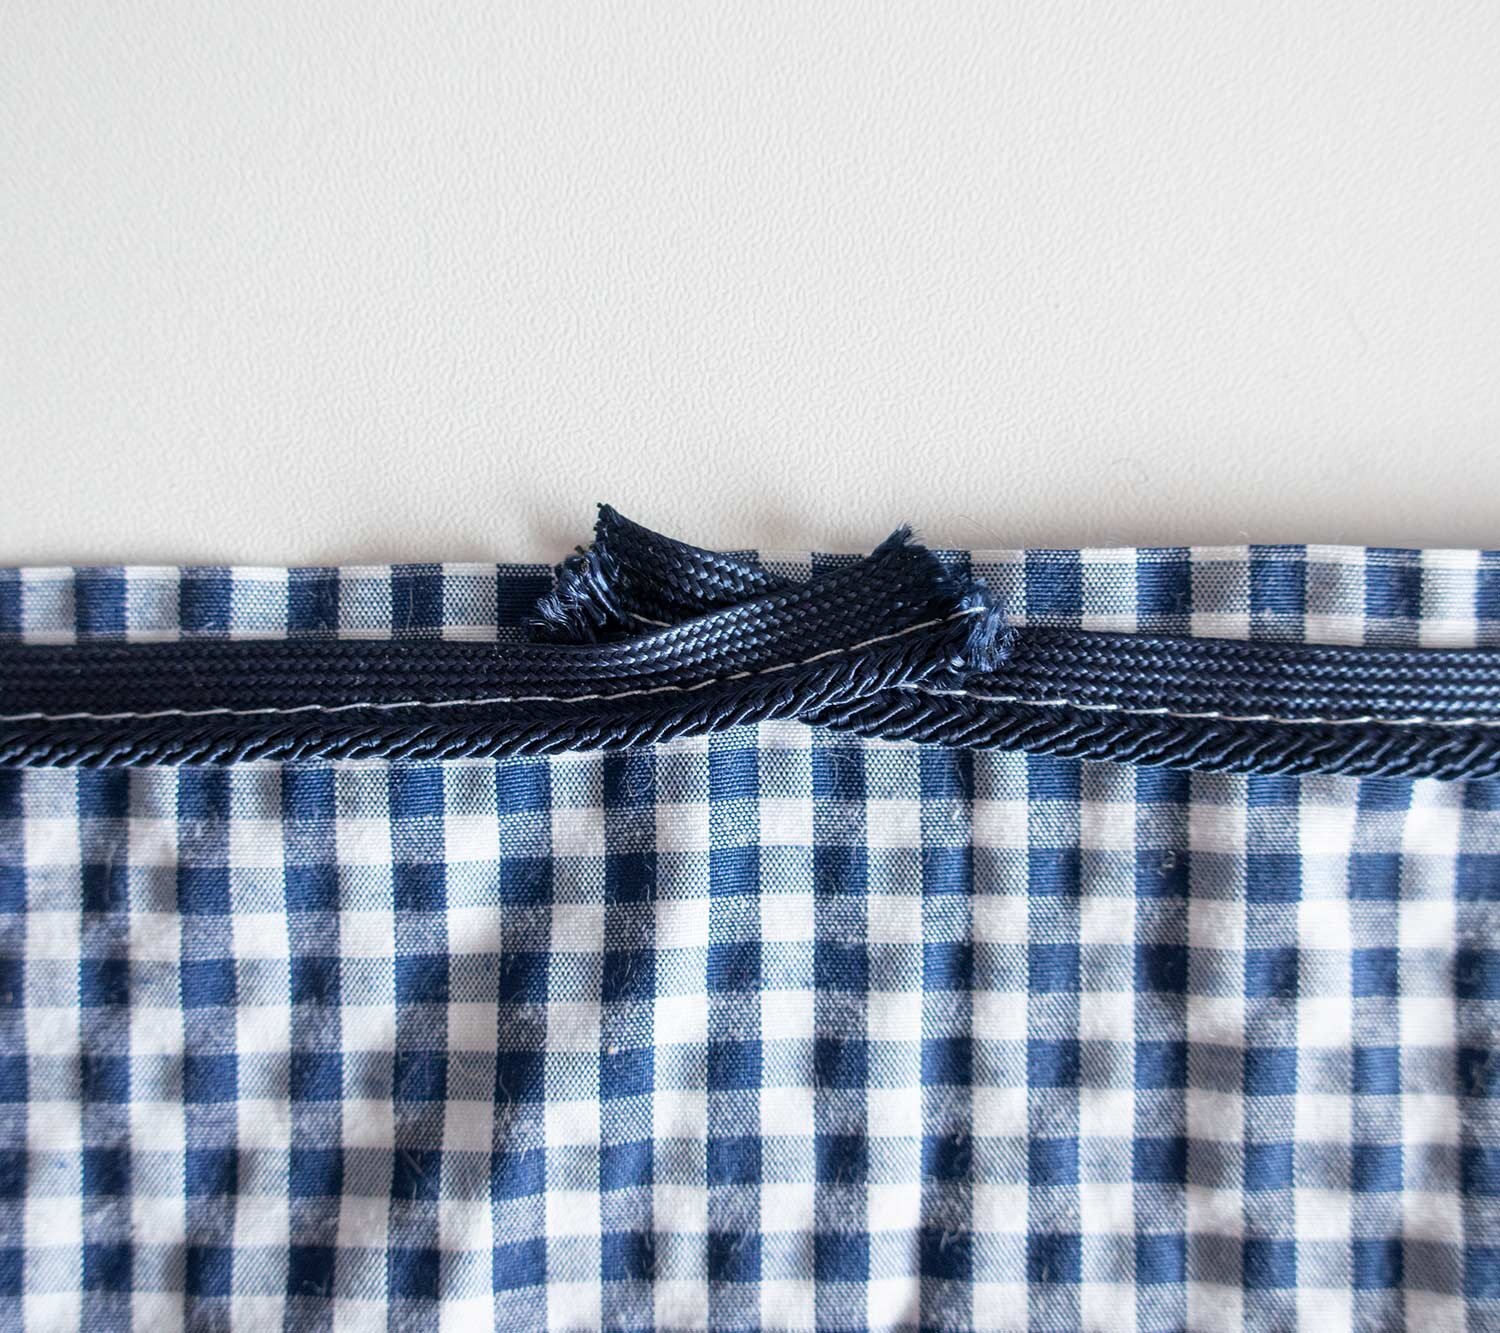
Finish basting the piping and stitch right over where you began, creating a V-shape with the piping (second photo above).
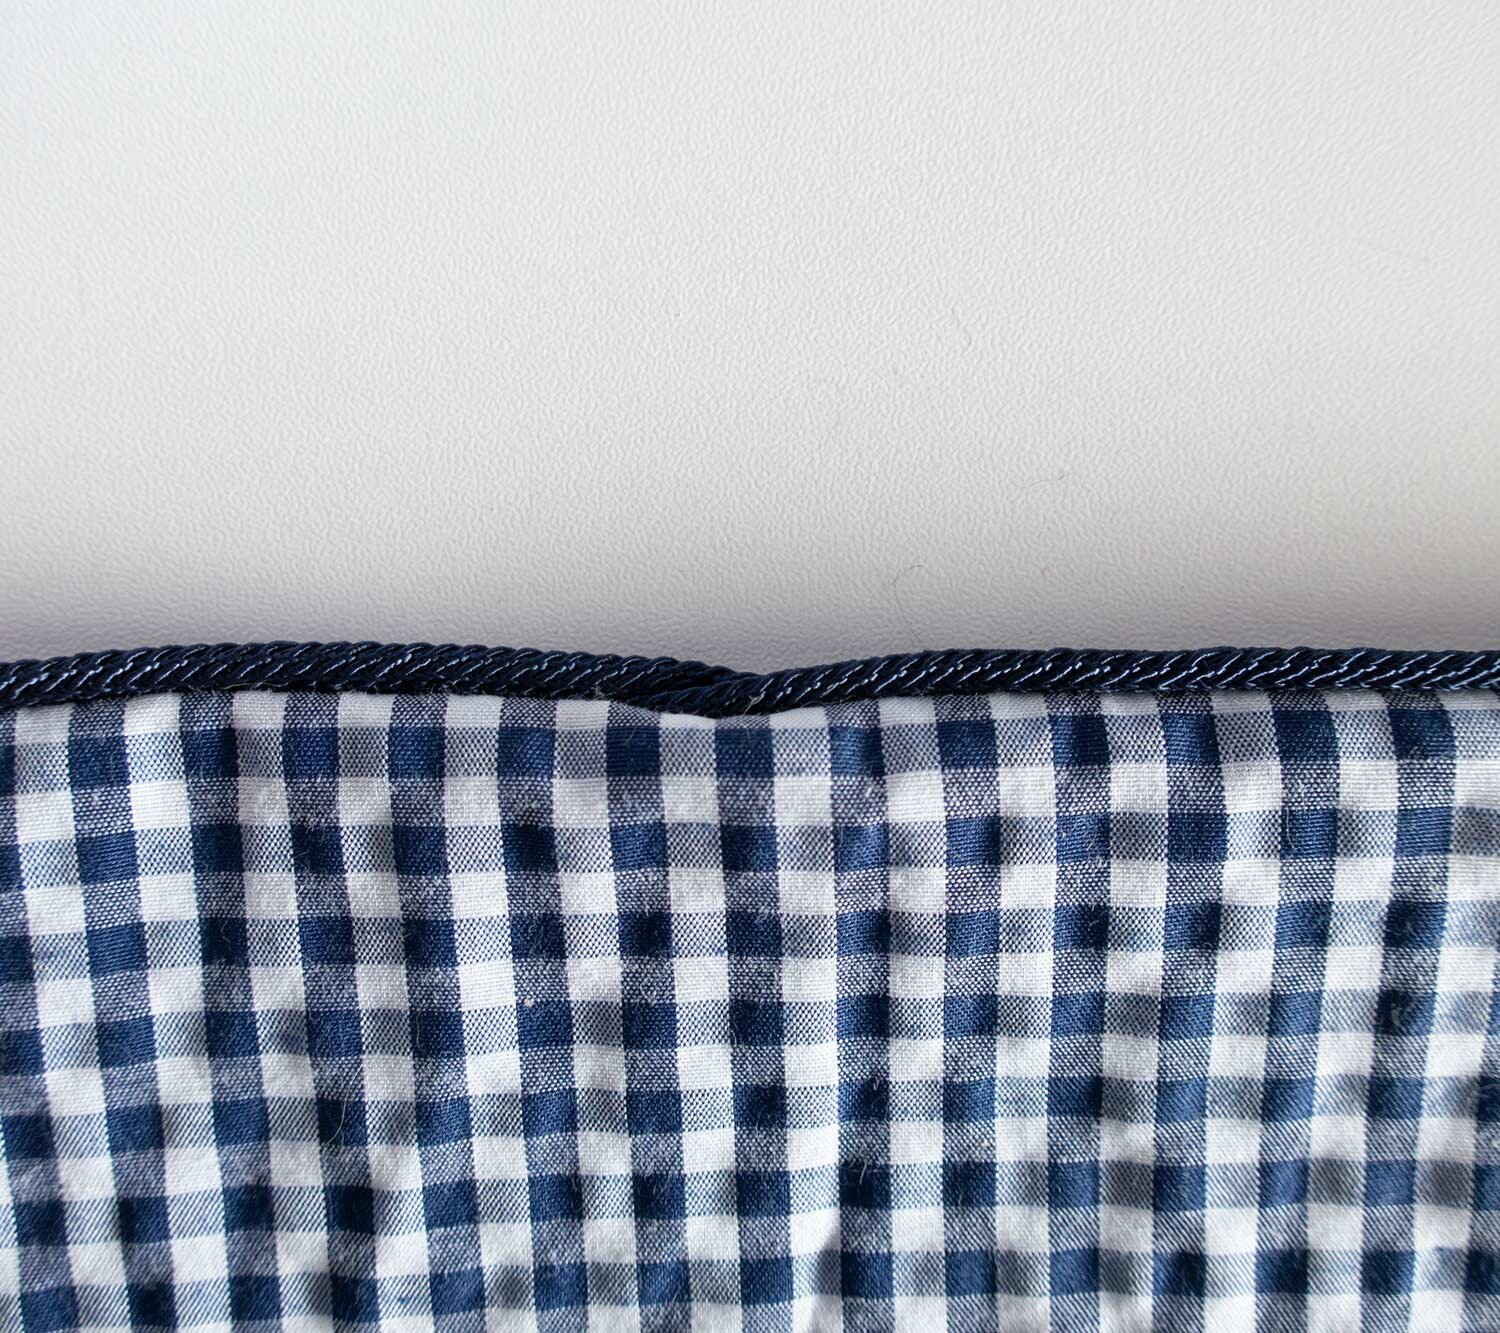
When turned right side out, the piping should look like the third photo above, with the piping overlapping in a V shape and no raw edges visible.
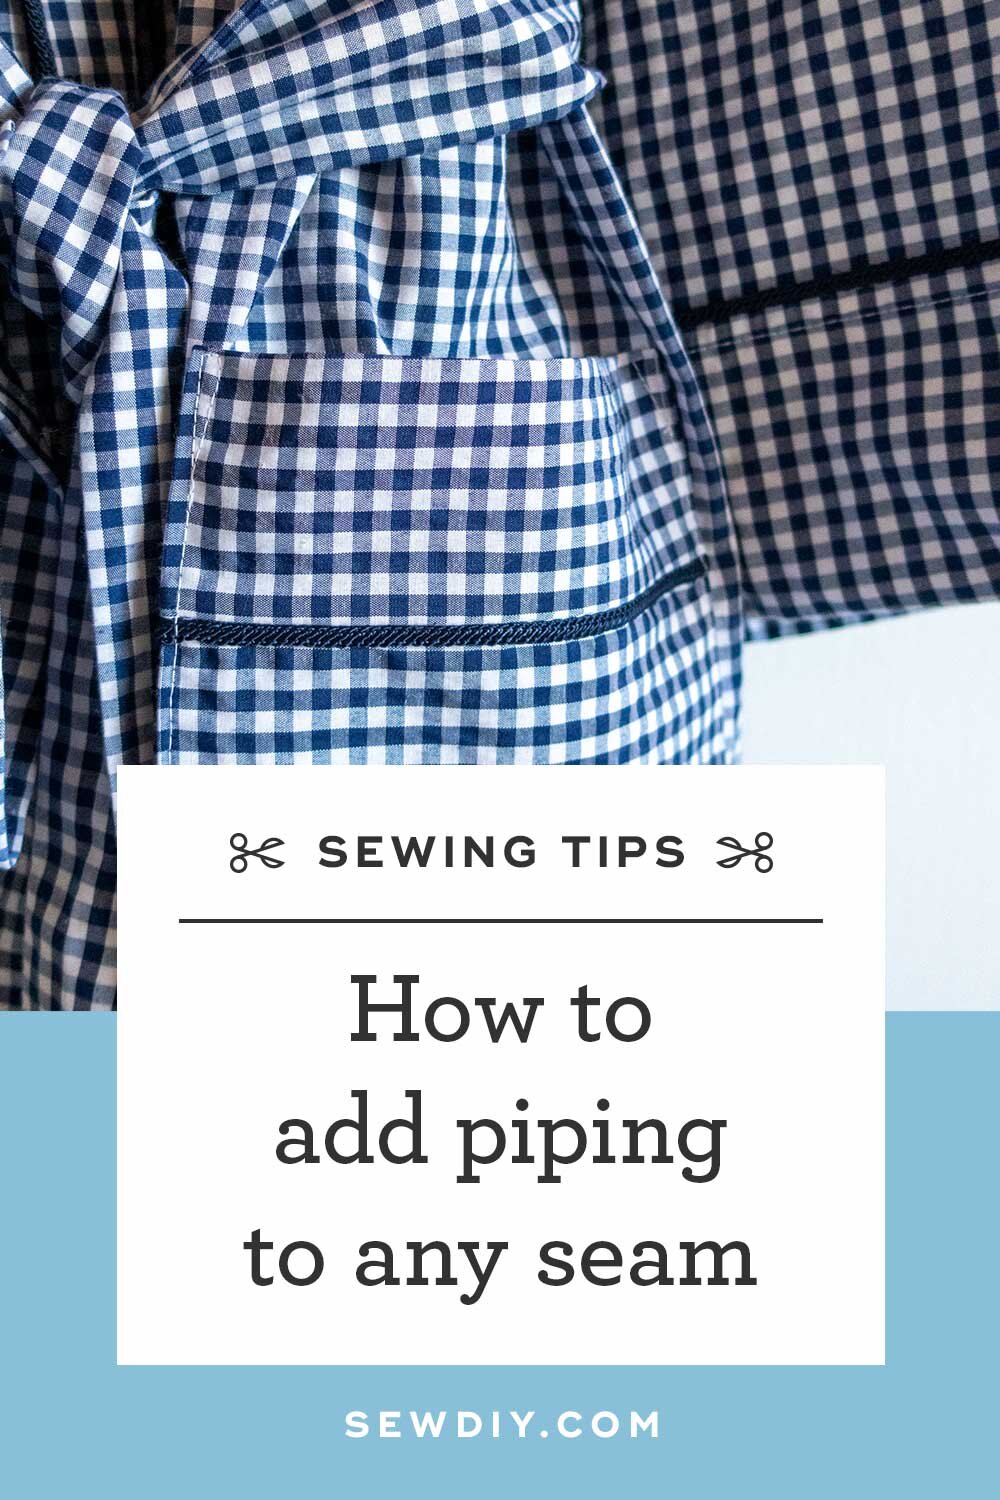
For future reference, you can pin the image below. And if you haven’t already, you can follow us on Pinterest here for more sewing inspiration.
If you are looking for additional help with adding piping to your garments, I recommend this tutorial from Megan Nielsen. In the video, I’m adding piping to my Tasi Robe pattern. It requires a few tweaks to the drafting to get the classic robe look and I’m planning to do a blog post soon with tips for how to do that. Happy sewing!


