Nice looking patch pockets are all about precision. That starts with cutting and continues to placement and stitching. Over the years, I've gathered a few tricks and tips to help you sew patch pockets with ease. If you're just getting started with sewing, I recommend using a stable woven cotton fabric for your first project because it's less likely to warp and will press nicely. With a sturdy fabric, you won't need too many tricks but the more drapey the fabric is, the more likely it is that you'll want to reach for a special tool or trick.
Most of all, I recommend taking your time and trying out different tools to find what works for you. And remember that different fabrics may need different techniques and you can test things out using fabric scraps. And don't sweat it too much if it's not perfect.
14 Tips for Sewing Perfect Patch Pockets
TIP 1: Be precise when cutting
Use a rotary cutter and ruler when cutting for the most precise cutting. It also helps if you cut the fabric on grain (and not on the bias).
TIP 2: Transfer pattern markings while cutting
When cutting out the pattern pieces, make sure to transfer the pattern markings before moving the fabric.
TIP 3: Make a folding template
One of the harder parts of patch pockets is folding in and pressing the edges in precisely. One method is to make a template from heavy paper (like tag board, card stock or a manila folder) to use as a pressing template. The template should be cut to the final folded size of the pocket. Place the fabric right side down on your ironing board, put the template on top, fold the fabric over the template and press. This blog post from Maven sewing patterns has more details.
TIP 4: Create a crease by basting along the fold lines
Another way to make folding the edges easier to sew a line of basting stitches on the foldline of the pocket. The basting stitches will act like a crease in the fabric, making it easier to fold precisely.
TIP 5: Make a facing
If you're sewing a really fancy pocket, like one with rounded or beveled corners, you may want to stitch a facing to the pocket, instead of pressing and folding in the edges. The facing is (usually) the same pattern piece as the pocket and the two are stitched with right sides together and then turned right side out. The stitched line becomes the folded edge of the pocket.
TIP 6: Clean up the corners
Sometimes the corners of the patch pockets want to peek out after stitching. To prevent this, you can trim the excess fabric from the corner. Or, if you want to be extra fancy, sew a mitered corner.
TIP 7: Use a ruler to double check placement
When you're ready to stitch the patch pocket in place, use a ruler to measure from the cut edge of the fabric to make sure the pocket or pockets are placed where you want them. Take your time here.
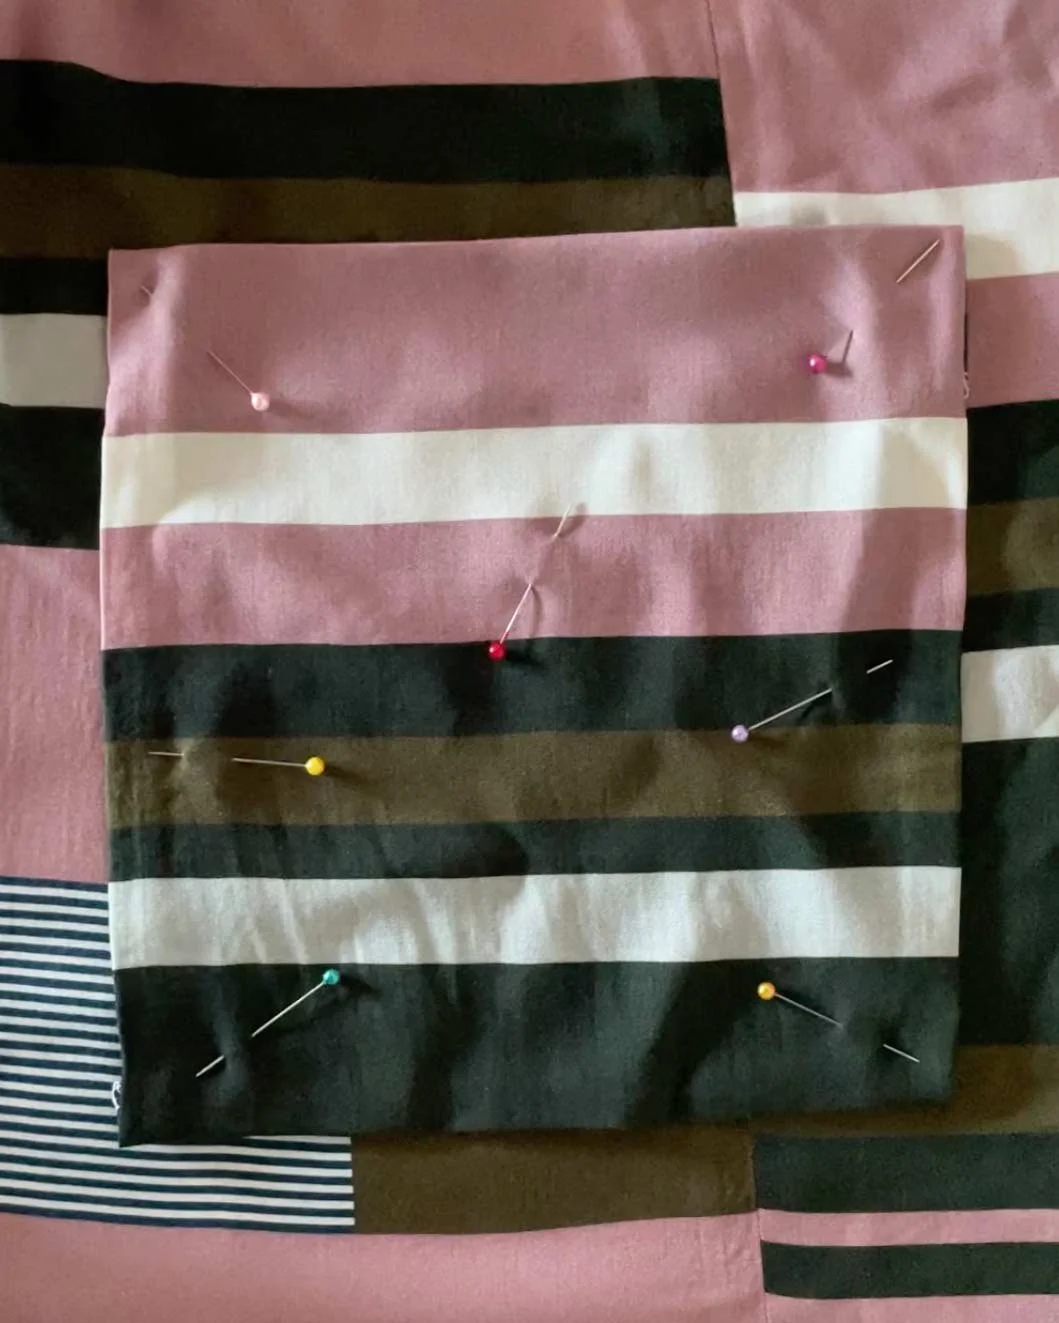
TIP 8: Place pins in the center of the pocket
To prevent the fabric from warping out of position, instead of placing pins into the edge of the fabric, place them in the center of the pocket and pointing outwards, like a starburst.
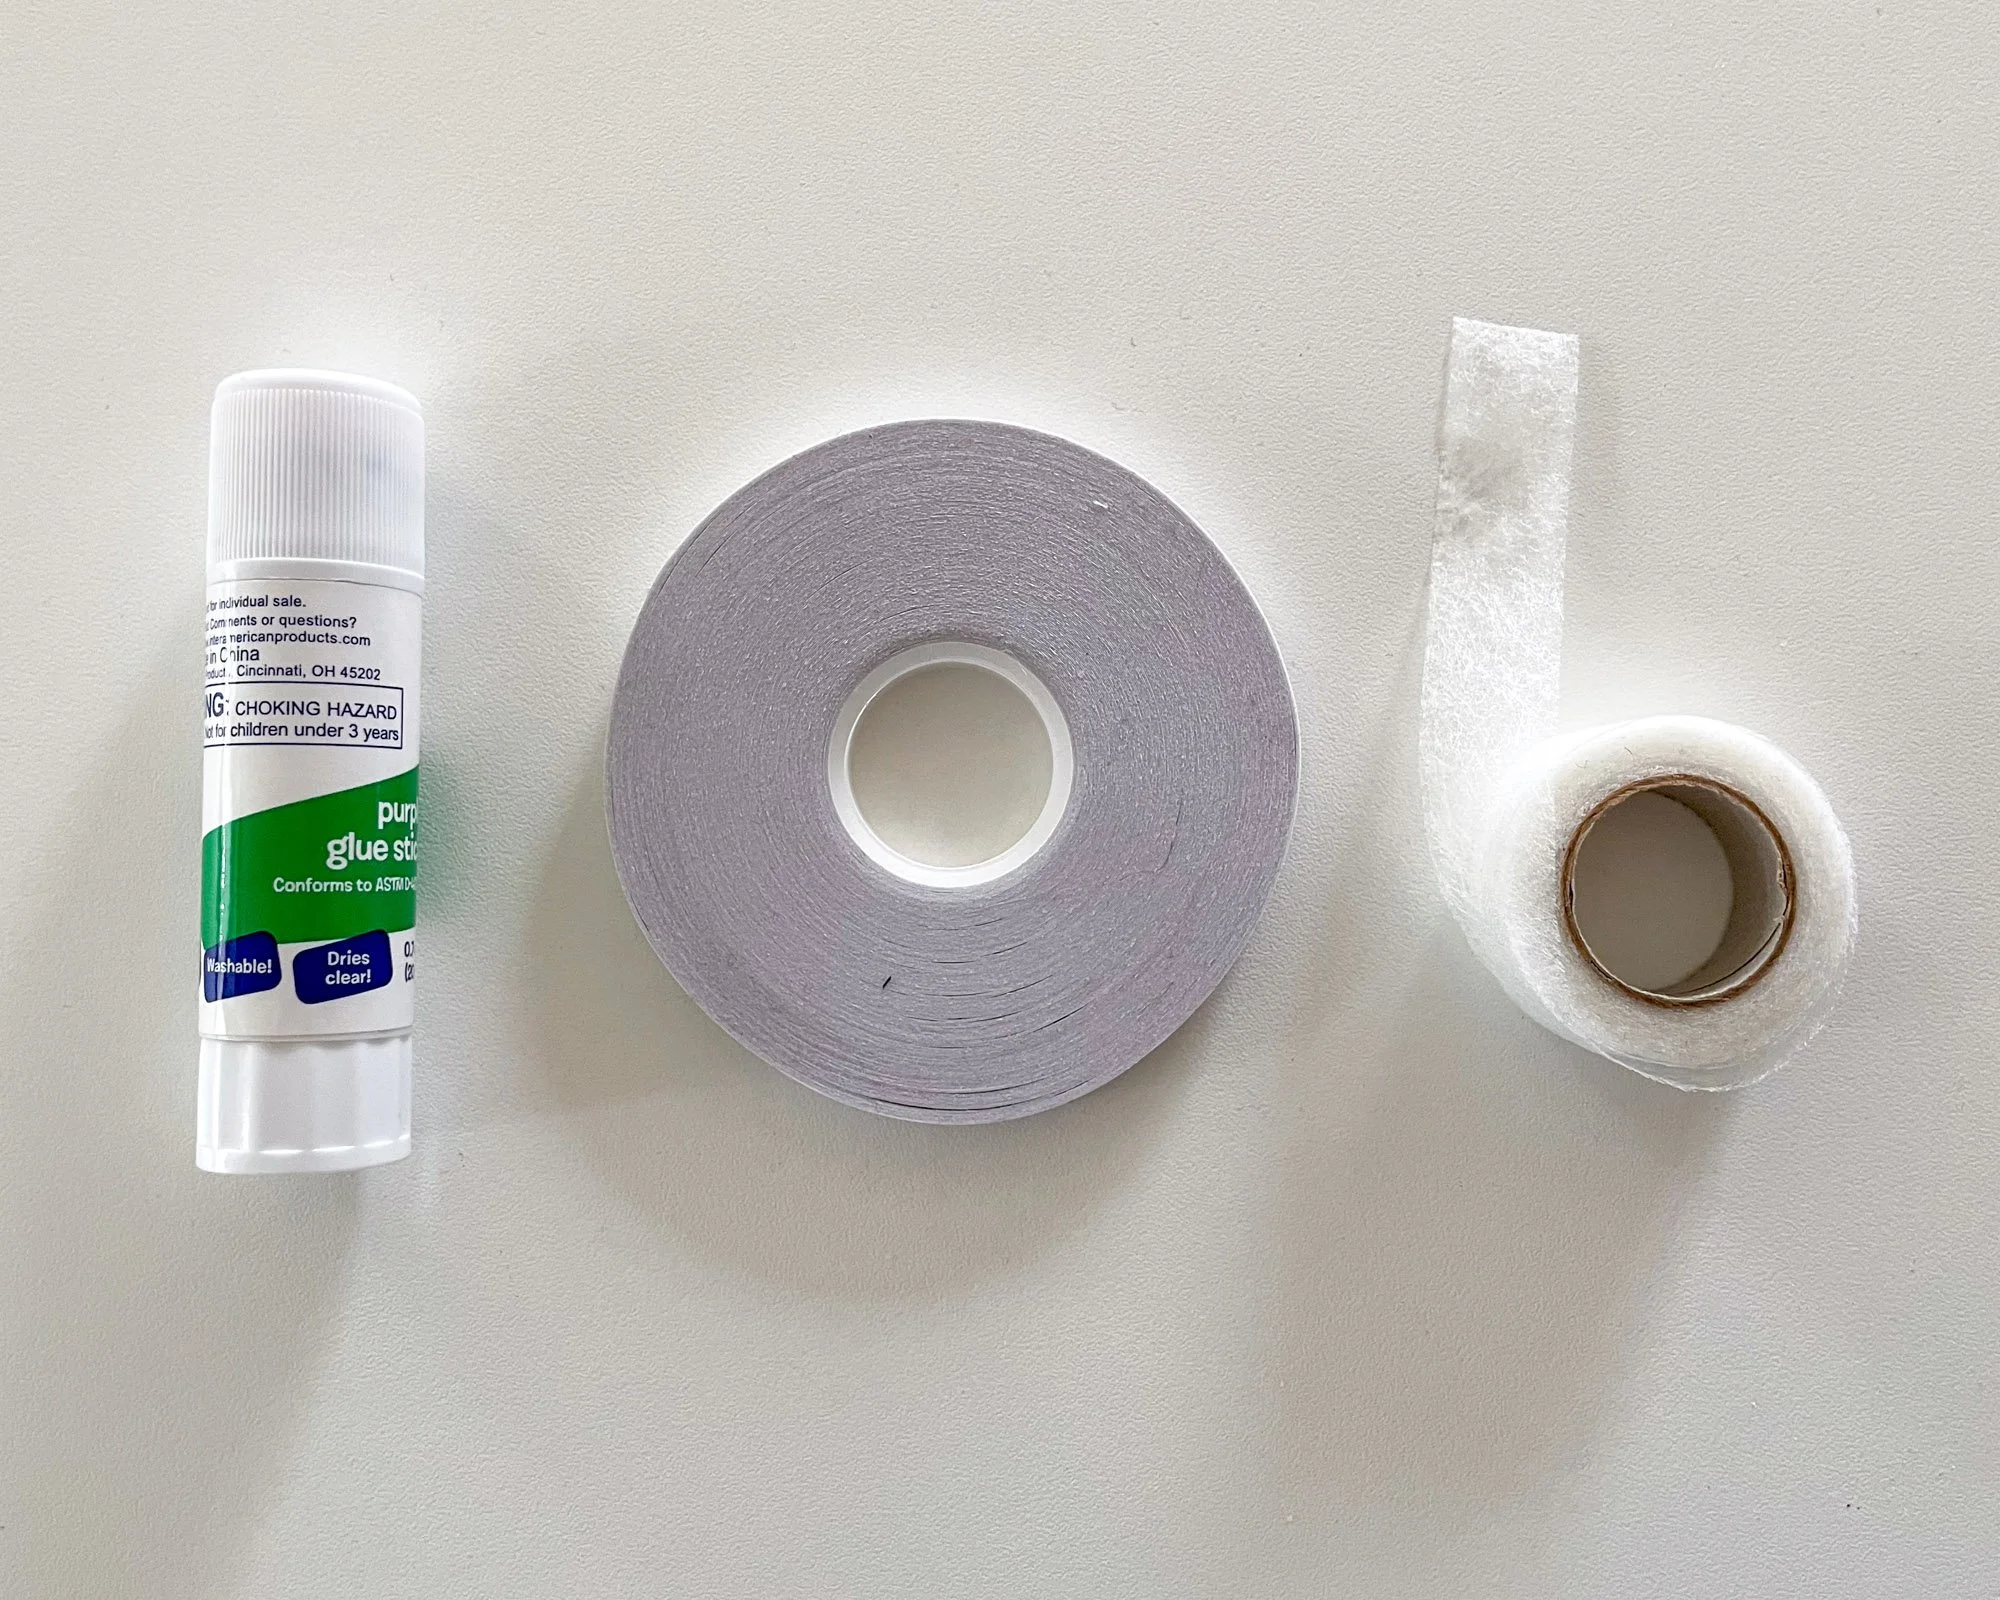
TIP 9: Use adhesive
Use a glue stick or other fabric adhesive to hold the pocket in place while stitching. In the photo above are a few adhesives that I regularly use; from left, glue stick, double sided fabric tape, and fusible web tape. My favorite is a glue stick because it’s really easy to use, will wash away and it’s relatively cheap. I've never had it gum up my needle either. Alternately, you can buy wash away or permanent fabric tapes that will glue the pocket to the fabric.
TIP 10: Stitch slowly
You’re less likely to make mistakes and stray from straight lines if you stitch slowly. Some machines even have a speed control that you can set so you don’t accidentally stitch too quickly.
TIP 11: Use a longer stitch length
I like to use a top stitching length of about 2.8 to 3.0. The pockets don't have as much stress on them as other seams and the longer stitch length looks very nice as top stitching.
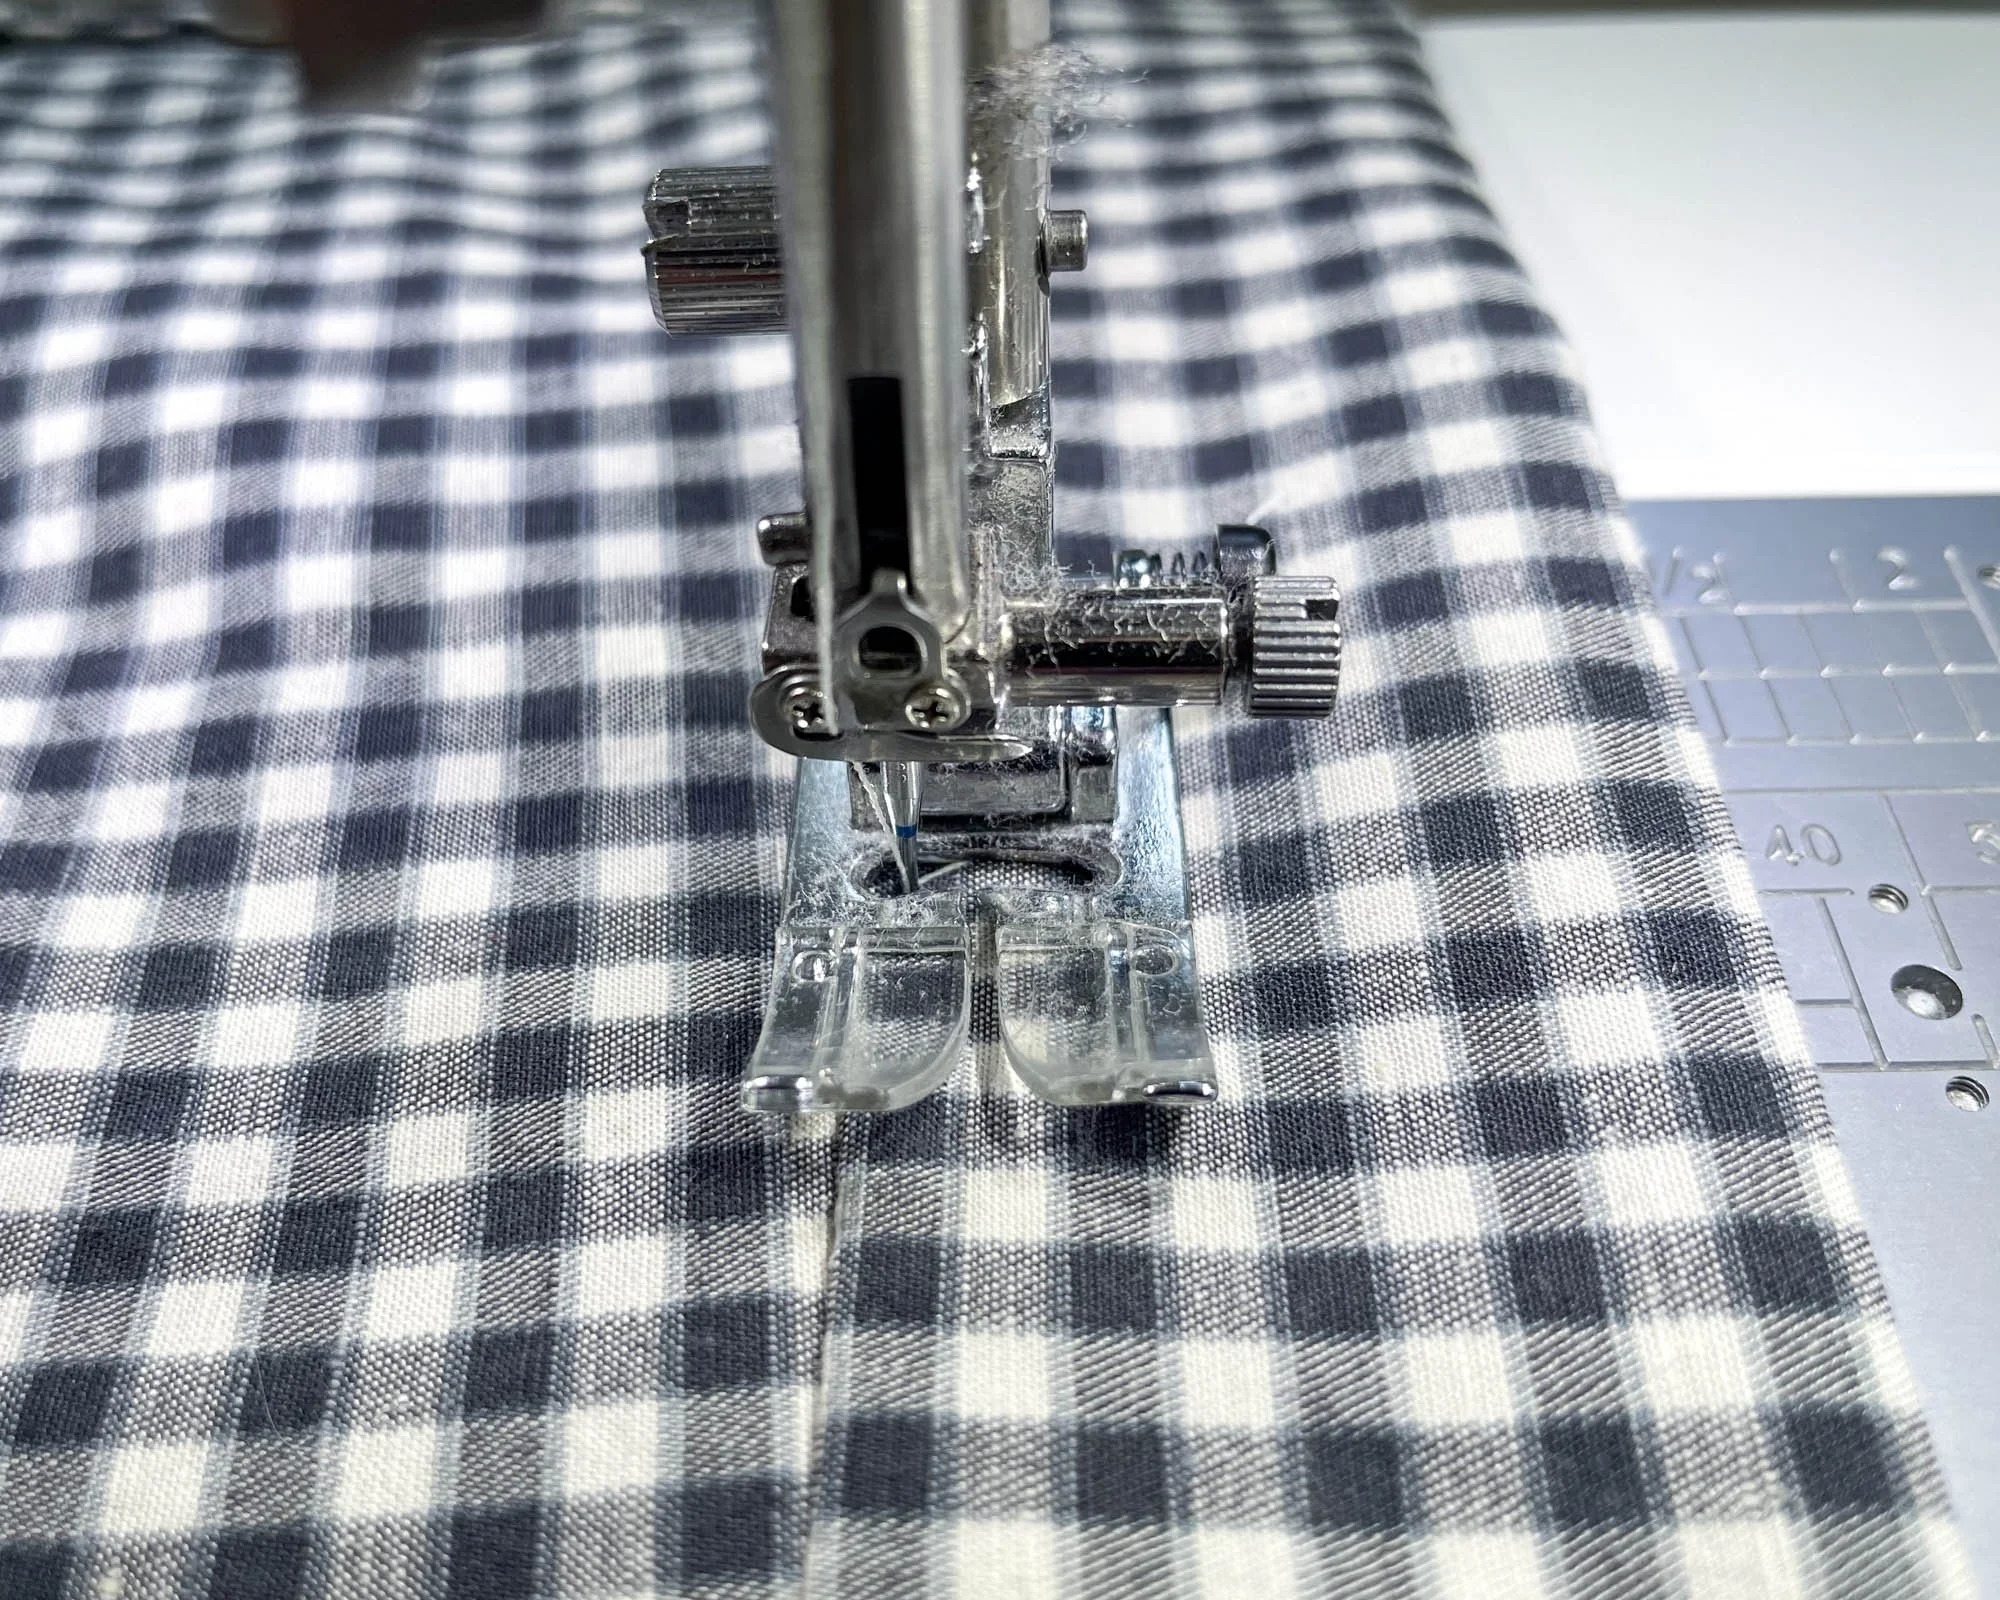
Example of needle position moved to the left for better balance and seam aligned with presser foot
TIP 12: Adjust the needle position
When using your regular sewing machine foot, try moving the needle to the left or right. The objective is to keep the foot balanced on the pocket and align the edge of the pocket with one of the guides on the foot.
TIP 13: Try out different feet
There are special sewing machine feet designed for topstitching or edge stitching that are worth checking out. These feet often have a special guide to help keep the stitching an even distance from the edge of the pocket. Sometimes you can also use the blind hem foot or another foot that comes with your machine. Give it a try and see what works for you.
TIP 14: Pull thread tails to wrong side and tie a knot
Instead of backstitching, you can pull the tail threads to the wrong side and tie them in a knot to secure the stitching. This will create a cleaner look on the right side of the fabric. Definitely do this if you are sewing with a twin needle.
If you want more help sewing your patch pockets, I showed how in this video for my Eva Dress sewalong.
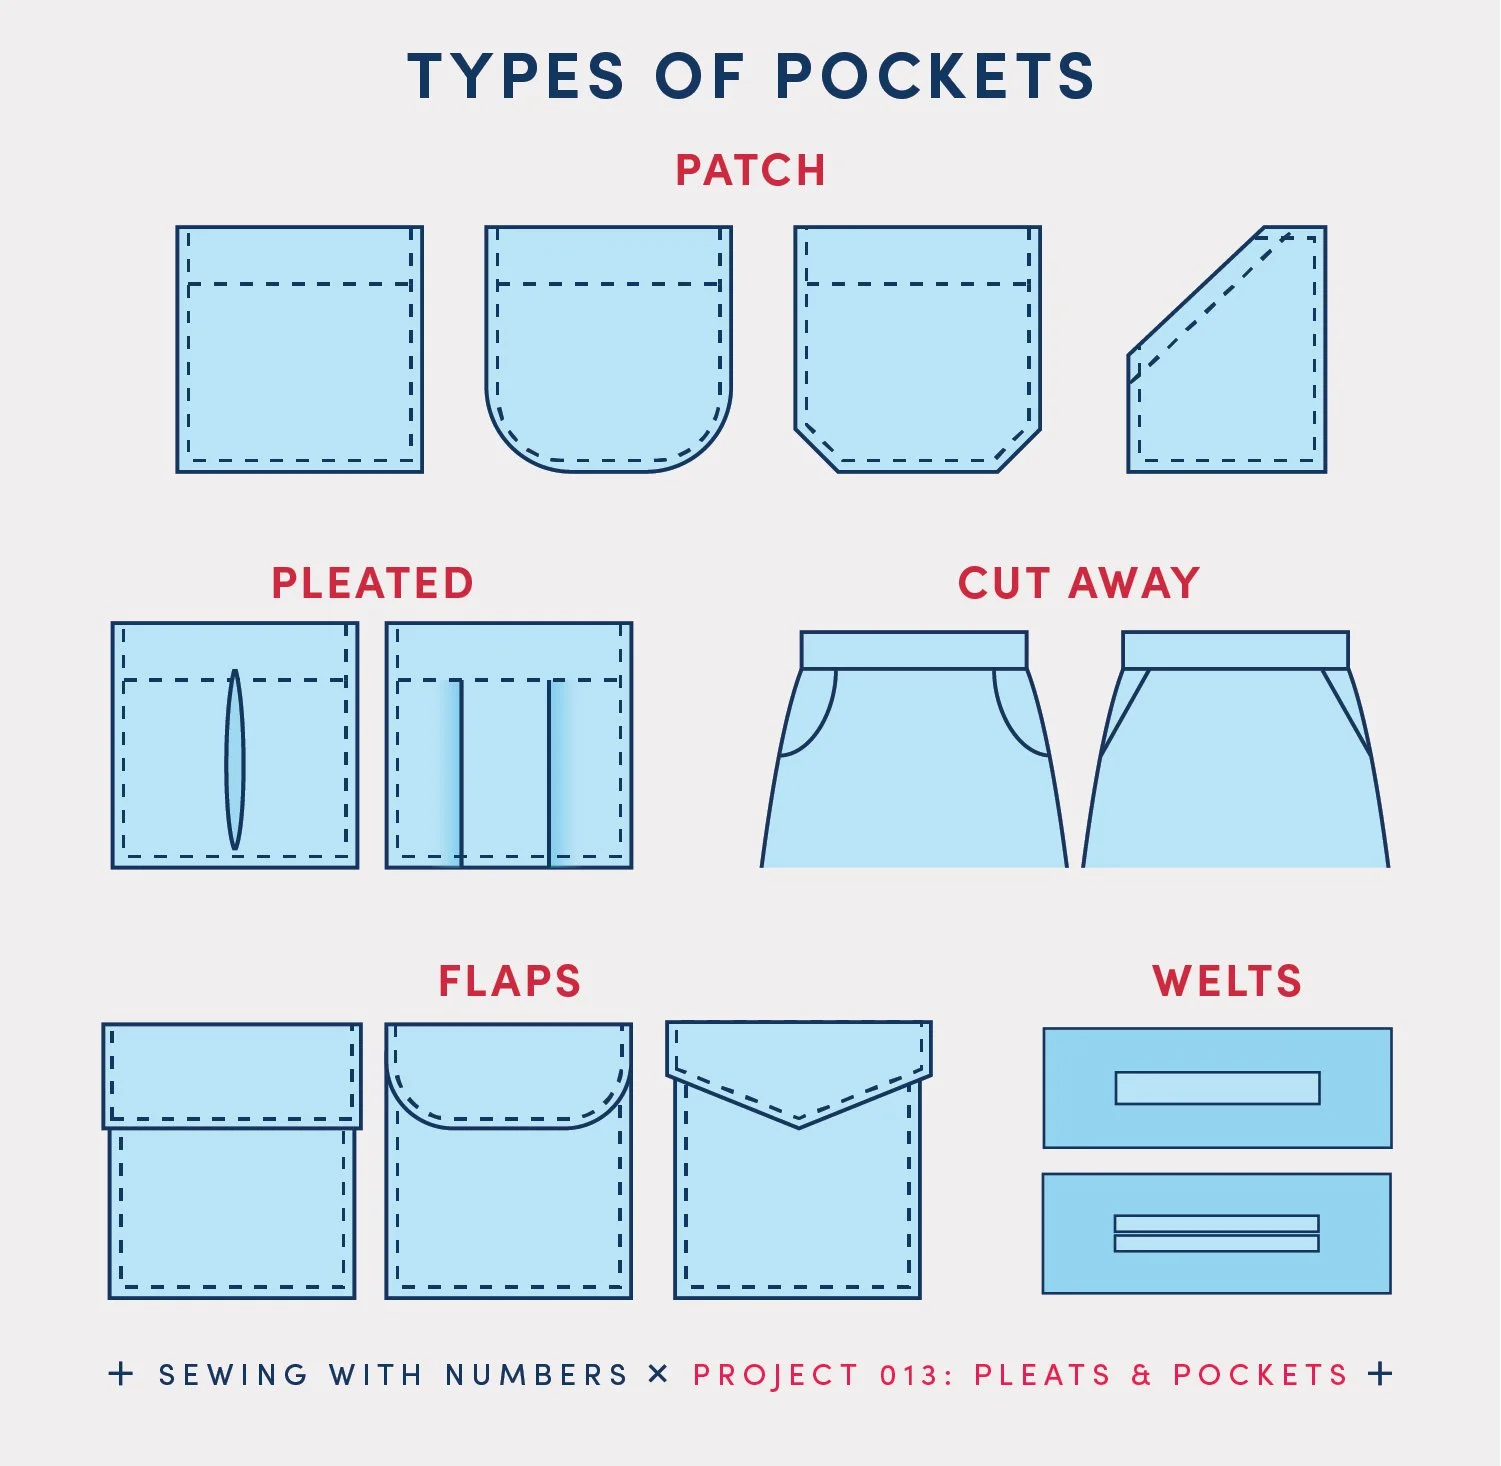
If you’re interested in drafting your own pockets, check out this post on my Substack Sewing WIth Numbers that will give you all the details. See the image above for a few of the pockets covered in the tutorial.
I also have patch pockets in a few of my sewing patterns, check them out below or browse the shop.

The Lou Box Top is a versatile, loose fitting top with two neckline options and three hem options, for a total of six different silhouettes. Designed with beginners in mind, the steps are very easy to follow, using the most basic techniques and the loose fit of the design requires minimal fitting. It's a great project for beginners looking to get their feet wet and for more experienced sewists who want to add some quick-to-make basics to their wardrobe.
This is a digital pdf pattern that includes a print-at-home pattern, copy shop pattern and illustrated instructions for both woven and knit fabrics. THIS IS NOT A PHYSICAL PRODUCT.
After checkout, you will receive a link to the pattern that will be active for 24 hours after you click it. Prices are in USD.

The Lou Box Dress 1 is a loose-fitting cocoon style dress. Worn alone, it’s perfect for warm summer days. Paired with a sweater, tights and boots, it will take you through the colder months. Make it in linen for a casual look or printed silk for a luxurious night out. View A features a medium scoop neck, 3/4 length sleeves with cuffs, in-seam pockets and a knee-length skirt. View B features short cuff sleeves and patch pockets. Instructions are included for sewing the dress in both woven and knit fabrics.
This digital pattern includes an illustrated, step-by-step instruction booklet, a print-at-home layered pattern for letter or A4 size paper, a US copy shop pattern and an A0 size pattern.
Model is 5’11” and is wearing a size 12.
THIS IS NOT A PHYSICAL PRODUCT. After checkout, you will receive a link to the pattern that will be active for 24 hours after you click it. Prices are in USD.

The Dana Jumpsuit is the perfect mix of sophistication and sport. Make the pants version in velvet or silk for sophisticated nighttime look or sew up the shorts length in a rayon crepe or cotton chambray for a carefree, summer romper. The front waist tie creates subtle shaping while maintaining total comfort.
This all-season jumpsuit features a dramatic front waist tie, a scoop neck, set-in elbow-length sleeves, an invisible back zipper and optional center front top stitching. Choose between a high curved or a deeper V-shaped back neckline.
This digital pattern includes an illustrated, step-by-step instruction booklet, a print-at-home layered pattern for letter or A4 size paper, a US copy shop pattern and an A0 size pattern.
Model is 5’11” and is wearing a size 12.
THIS IS NOT A PHYSICAL PRODUCT. After checkout, you will receive a link to the pattern that will be active for 24 hours after you click it. Prices are in USD.

These semi-fitted tops and sundress feature a square neckline, side bust darts and are fitted at the back with a combination of narrow elastic and criss-crossed lacing. View A is a crop top that ends at the waistline. View B has a ruffled peplum and ends at the high hip. View C is a dress with a calf-length skirt and ruffle at the hem.
The pattern is a hybrid of a traditional pattern that you need to print and a zero-waste style pattern. You will need to print (or project) the front bodice and front facing pattern pieces. The remaining pattern pieces are rectangles that you can draw directly on your fabric (or paper) and then cut out, saving you paper and fabric.
This digital pattern includes an illustrated, step-by-step instruction booklet, a print-at-home layered pattern for letter or A4 size paper, a US copy shop pattern, an A0 size pattern and a projector pattern. All pattern files have layers. Pattern files are separated by cup size so that you can easily print only the pattern pieces that you need.
Visit the sewalong for more information, tips and tutorials.
Model is 5’11” and is wearing a size 12 C/D cup.
THIS IS NOT A PHYSICAL PRODUCT. After checkout, you will receive a link to the pattern that will be active for 24 hours after you click it. Prices are in USD.
If you’d like to save these tips for later, save the image below to Pinterest.