

Hello sew-friends! Have you noticed that lately, everyone says "spooky season" rather than Halloween? I think it's a justification for stretching out the Halloween decorations for a month or more before the big day. Or maybe, it's just a way to make the Fall season a little more fun and moody? Anyway, I'm here for it. Especially now that I'm living in Seattle again and the air is cold, the ground is wet and leaves actually change color. I've even decorated my front porch with a maroon and a yellow mum and it’s so nice to have that pop of color.
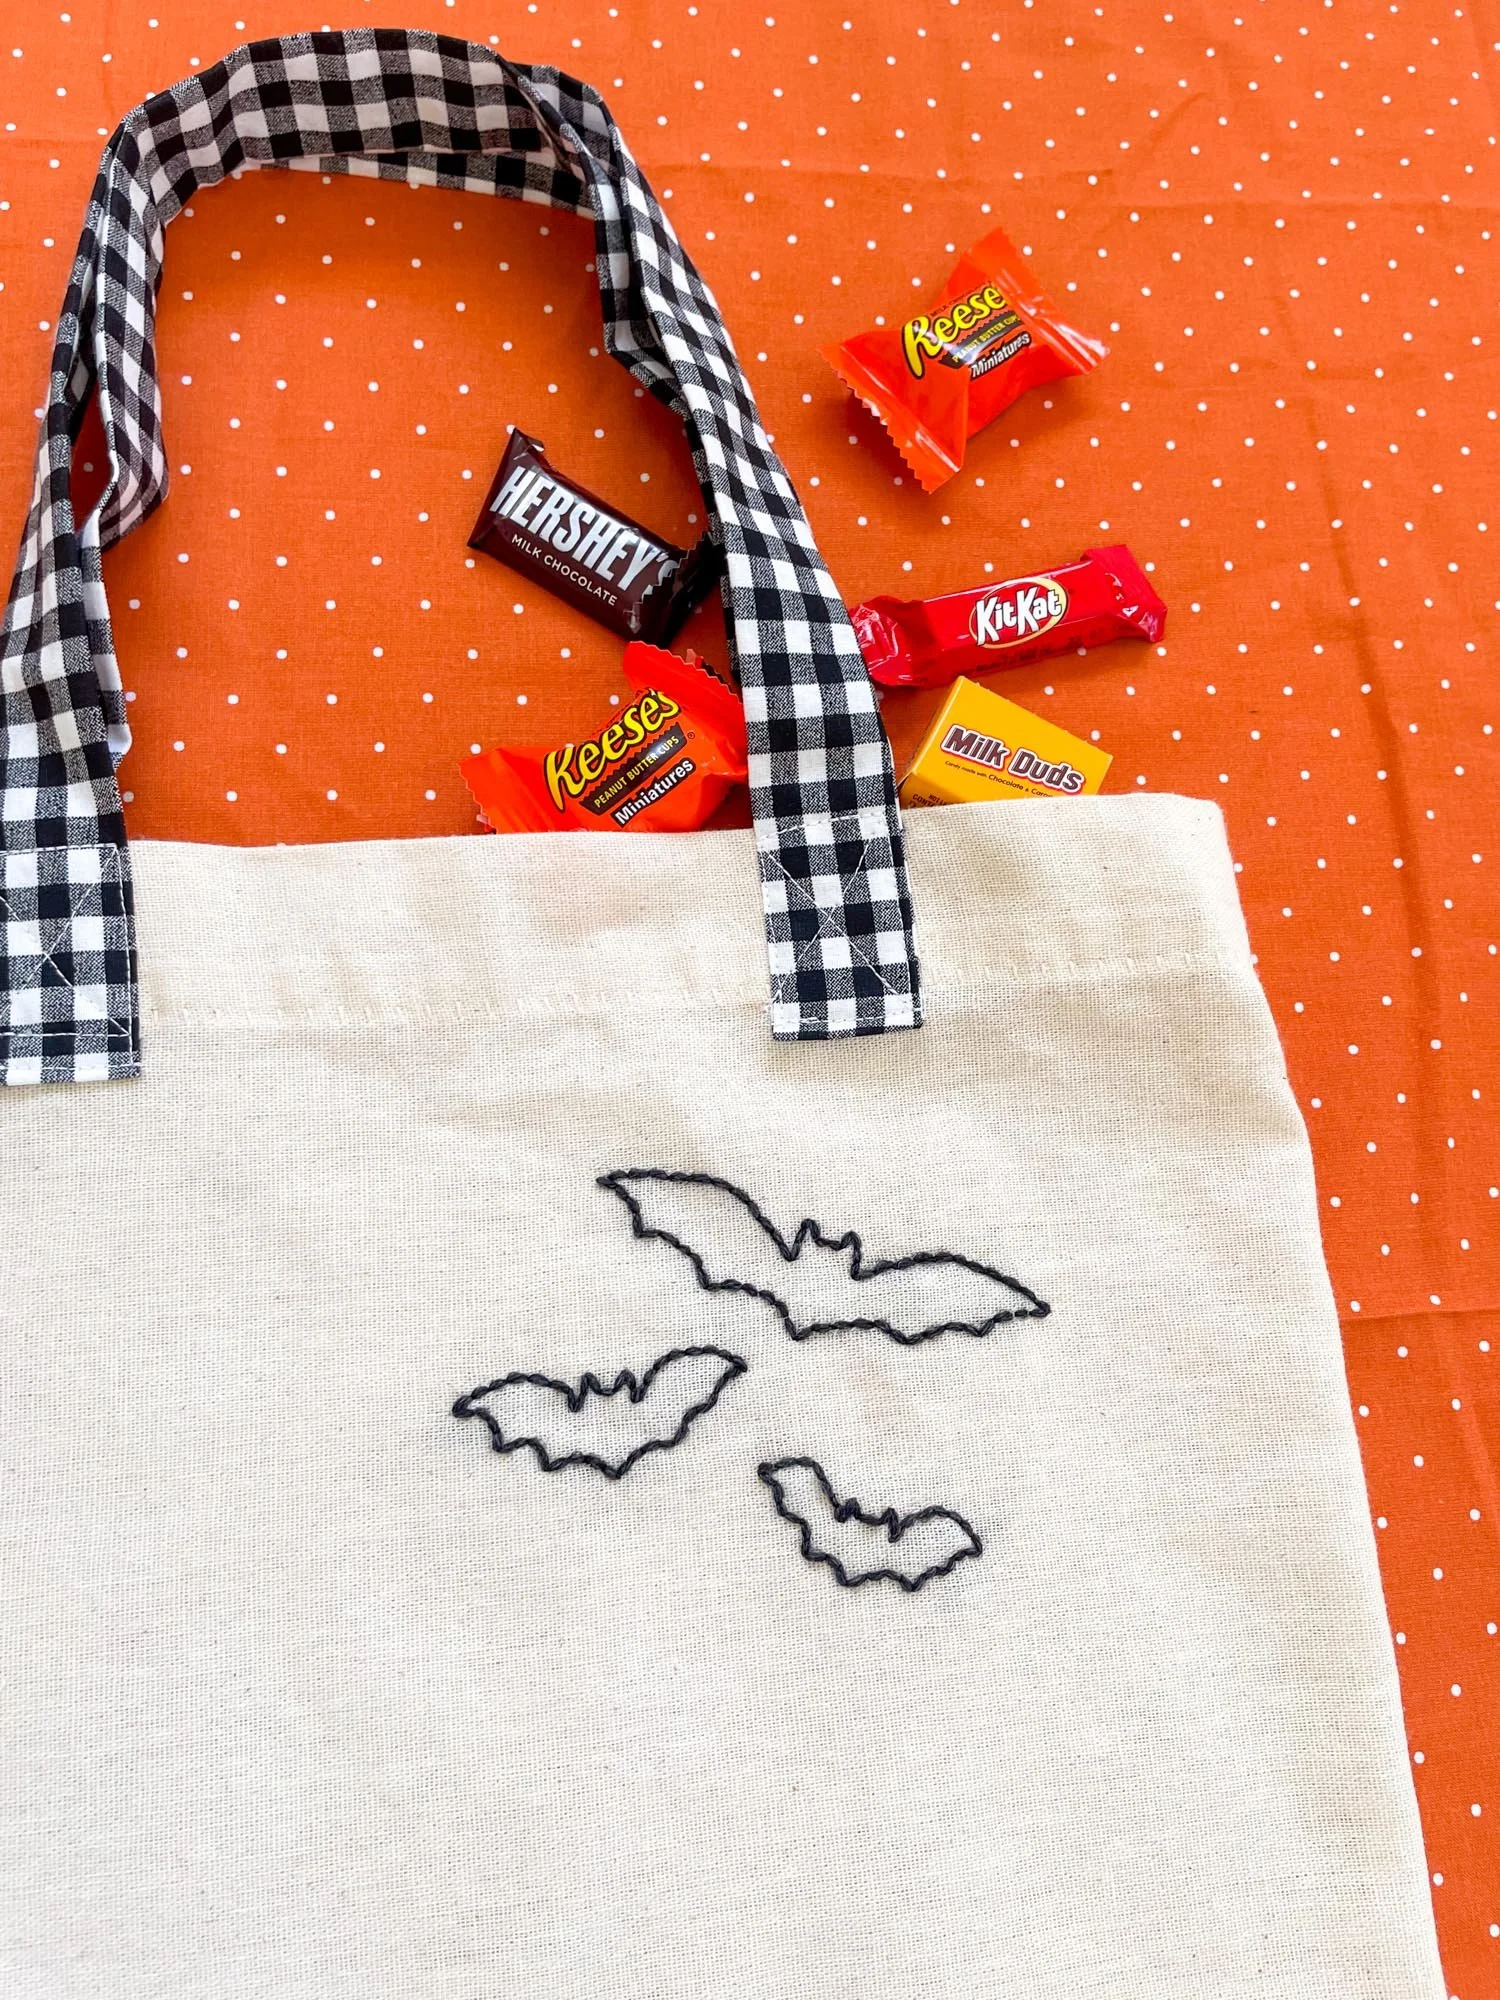
Today, to celebrate the season, I have a fun little Halloween themed craft to share with you. This tutorial will show you how to sew a simple tote with boxed corners and contrast handles. Plus, I’ve designed bat and ghost embroideries to decorate your tote. The tote is an average size and would work well for trick-or-treating or use it any day or night of the year to tote your favorite spooky books or craft projects.

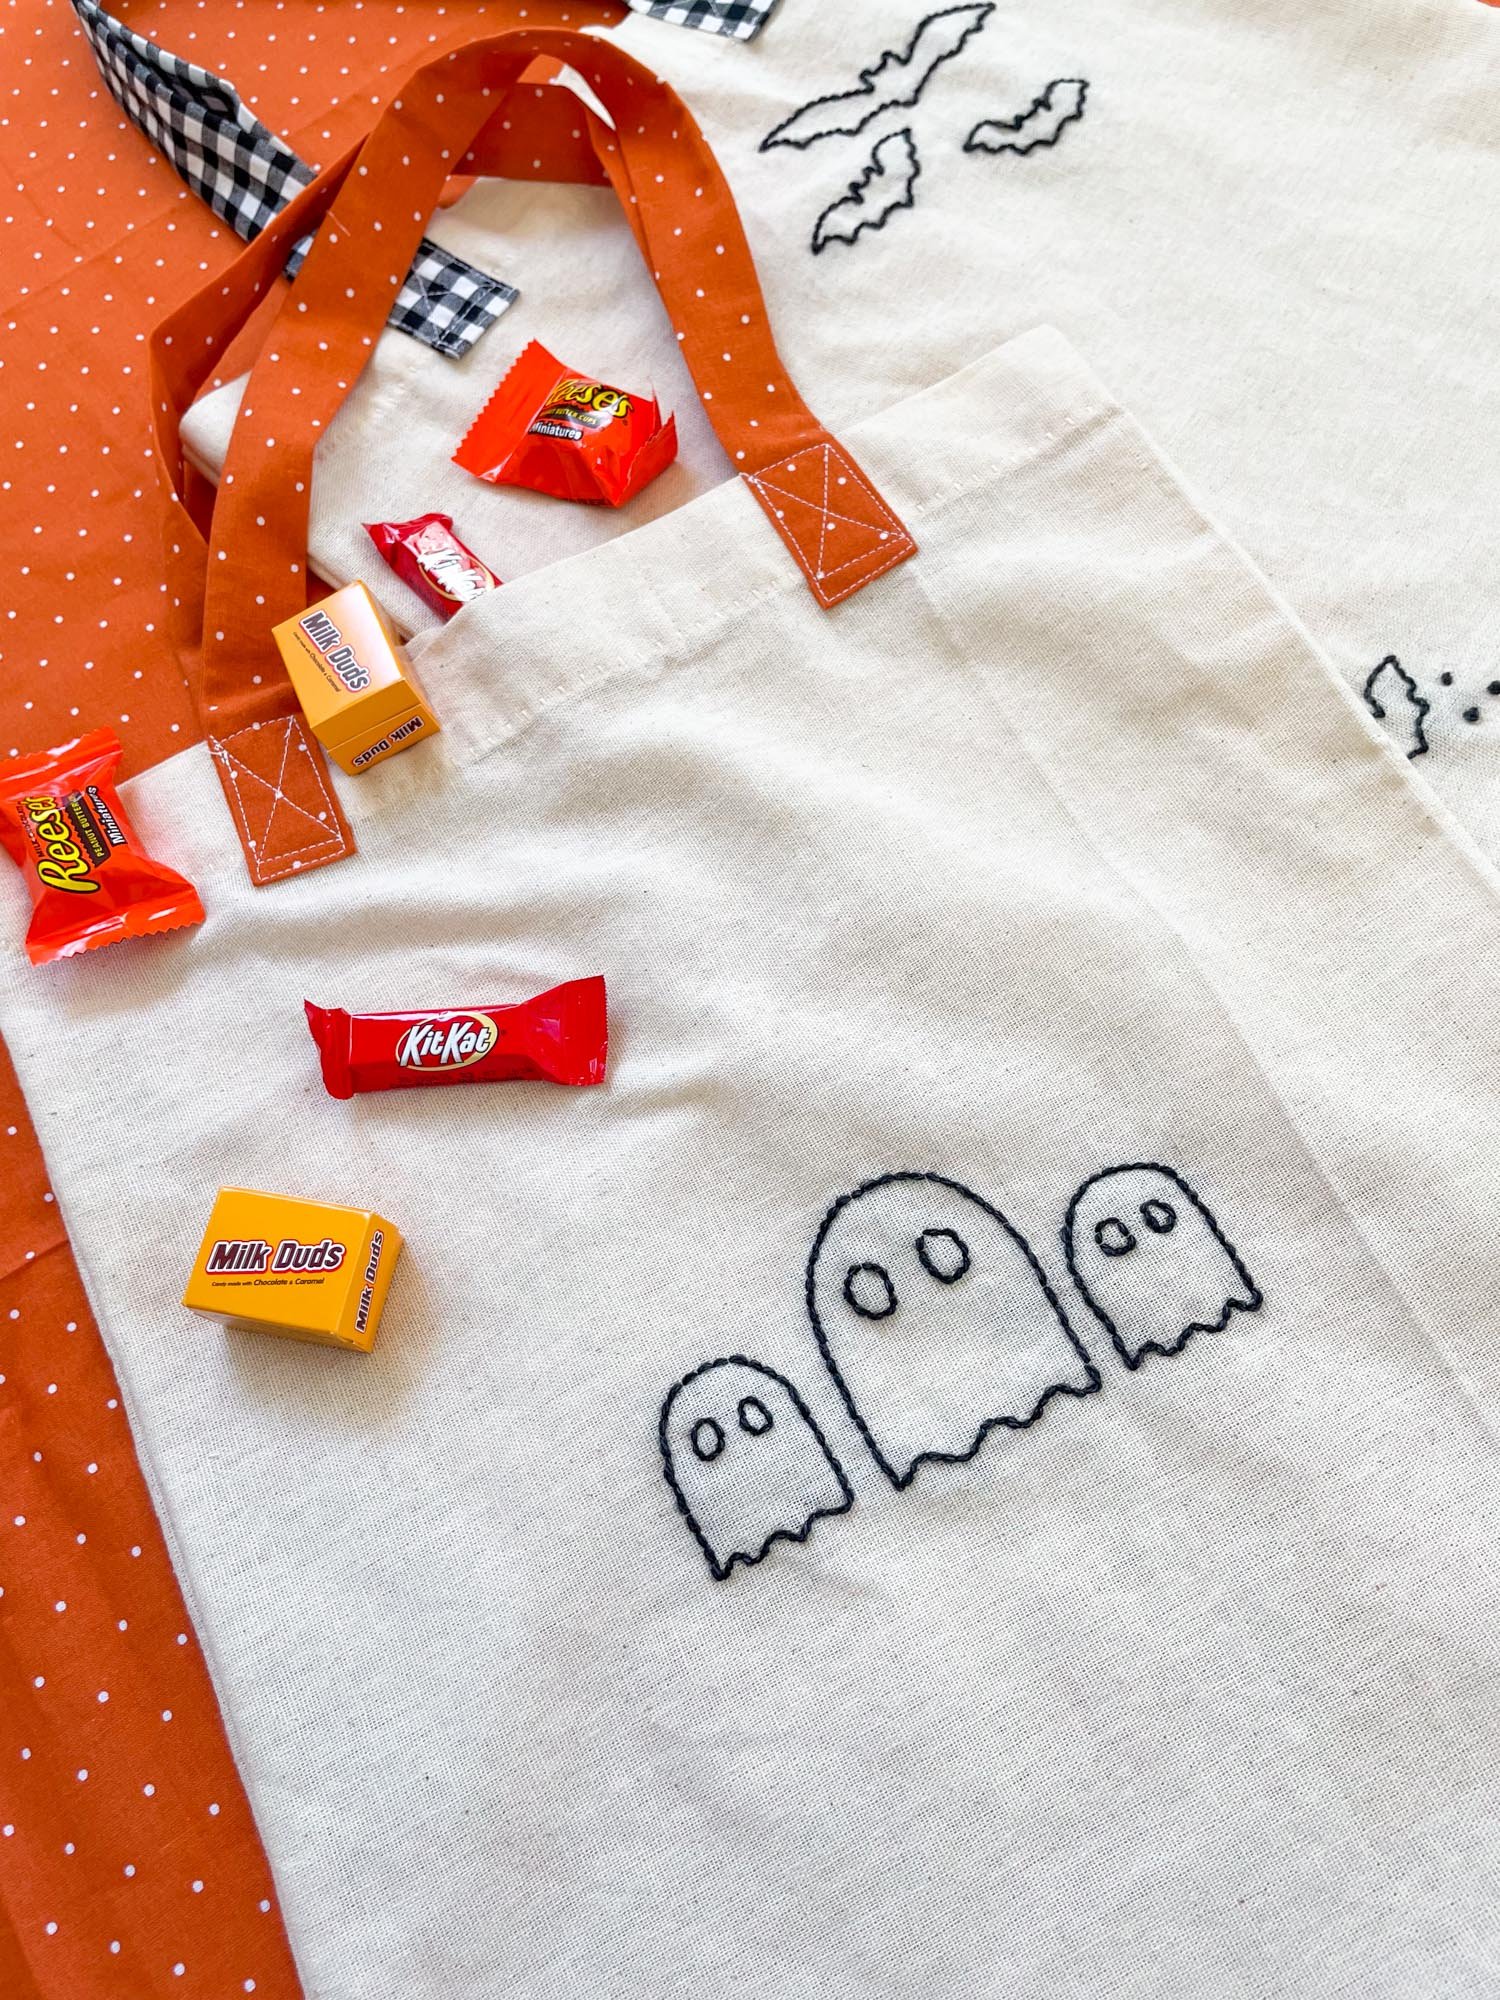
For this project, I created two embroidery designs, a trio of bats and a trio of ghosts. The designs can be used together, one at a time or in sets. The pdf for this project is free to download when you sign up for the newsletter and includes one page with the embroidery designs and one page with simplified instructions and illustrations of the steps for sewing the tote.
If you are already subscribed to my weekly newsletter, you can find the pdf in the Resource Library at the bottom of the page in the “Printables” section. The link and password to the library are at the bottom of every newsletter.
If you're not signed up yet, you can sign up via the form below. After you sign up, you'll receive an email pretty soon afterwards with a direct link to download the pdf as well as the link and password to the resource library (woohoo!). If you can't find the email, make sure to check your spam folder and look for an email from help@sewdiy.com.

How to use the embroidery designs
There are a few ways to use the embroidery designs. First, print them out on paper. If your fabric is translucent enough, you can put the paper under your fabric and trace the designs using a wash away fabric pen. You can also use a lightbox or window to help enhance the lines as you trace. If you are using dark or opaque fabric, cut the designs out of the paper and trace around them like a template. Another option is to use a hot iron transfer pencil. If you have one of these pencils, trace over the design on the BACK side of the paper. Then place the traced side down on your fabric and iron over the top. The image will be transferred to the fabric.

My sewing room is not set up yet so I wanted to make this project as simple as possible. I upcycled an old beige curtain panel that I got from Goodwill into simple totes with boxed corners and added sweet outline embroideries to make them spooky, as they say. The embroideries are done with a simple backstitch and yarn. So, even if you've never embroidered before, this is a great place to start.

How to stitch a back stitch
Although I've done lots and lots of sewing over the years, I've only dabbled in embroidery. It is a fun way to personalize your projects and a nice activity to do while watching tv. For these designs, I used a backstitch (see photo above). A split stitch is also a great way to outline. There are lots of embroidery resources out there from real experts. I used to have the book Sublime Stitching and I really like their vintage style.
Tips for stitching the embroideries
If you're having trouble threading the needle with the yarn, roll the end of the yarn between your fingers. This will help make the end of the yarn thinner and bind the fibers together a little.
Stabilize the fabric with spray starch (I didn't do this but wish that I had)
Don't leave any gaps between stitches. When making the backstitch, put the needle down in the same place where the previous stitch ends. This creates a fuller, continuous line.
I had better accuracy making just one stitch at a time, rather than trying to put my needle down in one spot and up in another in one stitch. It's slower but, for me, prettier.
When stitching a curve, you can use a slightly smaller stitch to get a smoother line.
If your yarn starts to twist, let go of the needle and raise your fabric in the air. Let the yarn and needle hang down from the fabric. Gravity will help release the twists.
When you're done stitching, weave the ends through the stitches on the back side of the fabric.

FABRIC AND SUPPLIES
I upcycled fabric for my totes but the instructions below and in the pdf assume that you are using fabric yardage. I recommend using a fabric that is lighweight enough to embroider easily and is easy to handle, such as quilting cotton or muslin. You’ll need about 2/3 of a yard of 45” wide fabric for the main body of the tote. For the handles, you can use purchased cotton twill tape. Or, for a fun pop of color, use a contrasting quilting cotton. For the straps, you will need a strip of fabric 3” by 45”, cut in two.
For the main body of the totes, I used a 41" wide curtain panel. The slightly open weave of the fabric made it easy to embroider. To make the project a little more simple, I used the hemmed sides of the curtain as the top of the tote. I cut a 15" strip off the bottom of the panel for each tote. I then folded the fabric piece in half so that the finished sides of the curtain became the top of the bag and the fold was at the bottom. You can make this tote with most any fabric of your choosing. In the instructions below, I'll detail how to sew the tote from a regular (non-upcycled) piece of fabric.
Initially, I was going to make the handles using a natural color cotton twill tape but I had found some quilting cotton remnants at Joanns and decided that they would make really fun handles and add a nice pop of color. For each tote, I tore a strip of fabric 3" wide from the end of each remnant. Then, I cut the strips in half to make two handles. The orange polka dot fabric is available here and the black gingham is available here.
For the embroideries, I used a sock weight black yarn leftover from a knitting project. You could also use embroidery floss or pearl cotton.


HOW TO SEW AN EMBROIDERED HALLOWEEN TOTE
SUPPLIES
2/3 yard main fabric (A quilting cotton or similar weight)
Quilting Cotton for handles 45" x 3" (or use about 1 yard of cotton twill tape)
Thread
Sock weight black yarn
TOOLS
Some links below are affiliate links
Embroidery template (Download the pdf from the Printables section of the Sew DIY Resource Library. See earlier section in this blog post for access.)
Machine sewing needle
Sewing machine
Wash-away fabric pen or chalk

STEP 1: To make one tote bag, cut:
2 rectangles 22" × 15" for the Body
2 rectangles 3" × 22" for the Straps
Finish the raw edges of the main body with a zigzag stitch or pinking shears.
STEP 2: Download and print out the embroidery template (page 2 of the pdf). Trace the design onto the fabric using a wash-away fabric pen. If you are using a dark color fabric, or the fabric is not transparent, cut out the templates and trace around them using a light color chalk.
STEP 3: Thread a length of yarn onto the hand sewing needle. Stitch your desired embroideries using a back stitch. If you want to fill in the shapes, you can try a satin stitch or French knot. If desired, use an embroidery hoop to keep the fabric taut.

STEP 4: Iron the fabric and remove any pen markings. With right sides together, stitch the front to the back along the sides and bottom.

STEP 5: To give the bag more shape we will now “box” the corners. Press the seams open using an iron. With the bag inside out, fold the corner of the bag so that the bottom is aligned with the side seam, forming a triangle shape. Mark a 2" to 2.5” line across the corner, at a 90 degree angle to the side seam.
Repeat for the other corner. Stitch across the lines, doing a long backstitch at the beginning and end.
STEP 6: Fold and press the top edge of the tote to wrong side two times. Top stitch. (You are essentially hemming the top of the bag.)
STEP 7: Fold the straps in half lengthwise and stitch along one long side and one short side. Turn right side out and press. Tuck in the raw edge and press. (Alternately, cut two pieces of cotton twill tape about 18" long.)

STEP 8: Pin ends of straps to top of bag to form handles. I placed each handle about 5” from the side seam. Topstitch an “X” through all layers to secure the straps in place.
I really hope that you enjoy this project. I haven't done any sewing since I moved this summer and it was really fun to get my machine out, thread it up and do a little sewing. And I love that I was able to upcycle some materials and use yarn leftover from another project. Happy sewing!


Pin the image below to save this project for later.


