
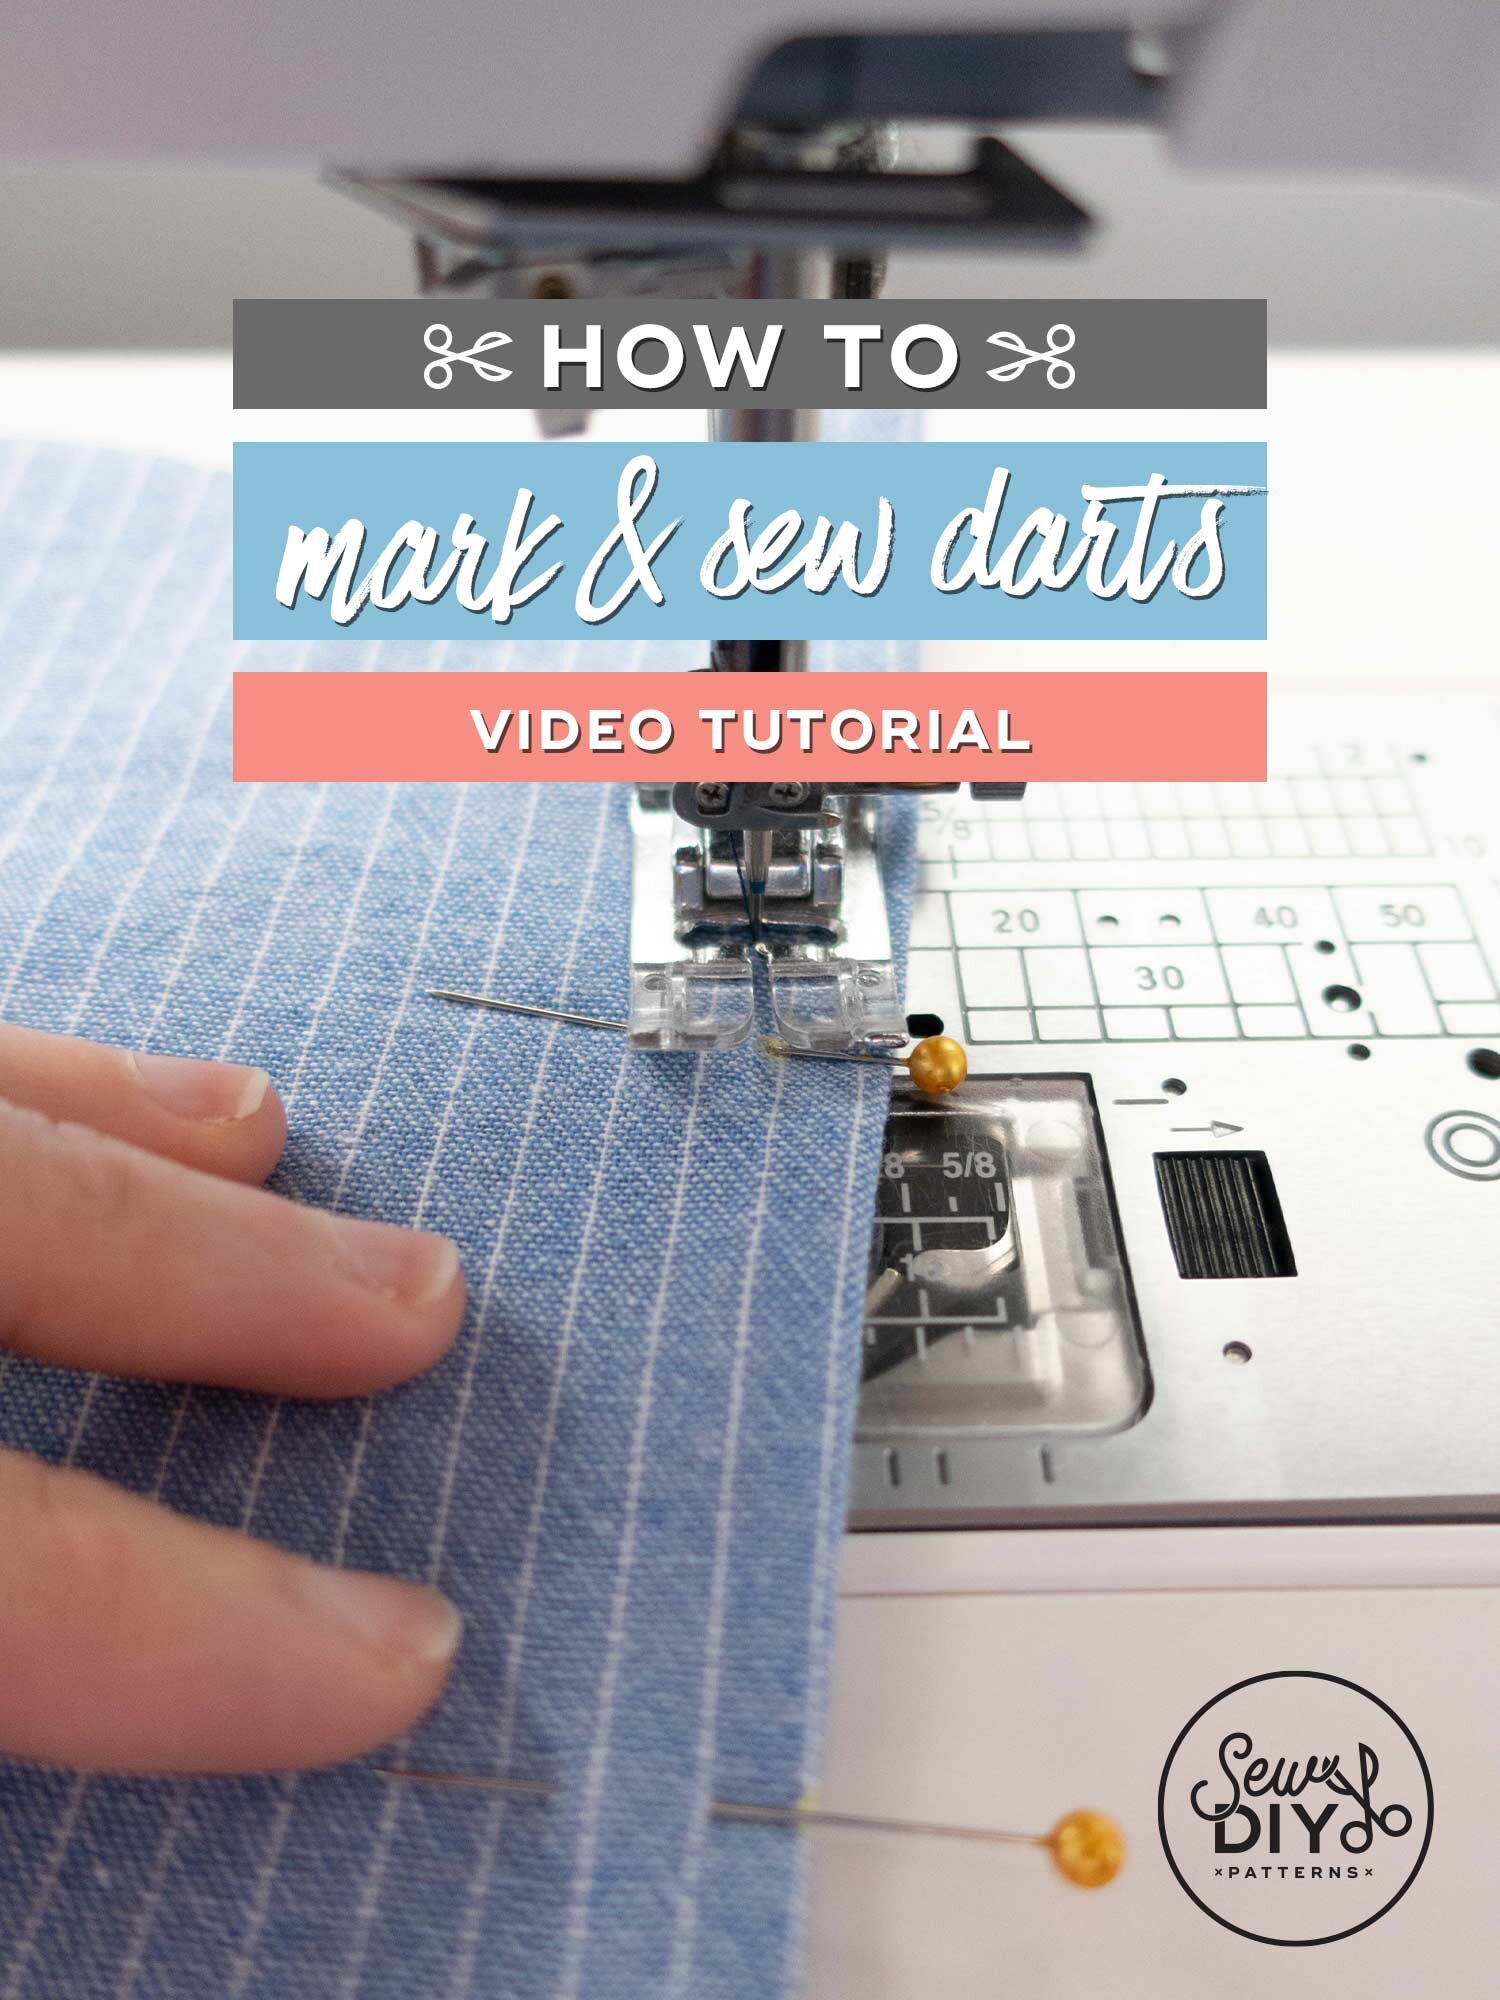
Hello sew-friends! Today, I’m happy to bring you a video tutorial for how to mark and sew darts. Darts are most commonly found in fitted woven garments. They are simply a little wedge of fabric that is folded and stitched in order to make the fabric more three-dimensional and to fit the curves of the body. You’ll most often find darts to shape the bust and waist. It’s really a fairly simple feature to sew and it’s worthwhile to practice and become comfortable with it.

Before you start sewing your darts, you’ll need to transfer the markings from the pattern onto the fabric. In the video, I share two methods of transferring the markings and then show you how to stitch the dart. You can watch the video by clicking above or on YouTube.
Tip: When you are cutting fabric in two layers, it’s usually best to cut with the wrong side of the fabric facing out. In general, you’ll want to have all the pattern markings on the wrong side of the fabric, and it will be easier to mark them if the wrong side of the fabric is facing out.
How to mark a dart - Method 1
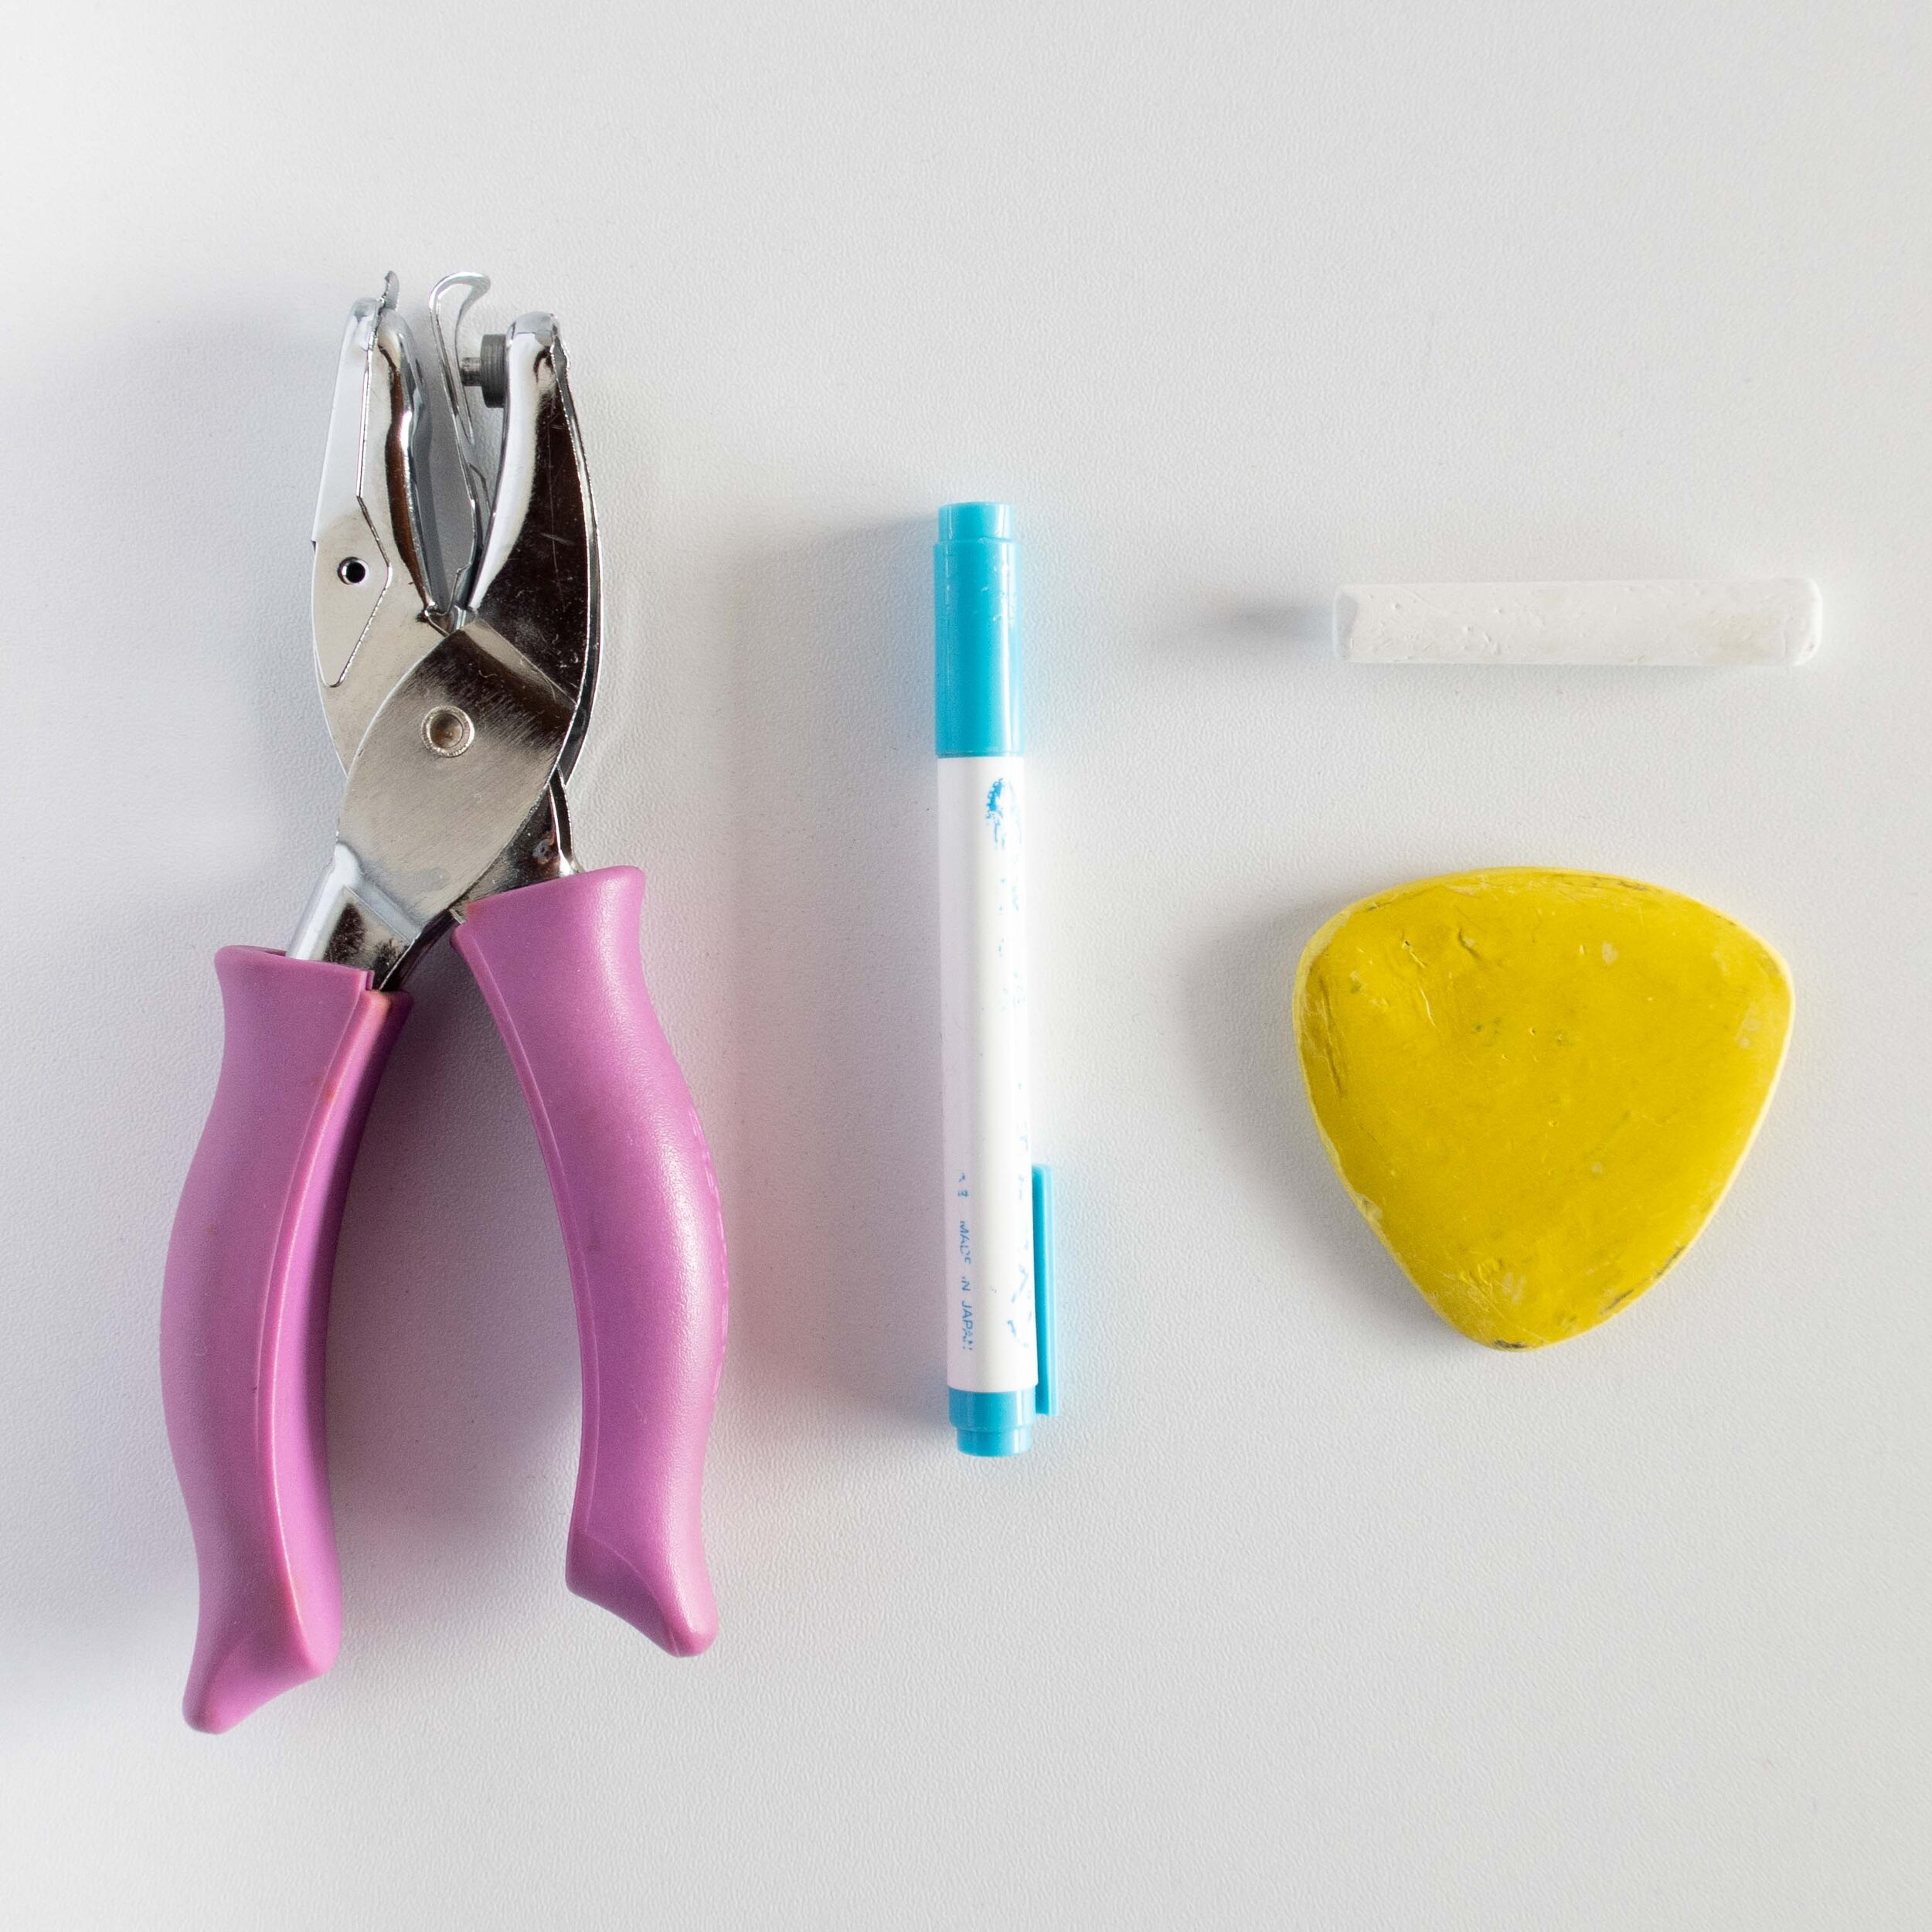
My favorite way to mark a dart is by transferring the dots to the fabric through a hole in the pattern.
Step 1: Before cutting out my fabric, I use a small hole punch to punch holes in the pattern through each circle marking.
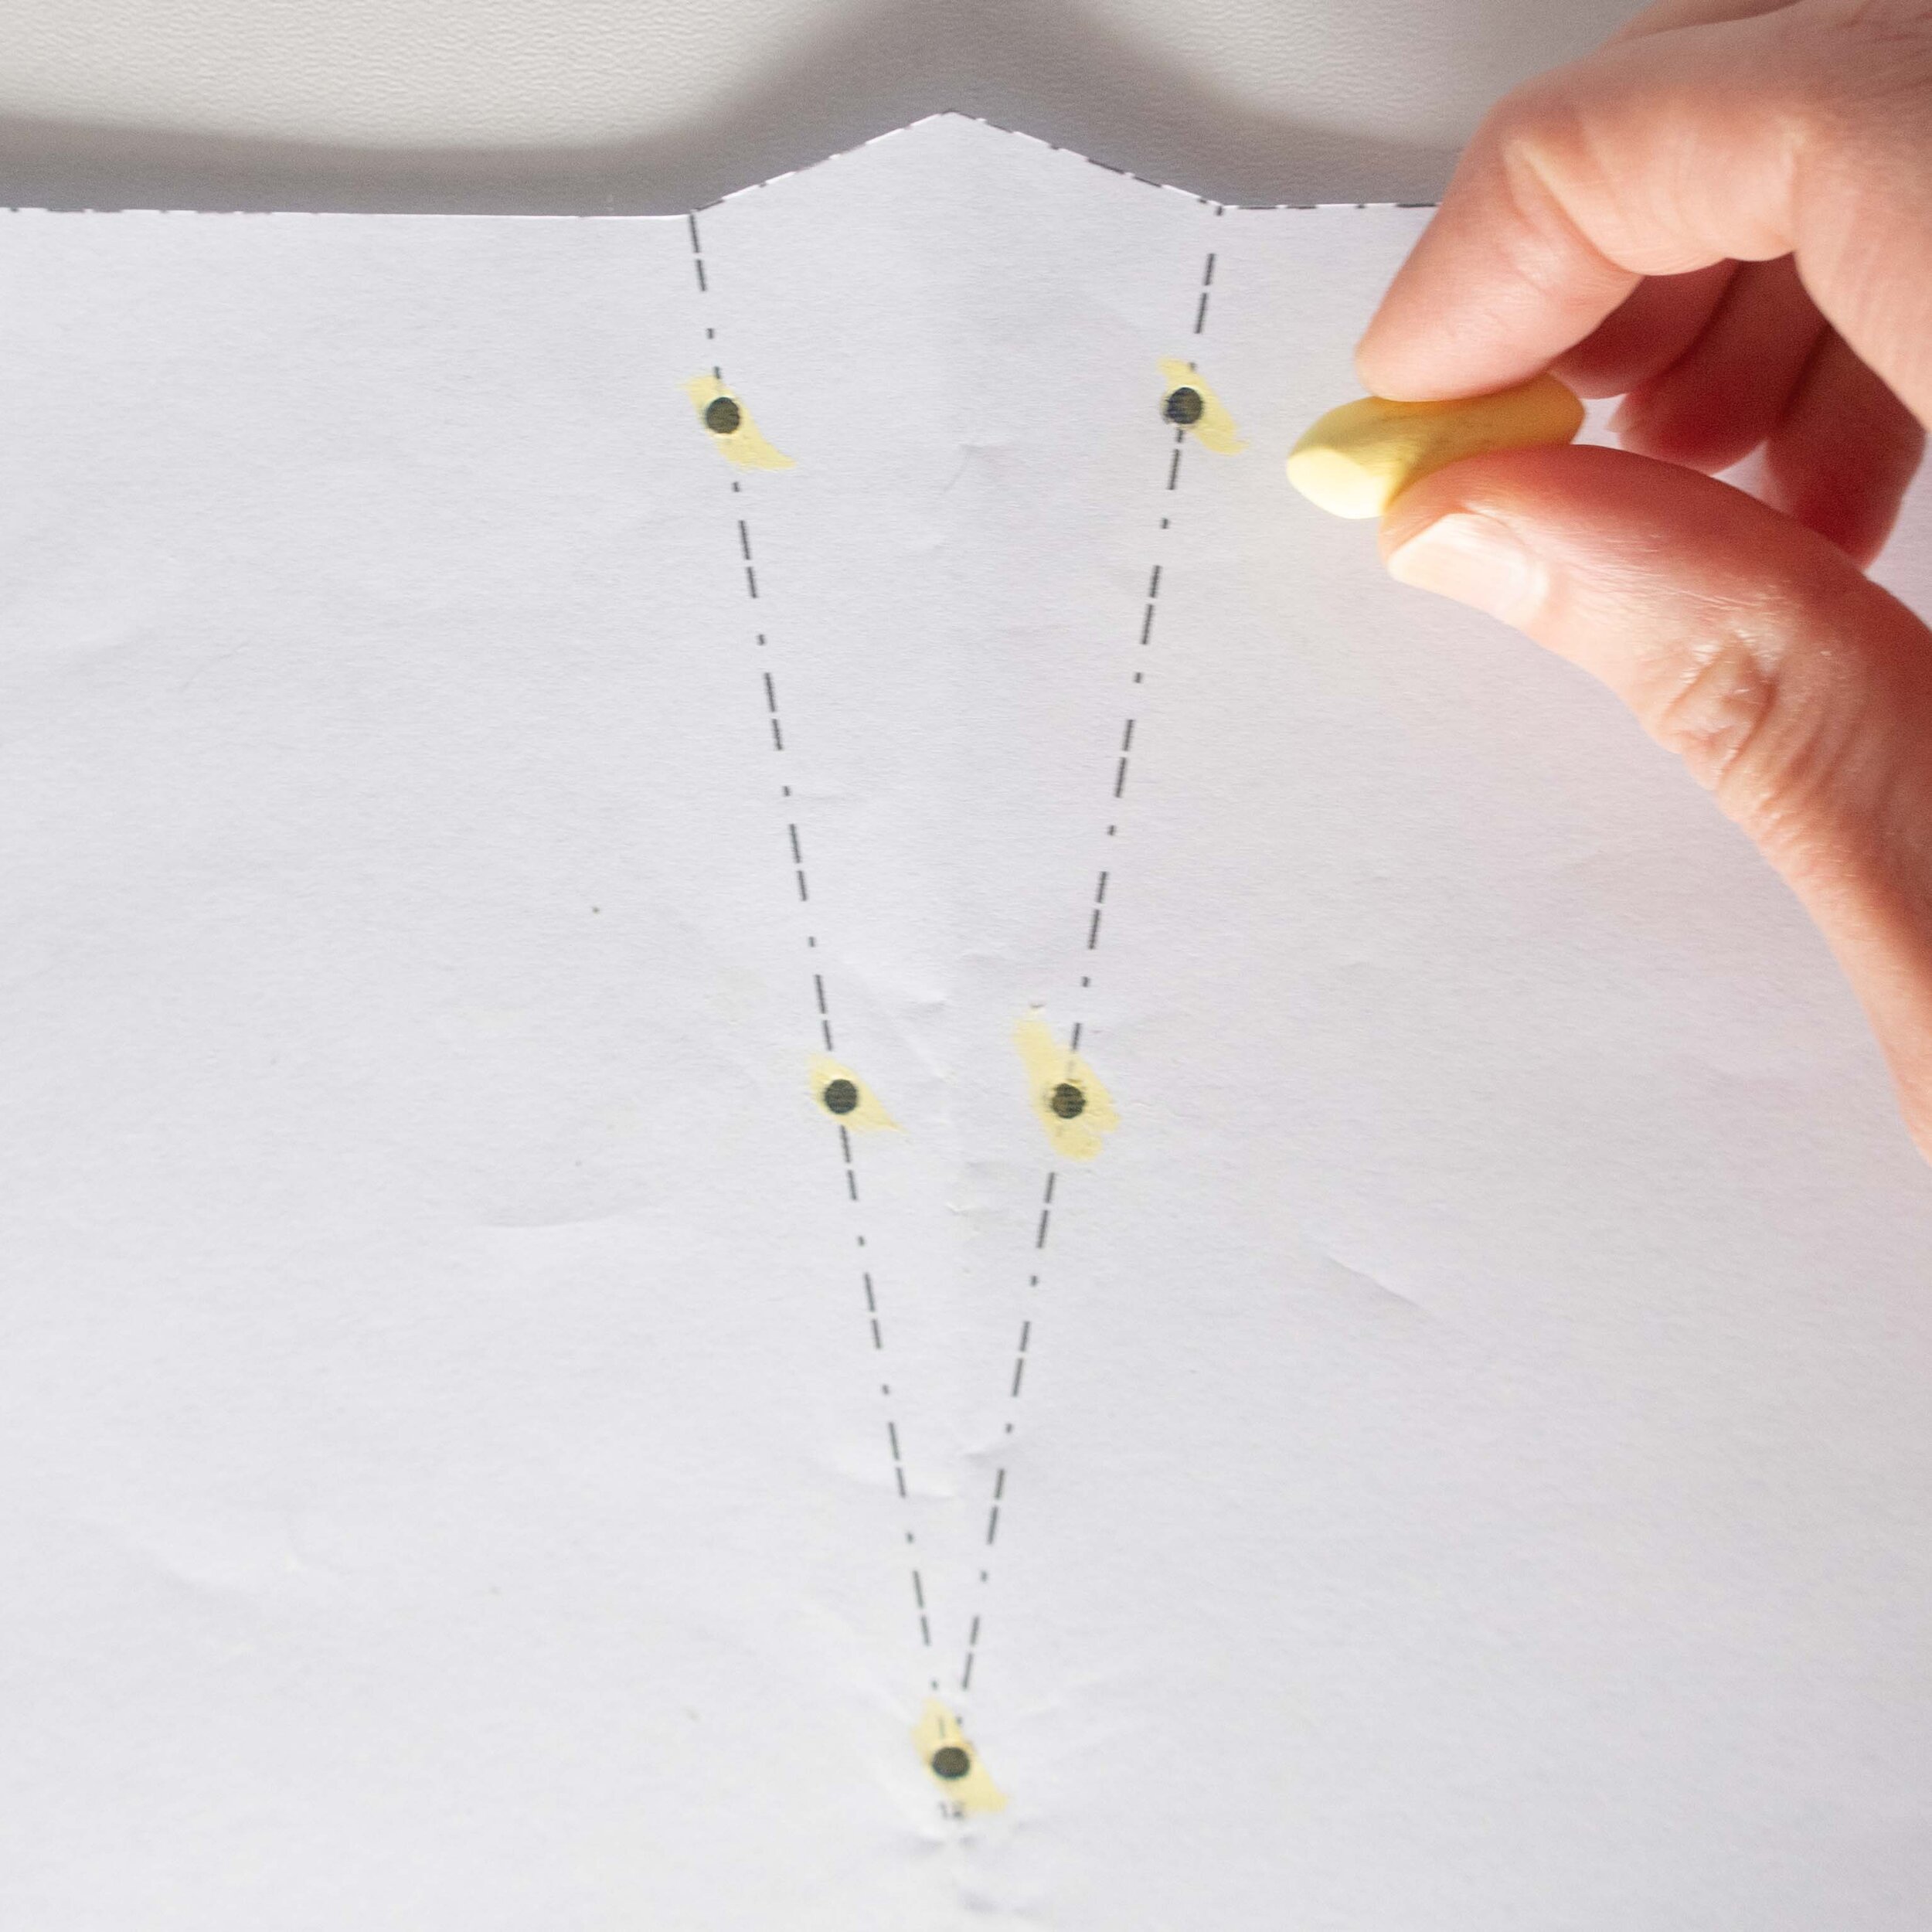
Step 2: After cutting out the fabric and before you move the pattern, rub a piece a chalk over the hole to create a circle marking on the wrong side of the fabric.

Step 3: If you cut two layers of fabric, carefully turn the fabric over. Turn the pattern piece over and align the edges of the pattern and fabric. Mark the dots on the reverse side using chalk.
Step 4: If desired, use a ruler to mark the straight line of the dart legs, connecting the dots.
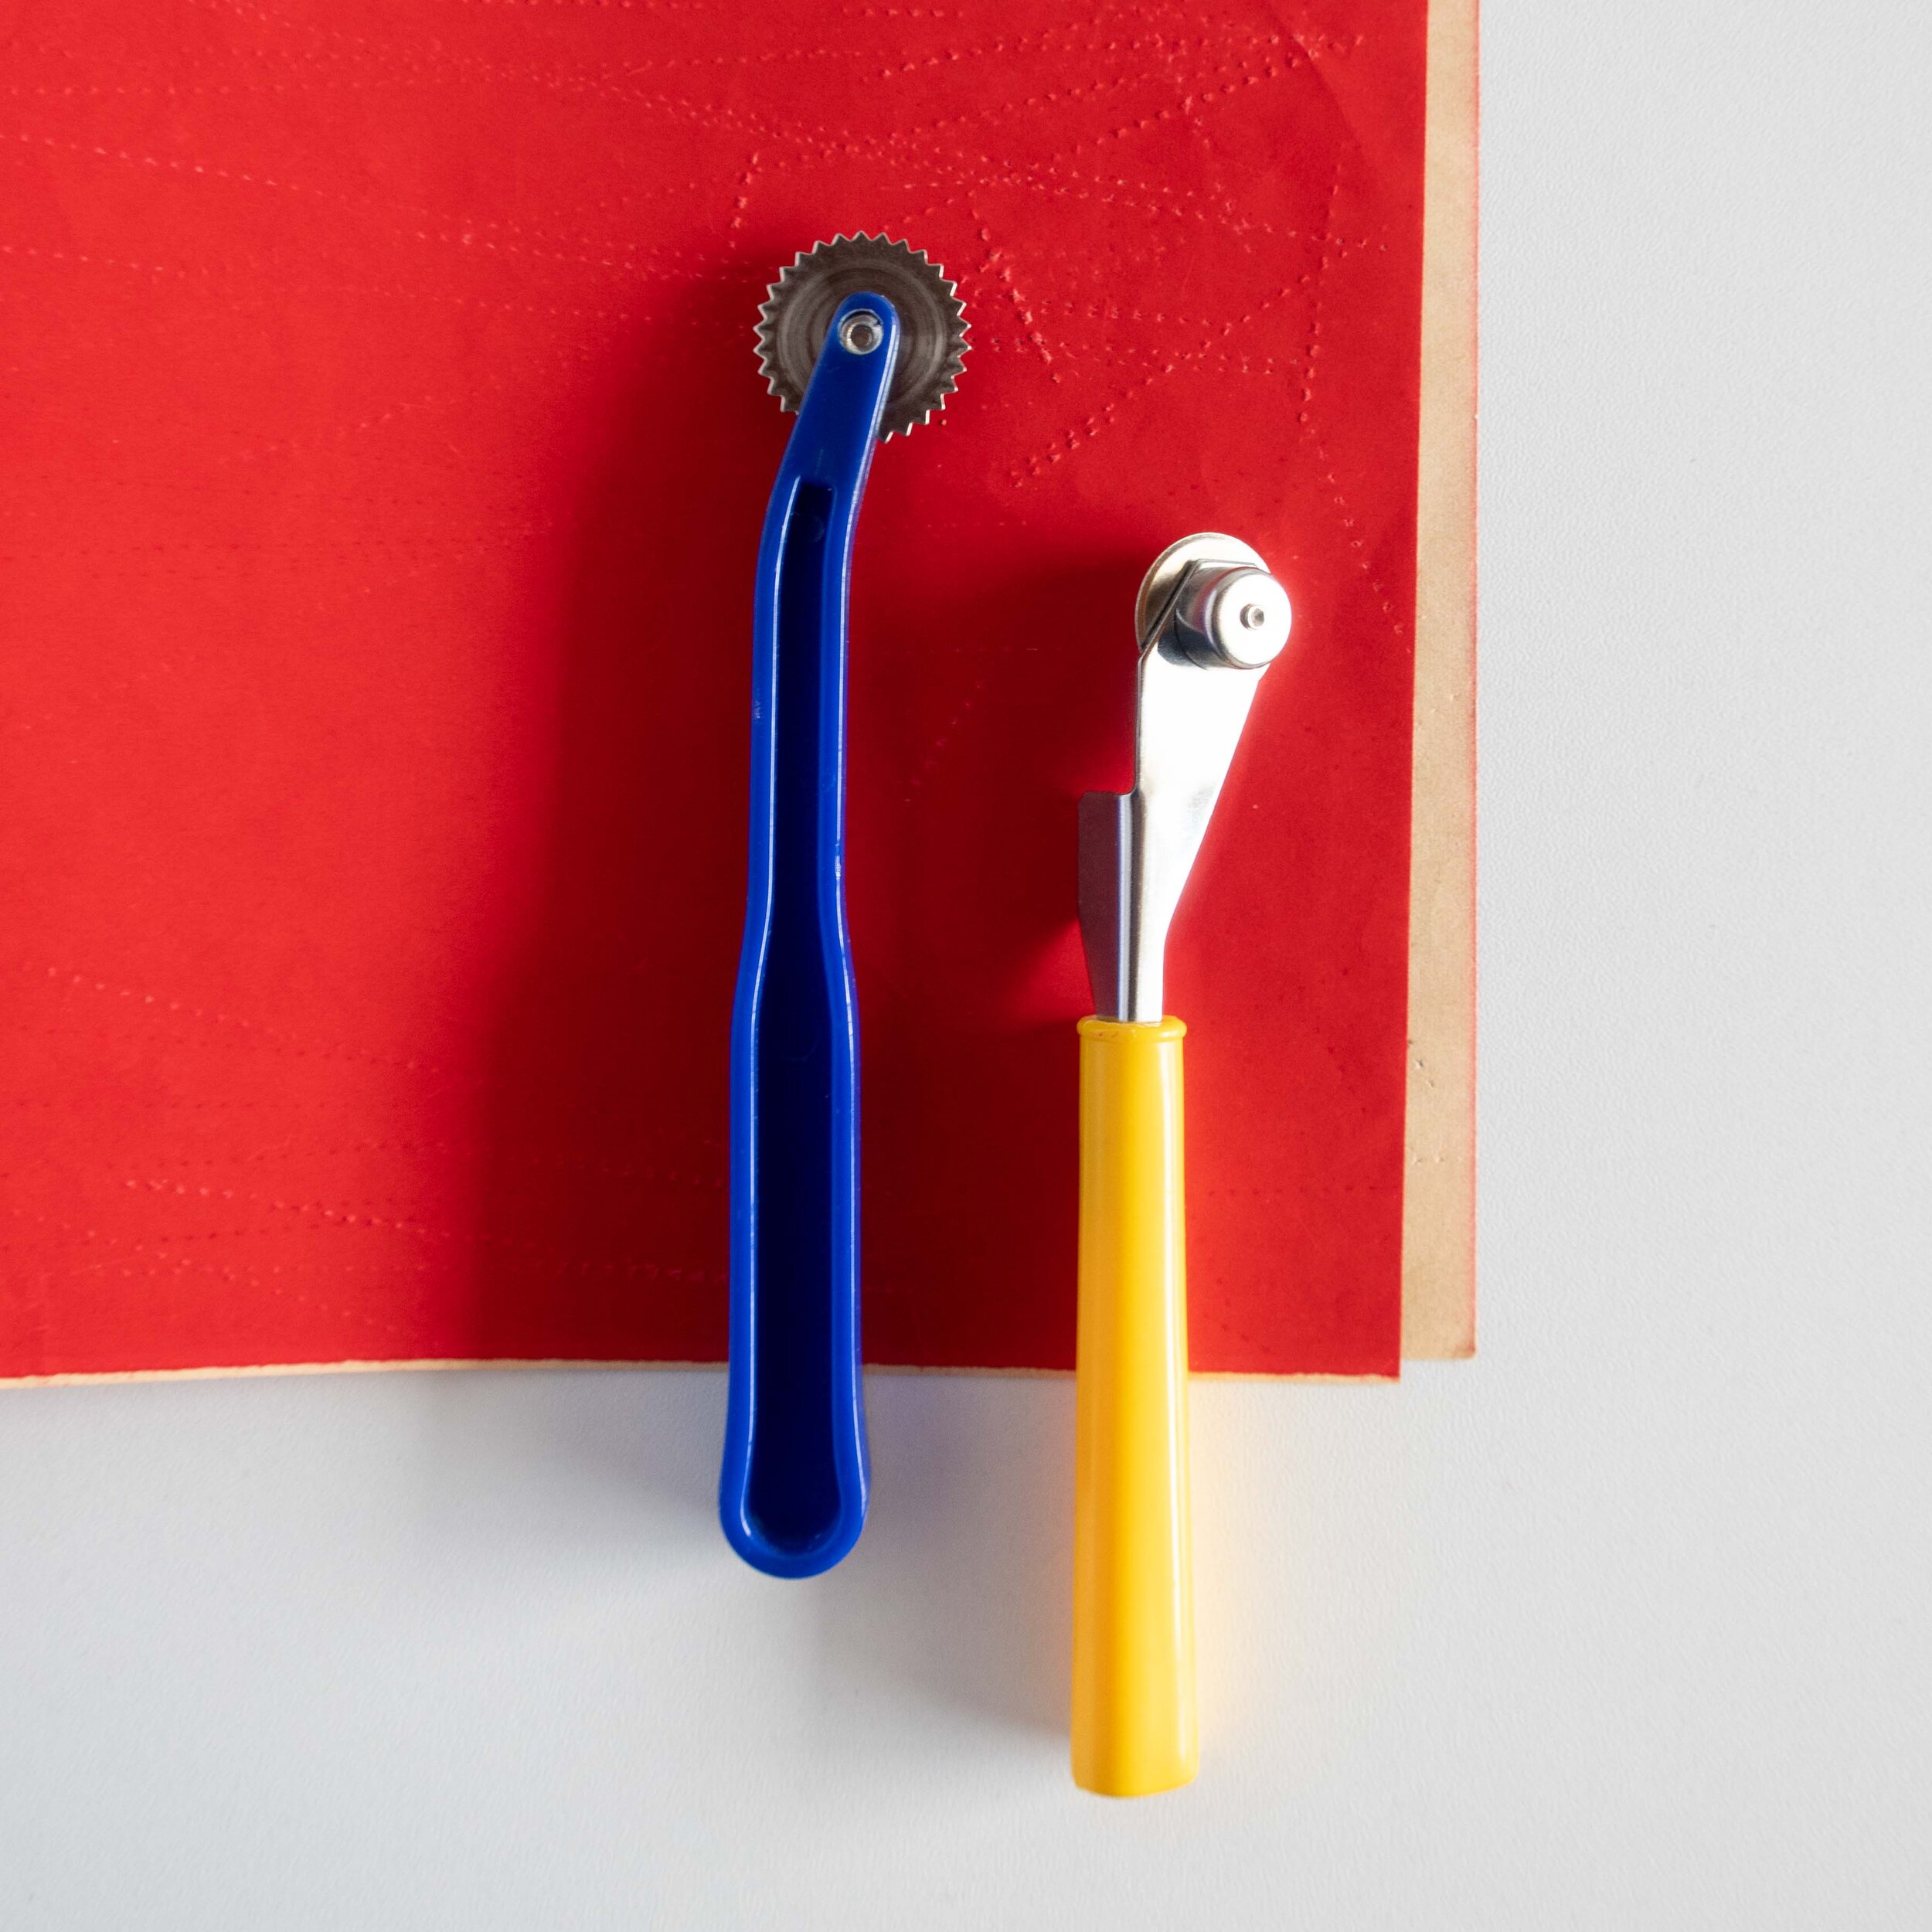
How to mark a dart - Method 2
Another easy (and traditional) way to mark a dart on fabric is using a tracing wheel and carbon transfer paper.
Step 1: Place the transfer paper under the pattern with the inked side of the paper next to the wrong side of the fabric.
Step 2: Use the wheel to mark and X through each dot.
Step 3: If desired, mark the straight line of the dart legs.
If you want to learn more about tracing wheels, I recommend this post from Oliver & S and this post from Treasurie.
How to sew a dart
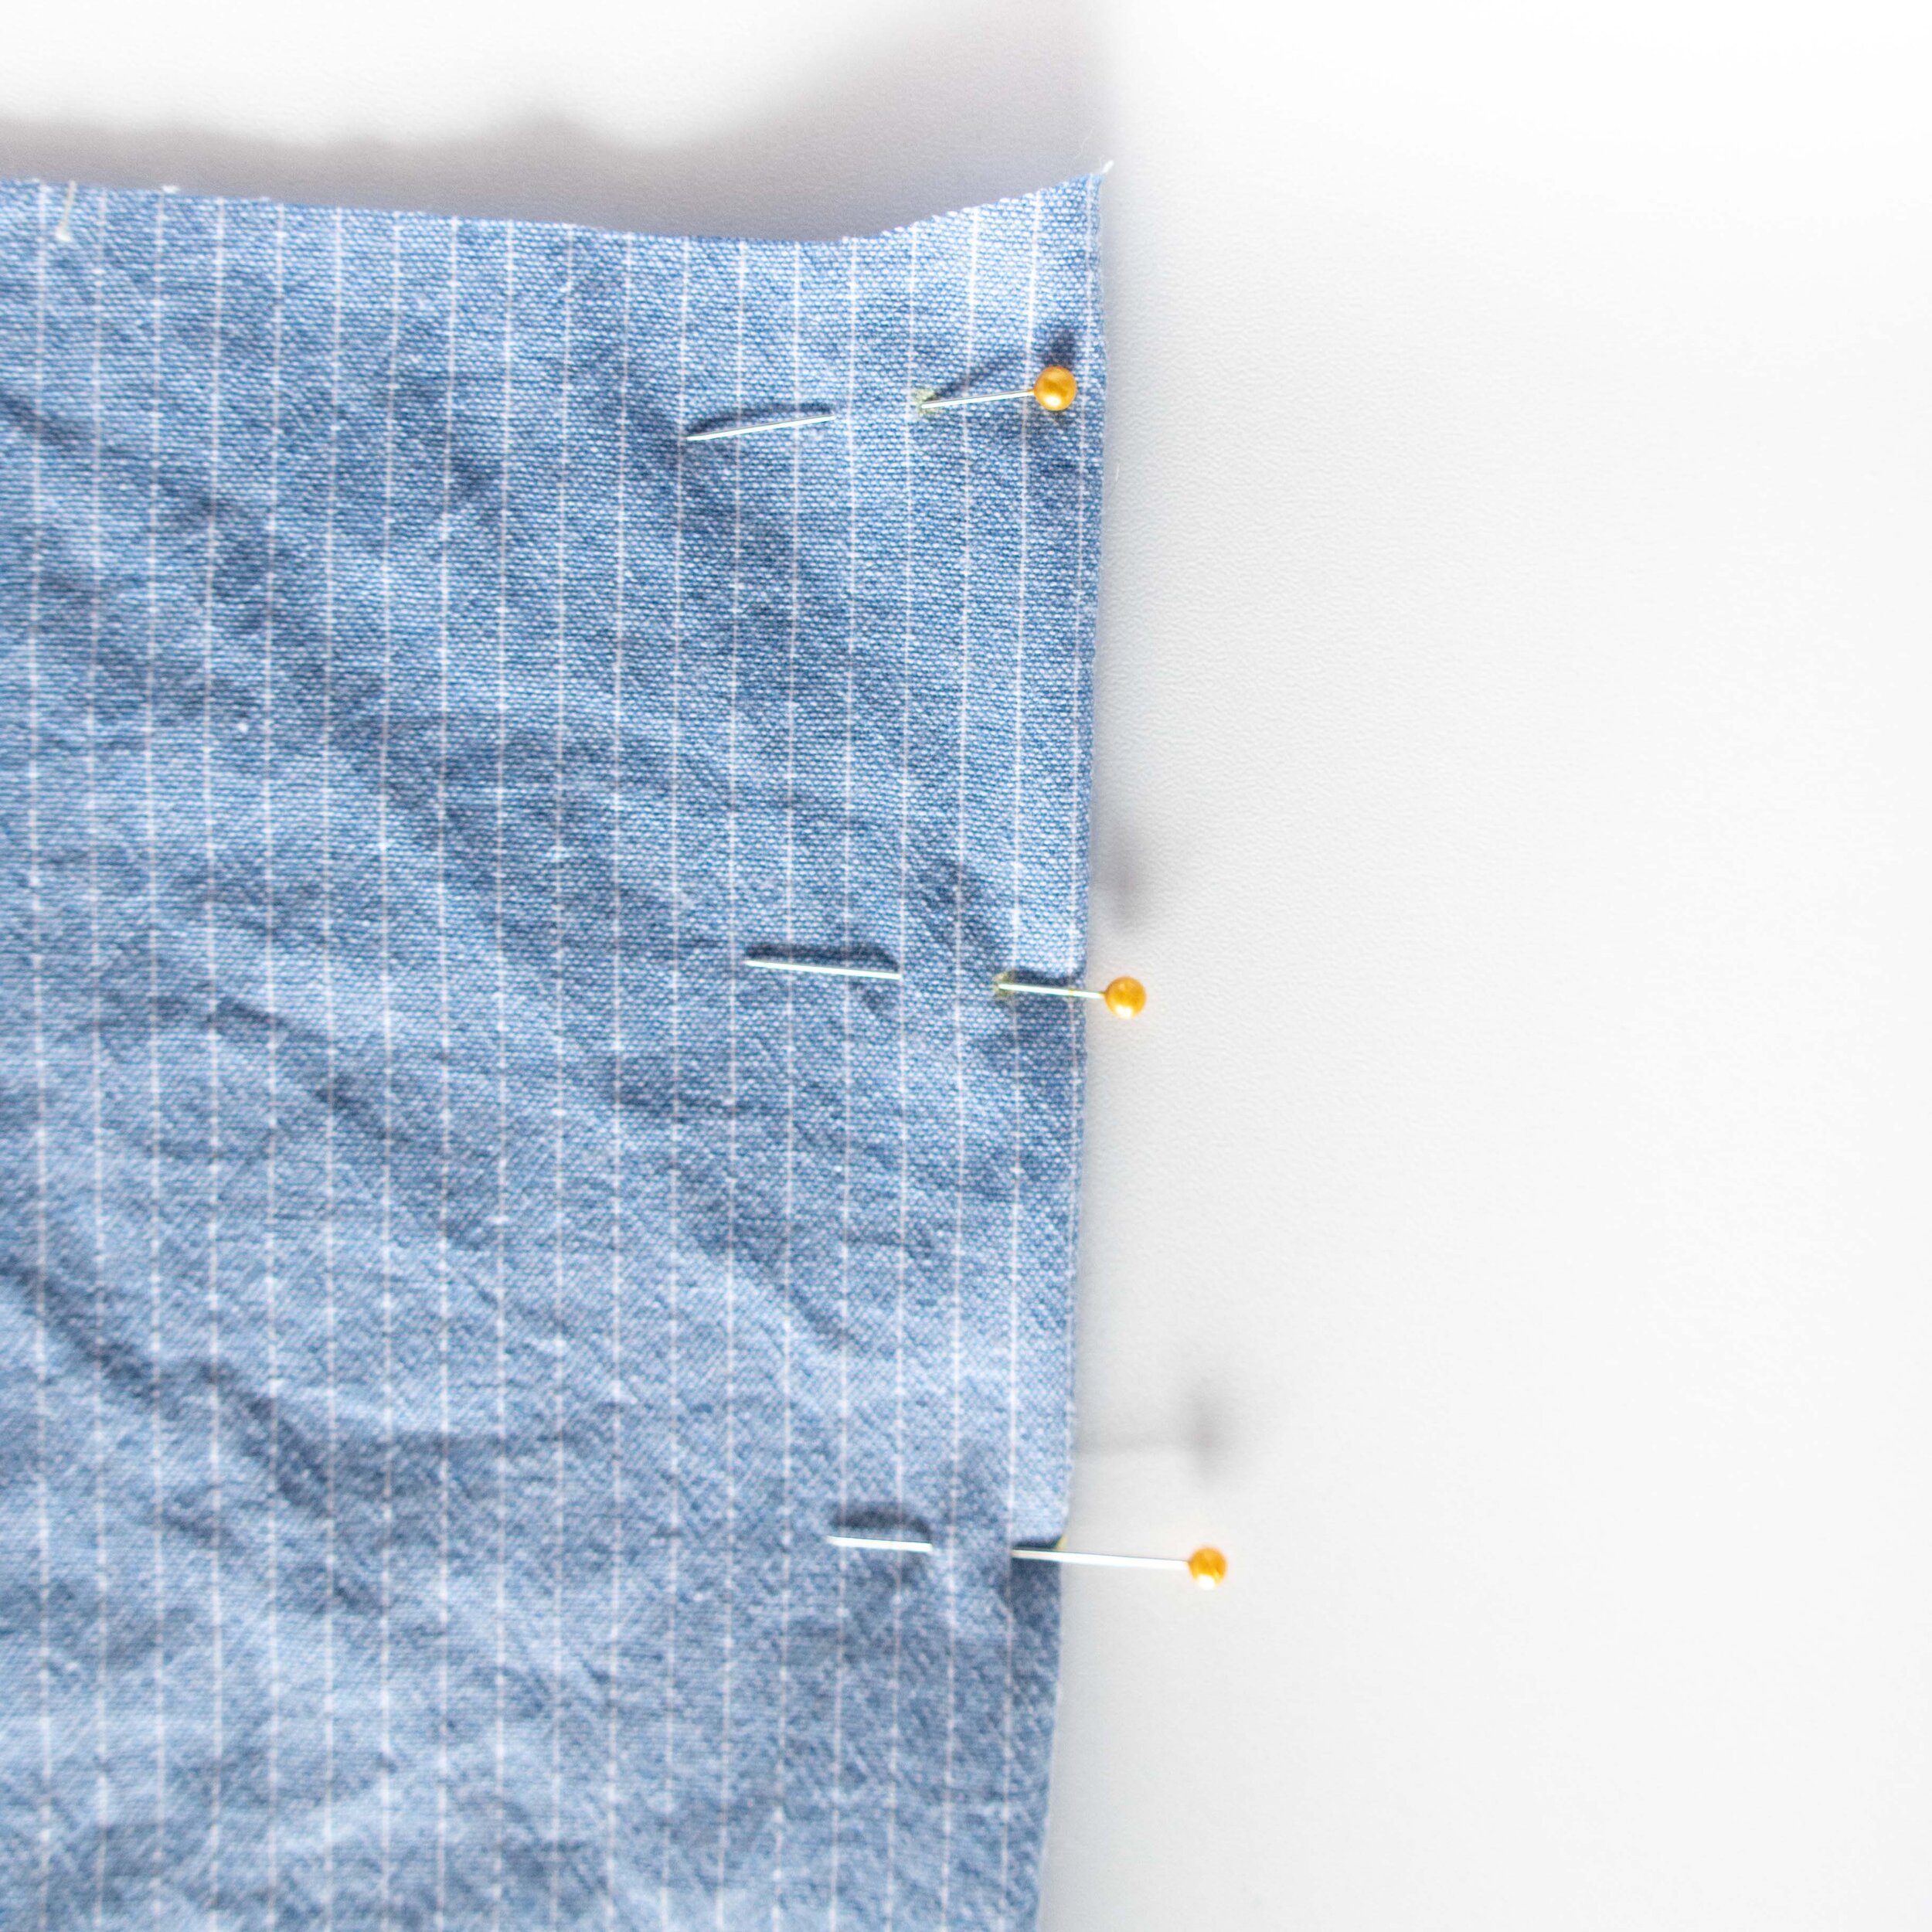
Step 1: Pinch the end of the dart and fold the fabric with right sides together along the center of the dart. Align the darts and pin together. I like to put one pin through each dart. This helps me ensure that the dart is folded correctly and the pins create a visual guideline while stitching.

Step 2: Starting at the wide end of the dart, stitch down to the point, connecting the dots.
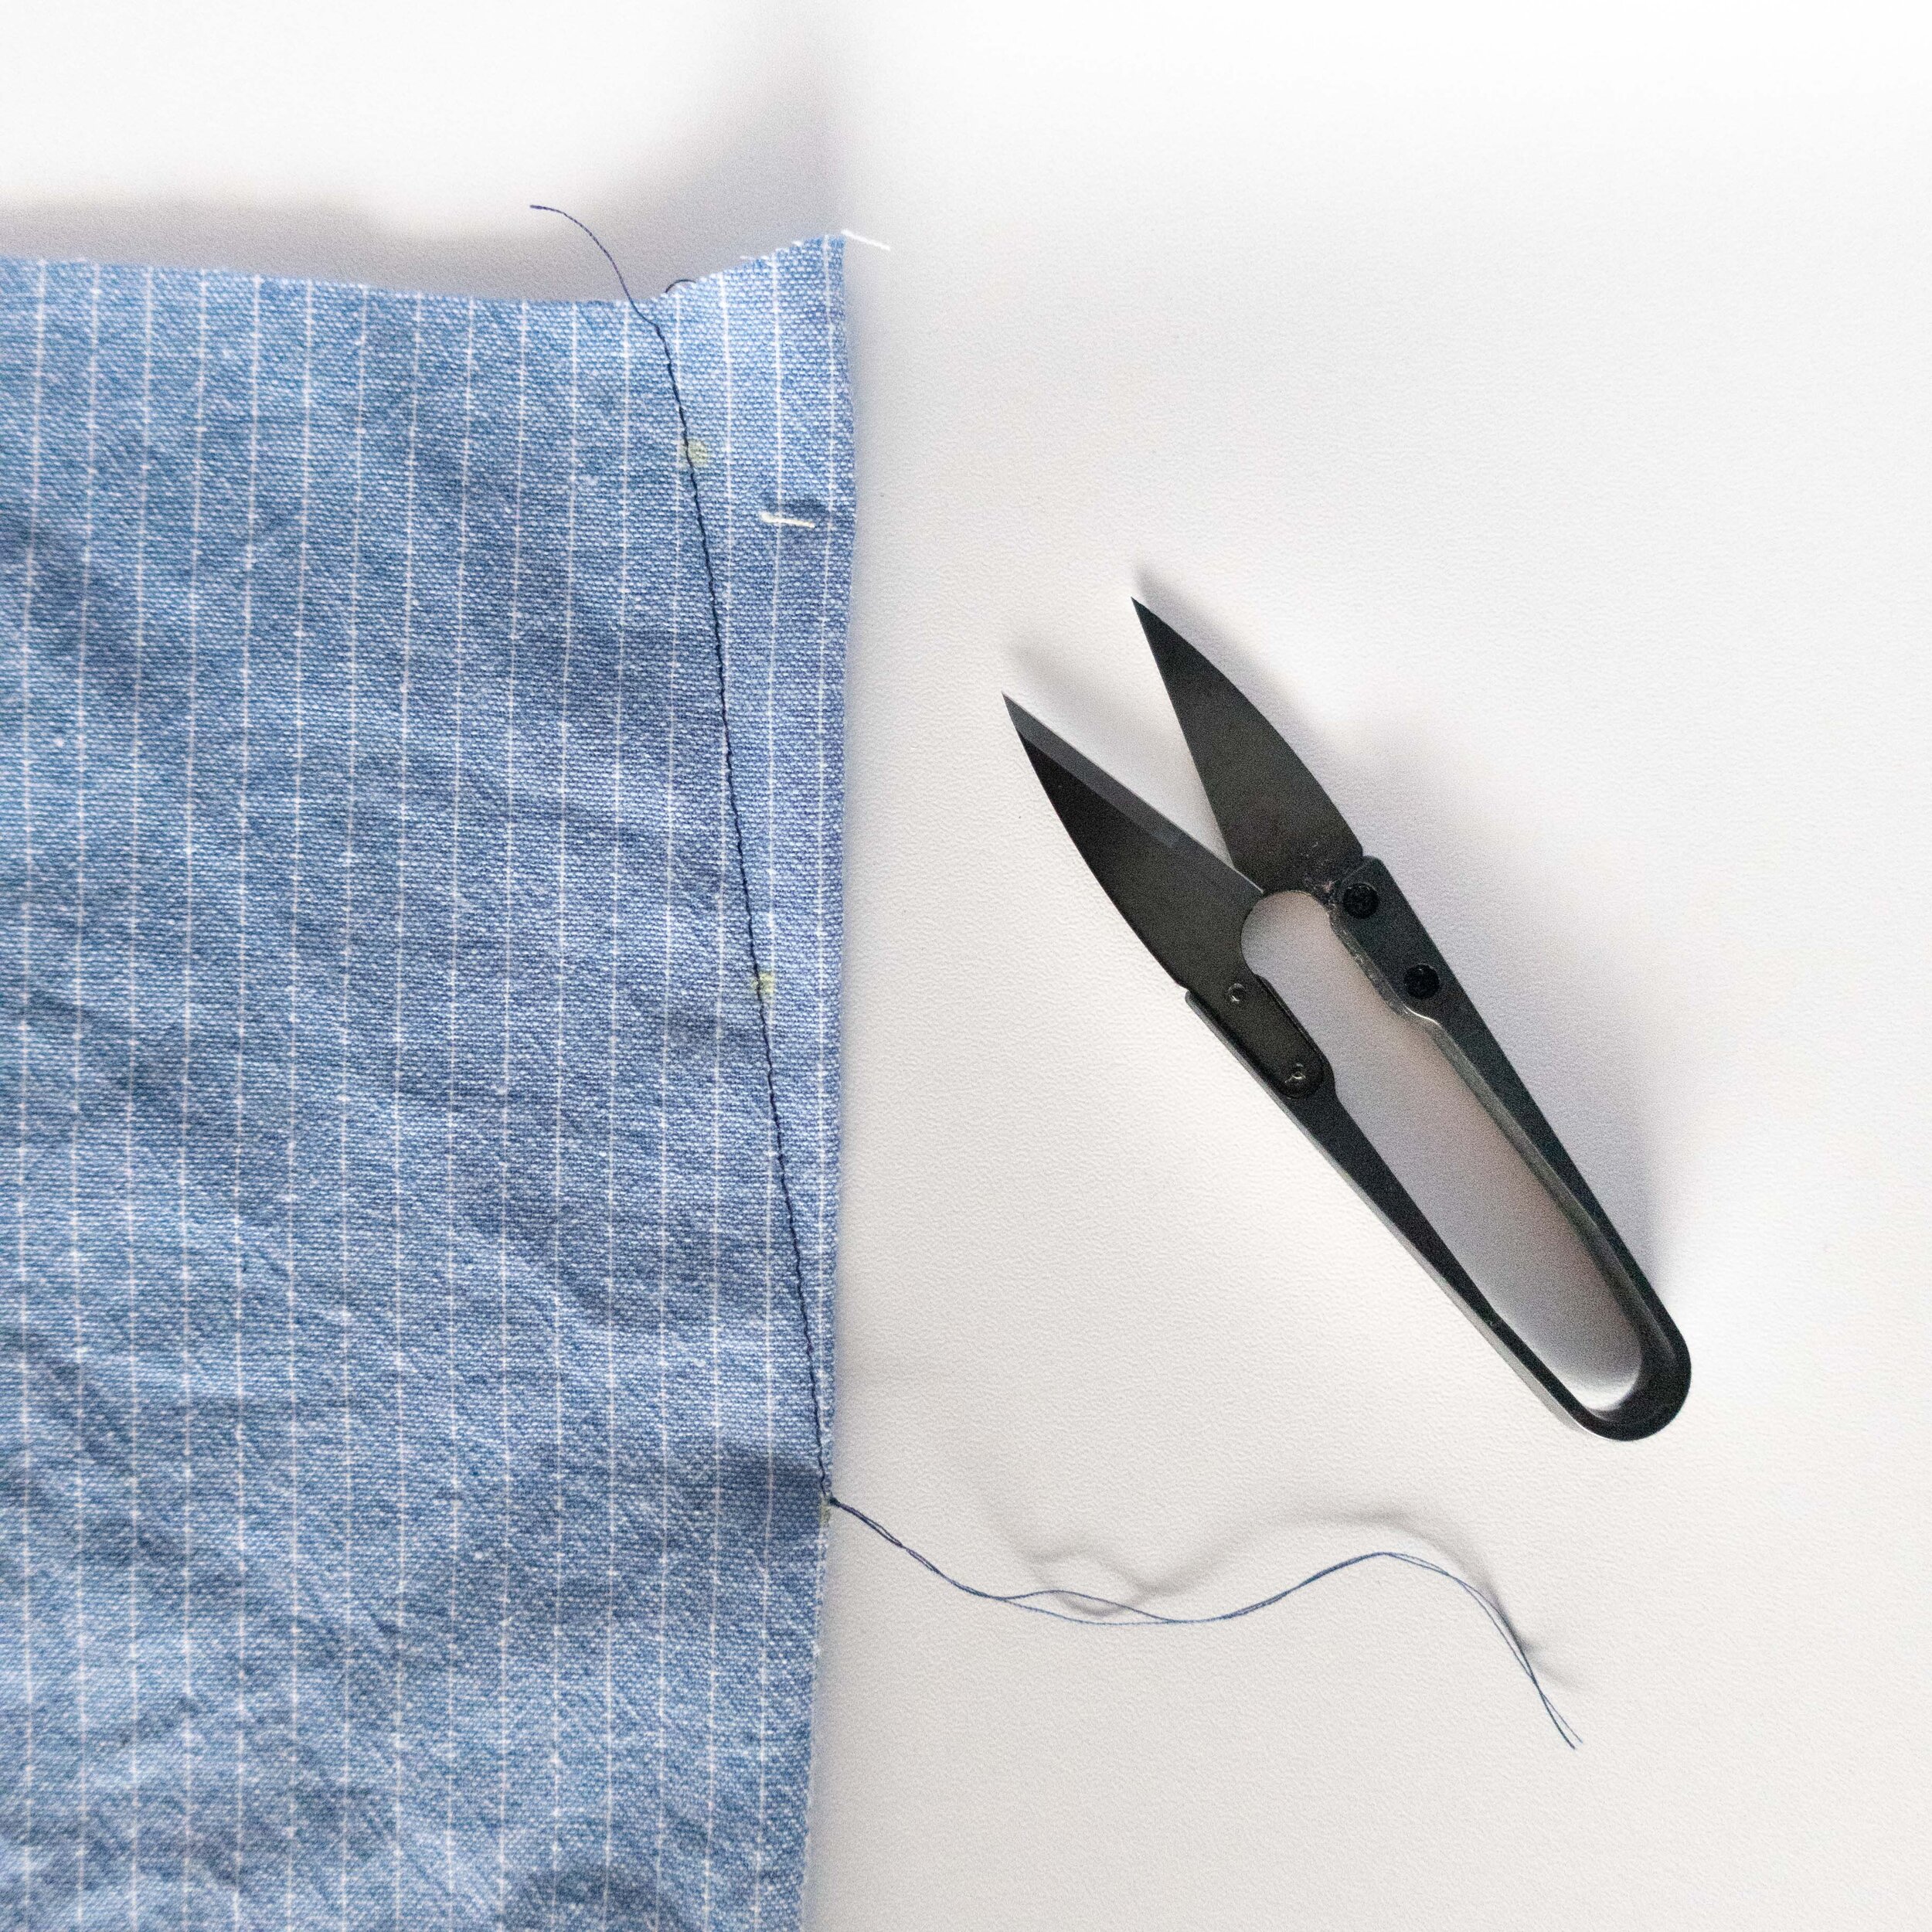
Step 3: Lift the needle and the presser foot. Pinch the end of the dart between your fingers (for stability) and pull away from the needle. Cut the threads at least three inches long and tie in a knot close to the end of the dart. Trim close to the knot.
More dart tips and notes:
If you are sewing a fisheye shaped dart, start in the middle and stitch to one point. Then start in the middle again and stitch to the other pointed end.)
If the dart looks too pointy for your taste, you can curve the dart towards the end.
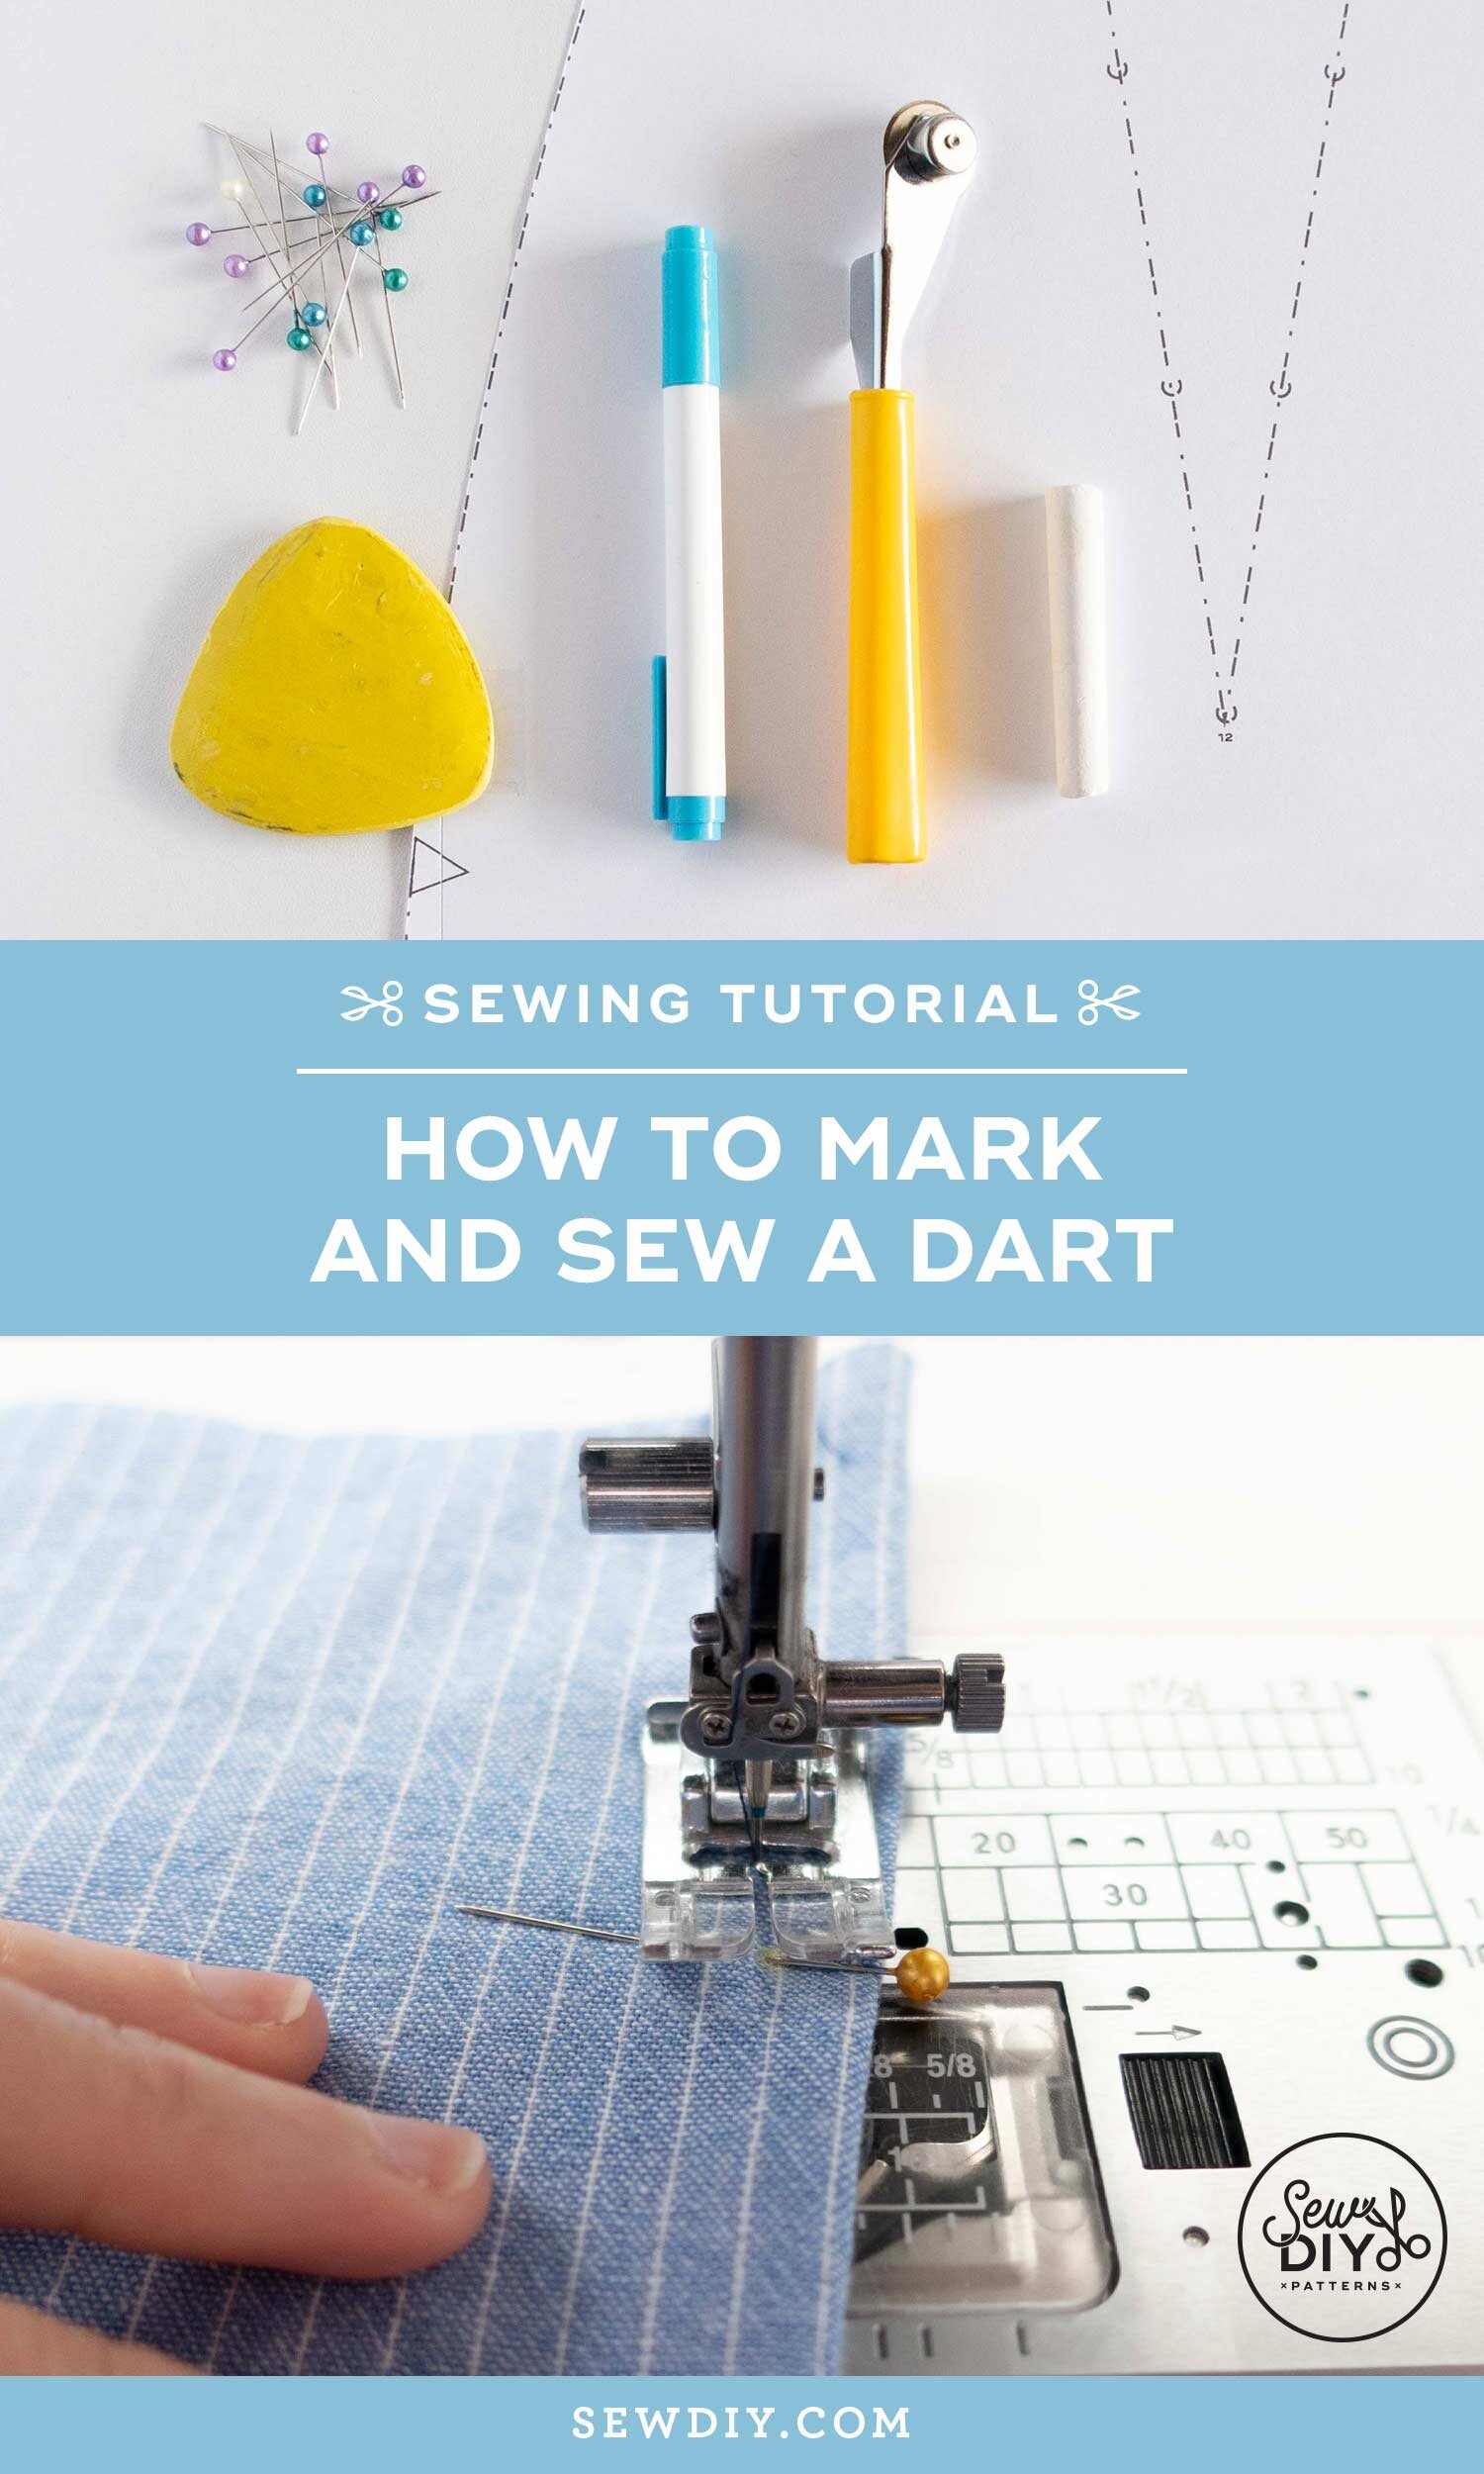
I hope that you found this tutorial helpful. If you are looking to try your hand at darts and sew an intermediate level pattern, I have two in the shop that you might like, the Nita Wrap Skirt and the Dana Jumpsuit. You can pin the image above to save it for later and make sure to check out the Learn to Sew page for more sewing tutorials. Happy sewing!


