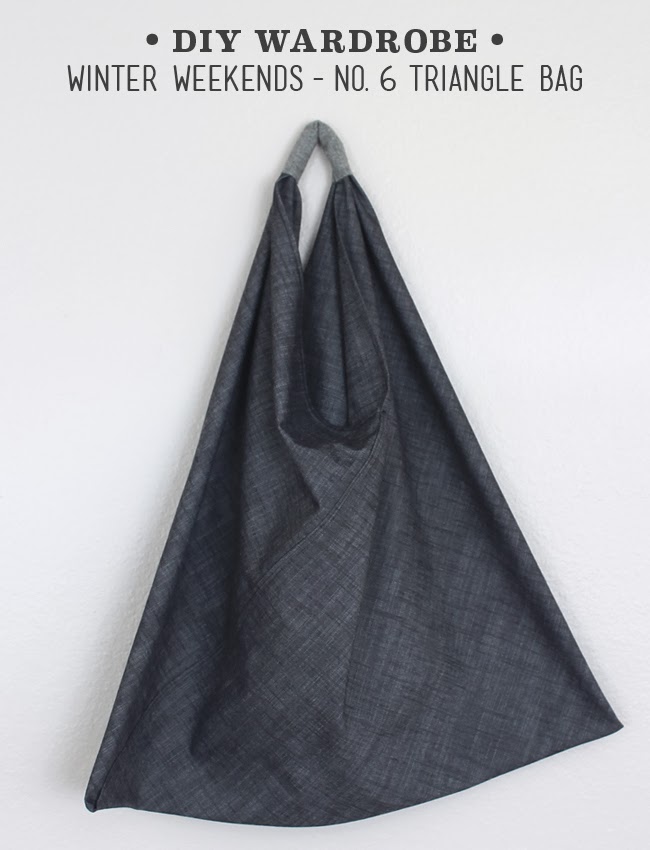
A while ago, probably more than a year ago, I was in this hip boutique that featured Japanese products in a very hip area of town, when I spied a very cool tote bag. It was sewn on the bias and made a triangle shape. It was so cool and looked deceptively simple. I went home and started playing around with fabric and even paper. And then I found this tutorial from Between The Lines and thought "wow! she's really figured it out!". And now at last I've made my own Triangle Bag.
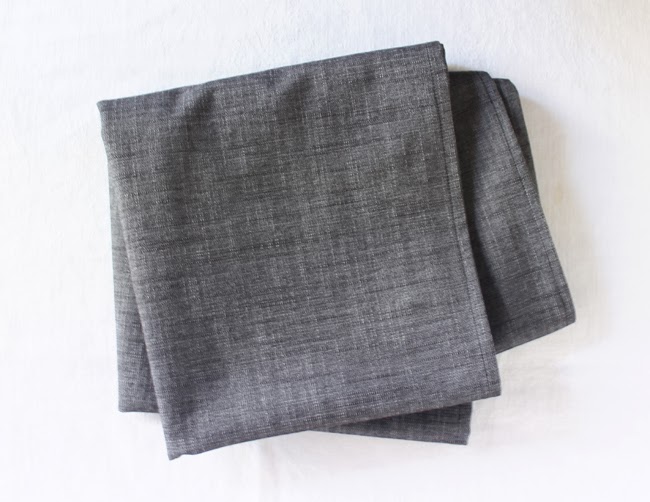
The bag is fairly simple to make. You need to start with a rectangle of fabric about 3 times as long as it is wide. My fabric is a medium-thick cotton fabric. First off, hem all the edges of the fabric.
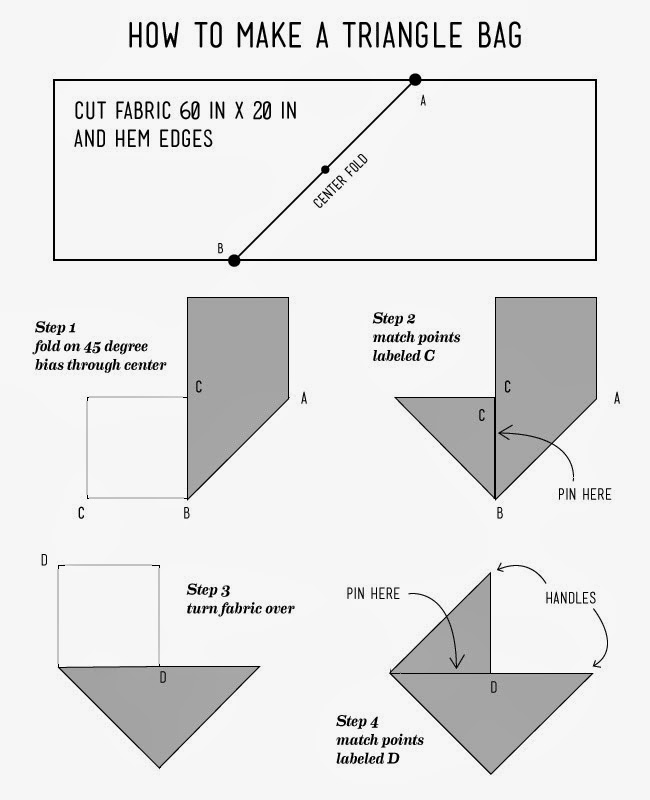
Next up you need to do some fabric origami. Fold the fabric on the bias through the center, then fold in sides matching points as shown in diagram above. Overlap edges and pin together. Topstitch overlapped edges together.

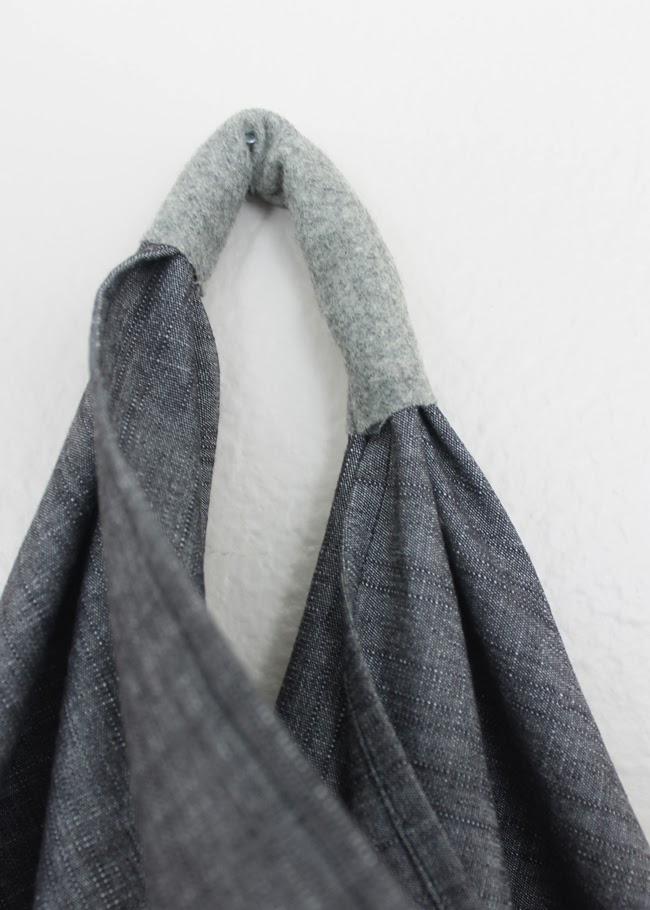
Next, make a tube to cover the handles of the fabric. Cut a piece of fabric about 5 x 3.5 inches. Fold in half lengthwise and stitch long edge. Turn right side out.

Slip tube onto one handle and pull handle all the way through using a safety pin if needed. Overlap handle ends and stitch together. Adjust tube to cover both ends and stitching.
I love this bag and will probably make some more of them. You can increase or decrease the size of the bag as you wish. These days, who can't use more bags? If you're not feeling up to the DIY and are looking to buy a triangle bag, check out this one by Martin Margiela.