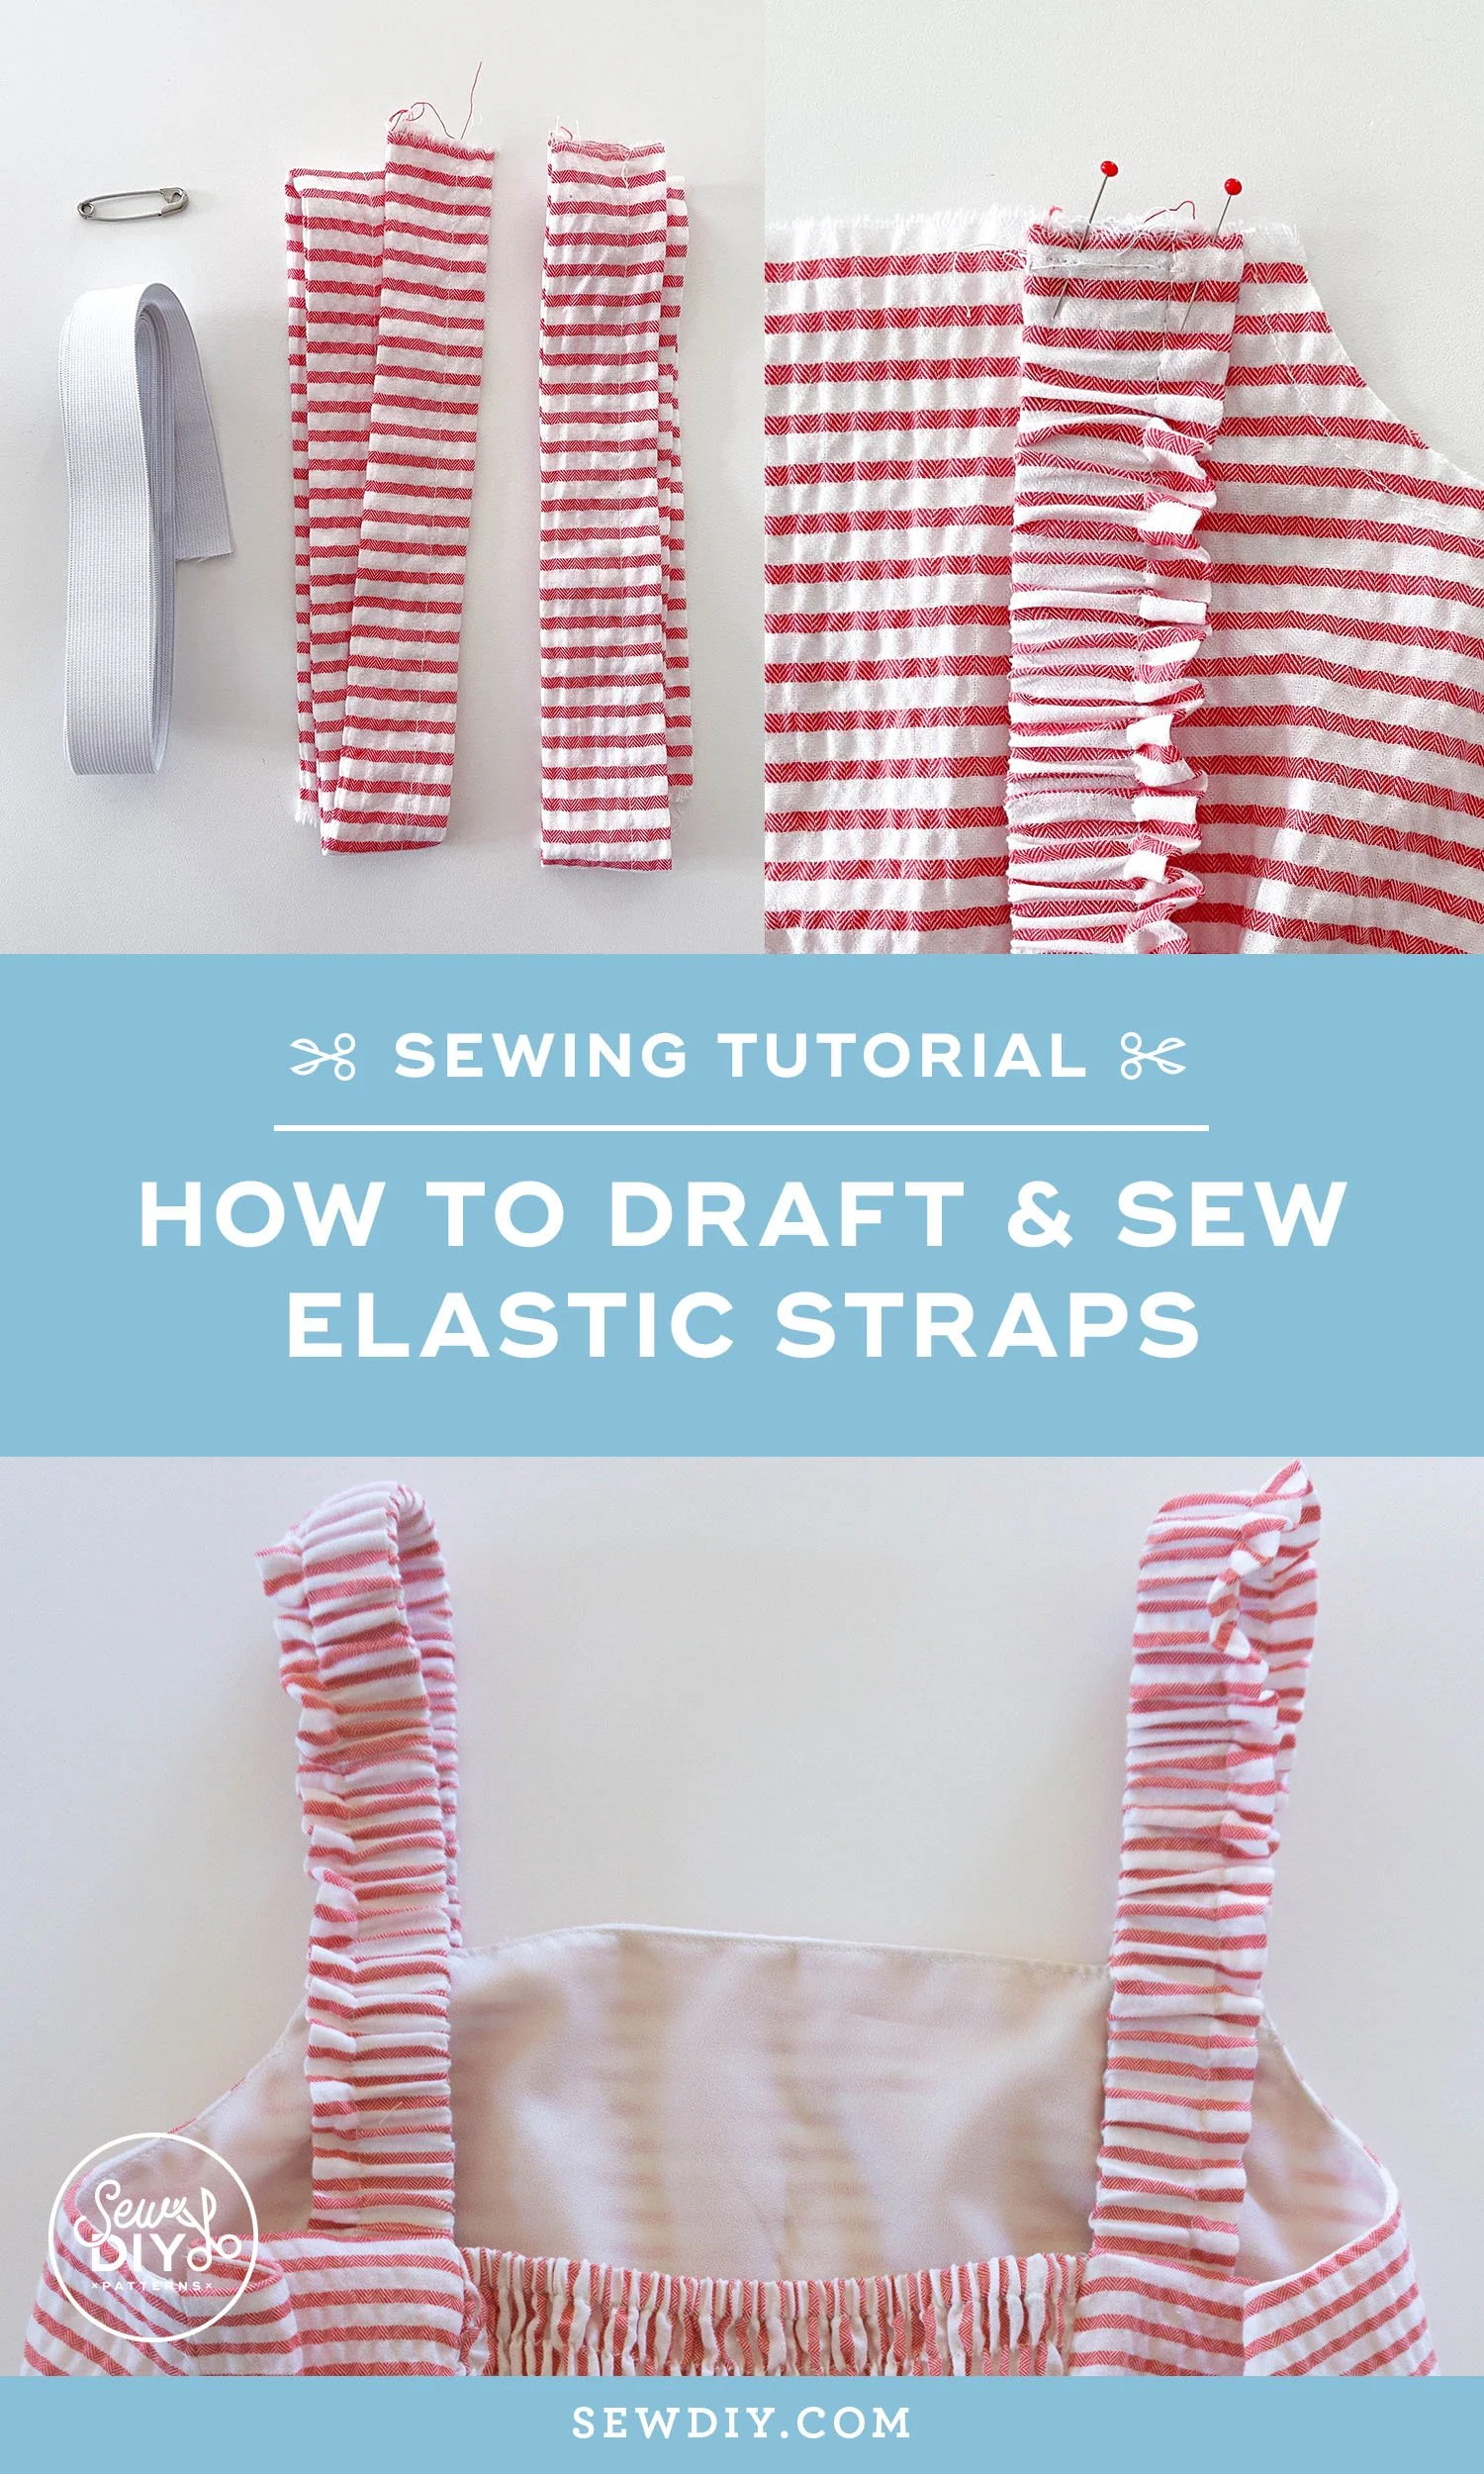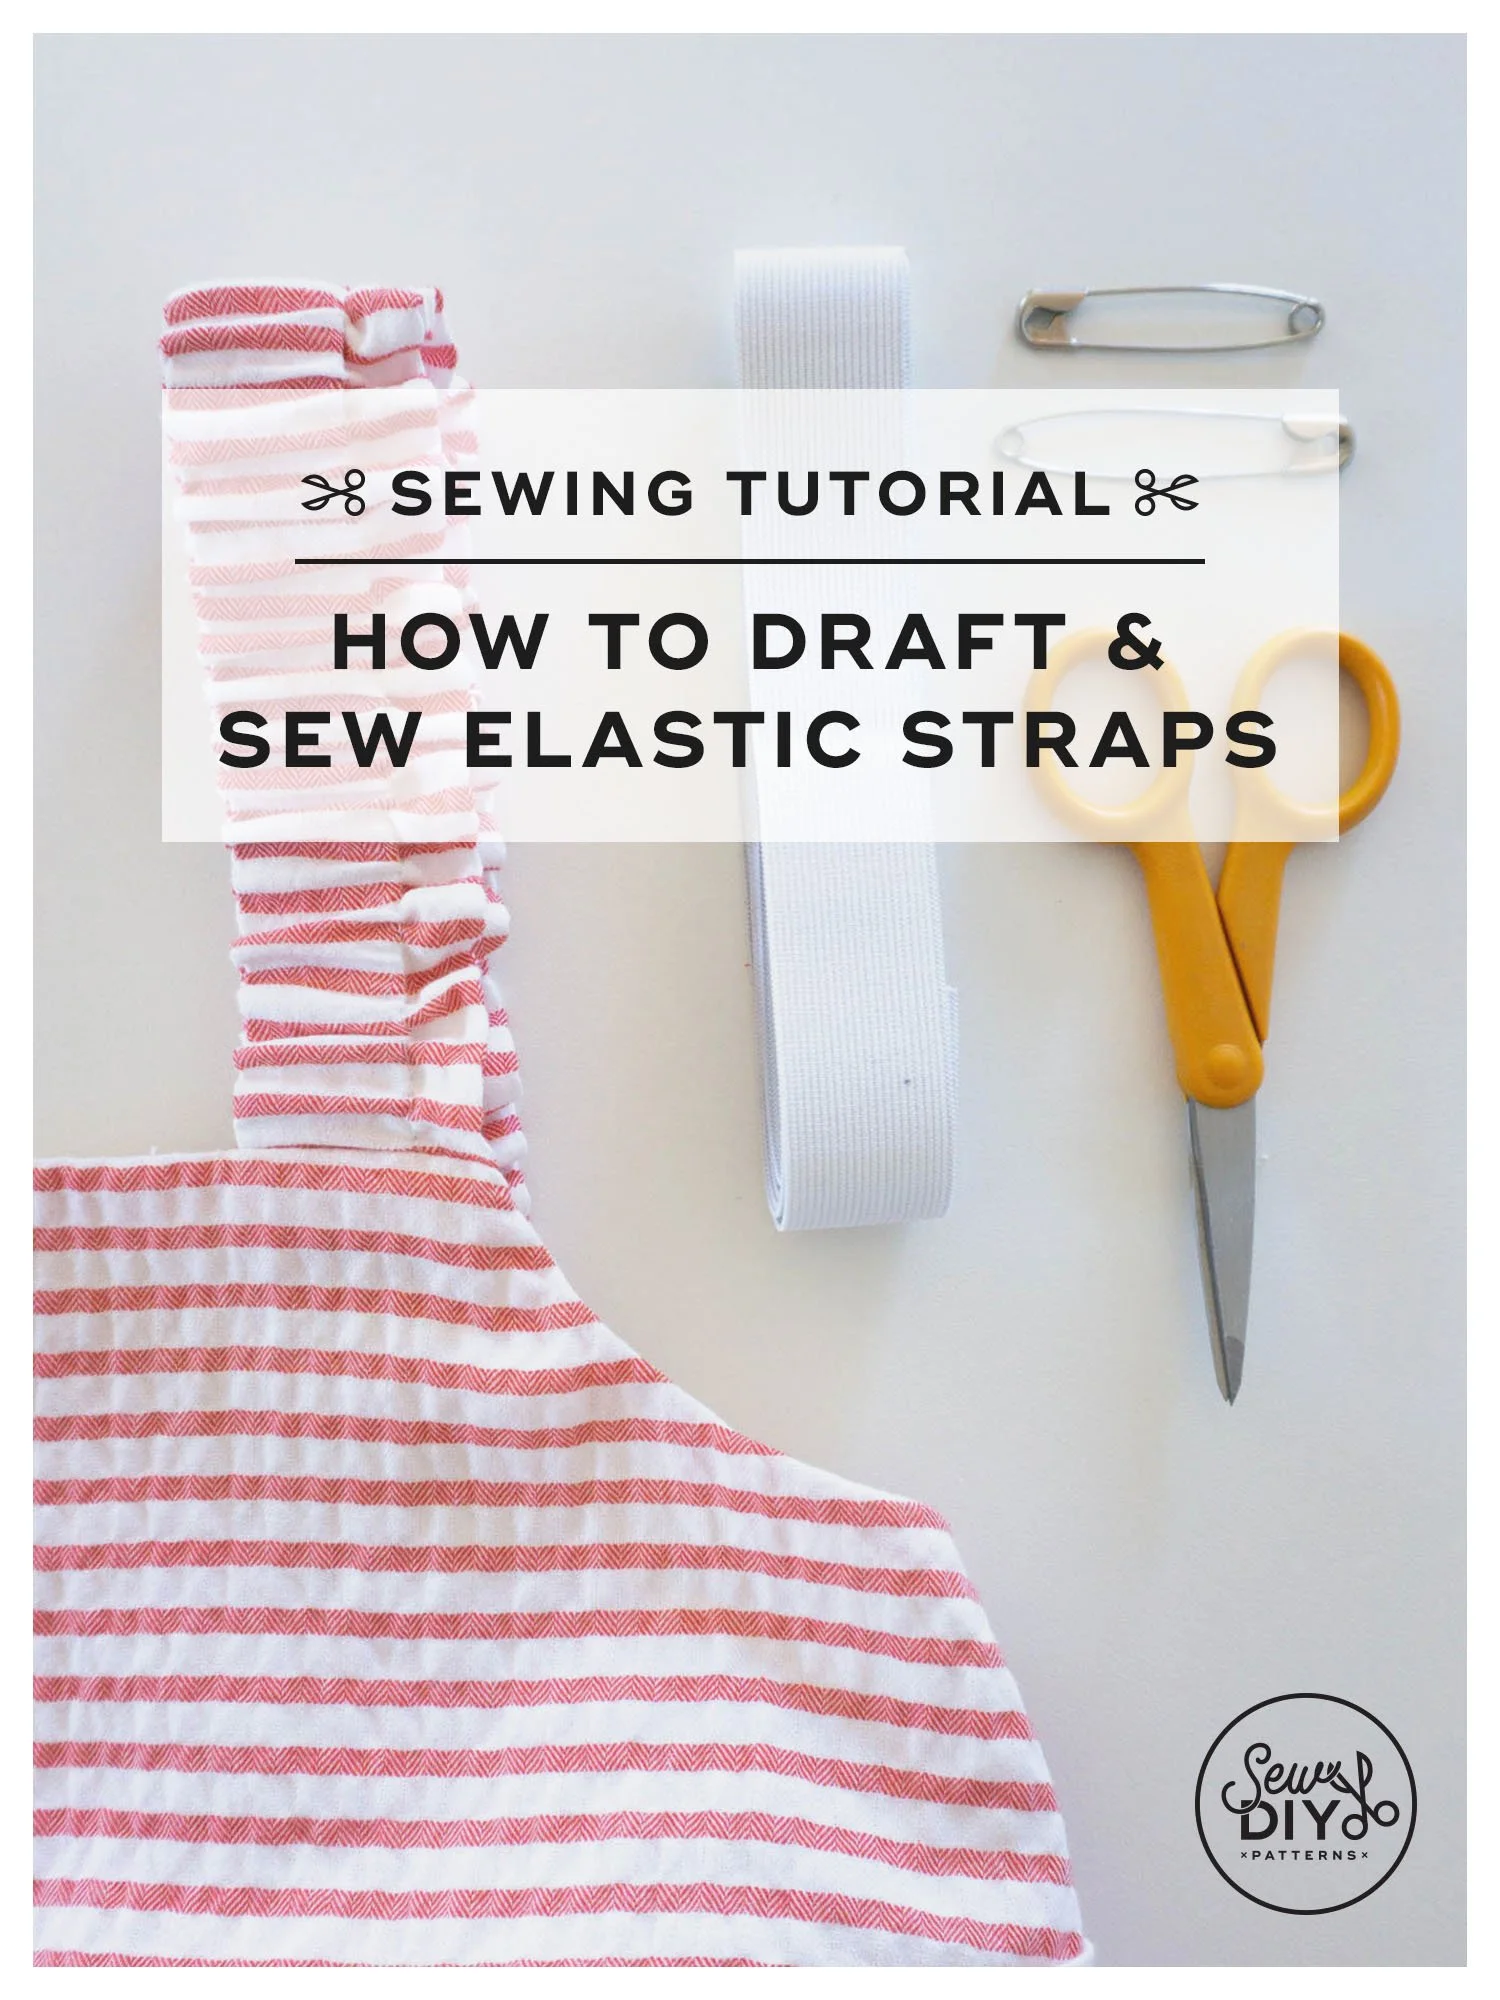
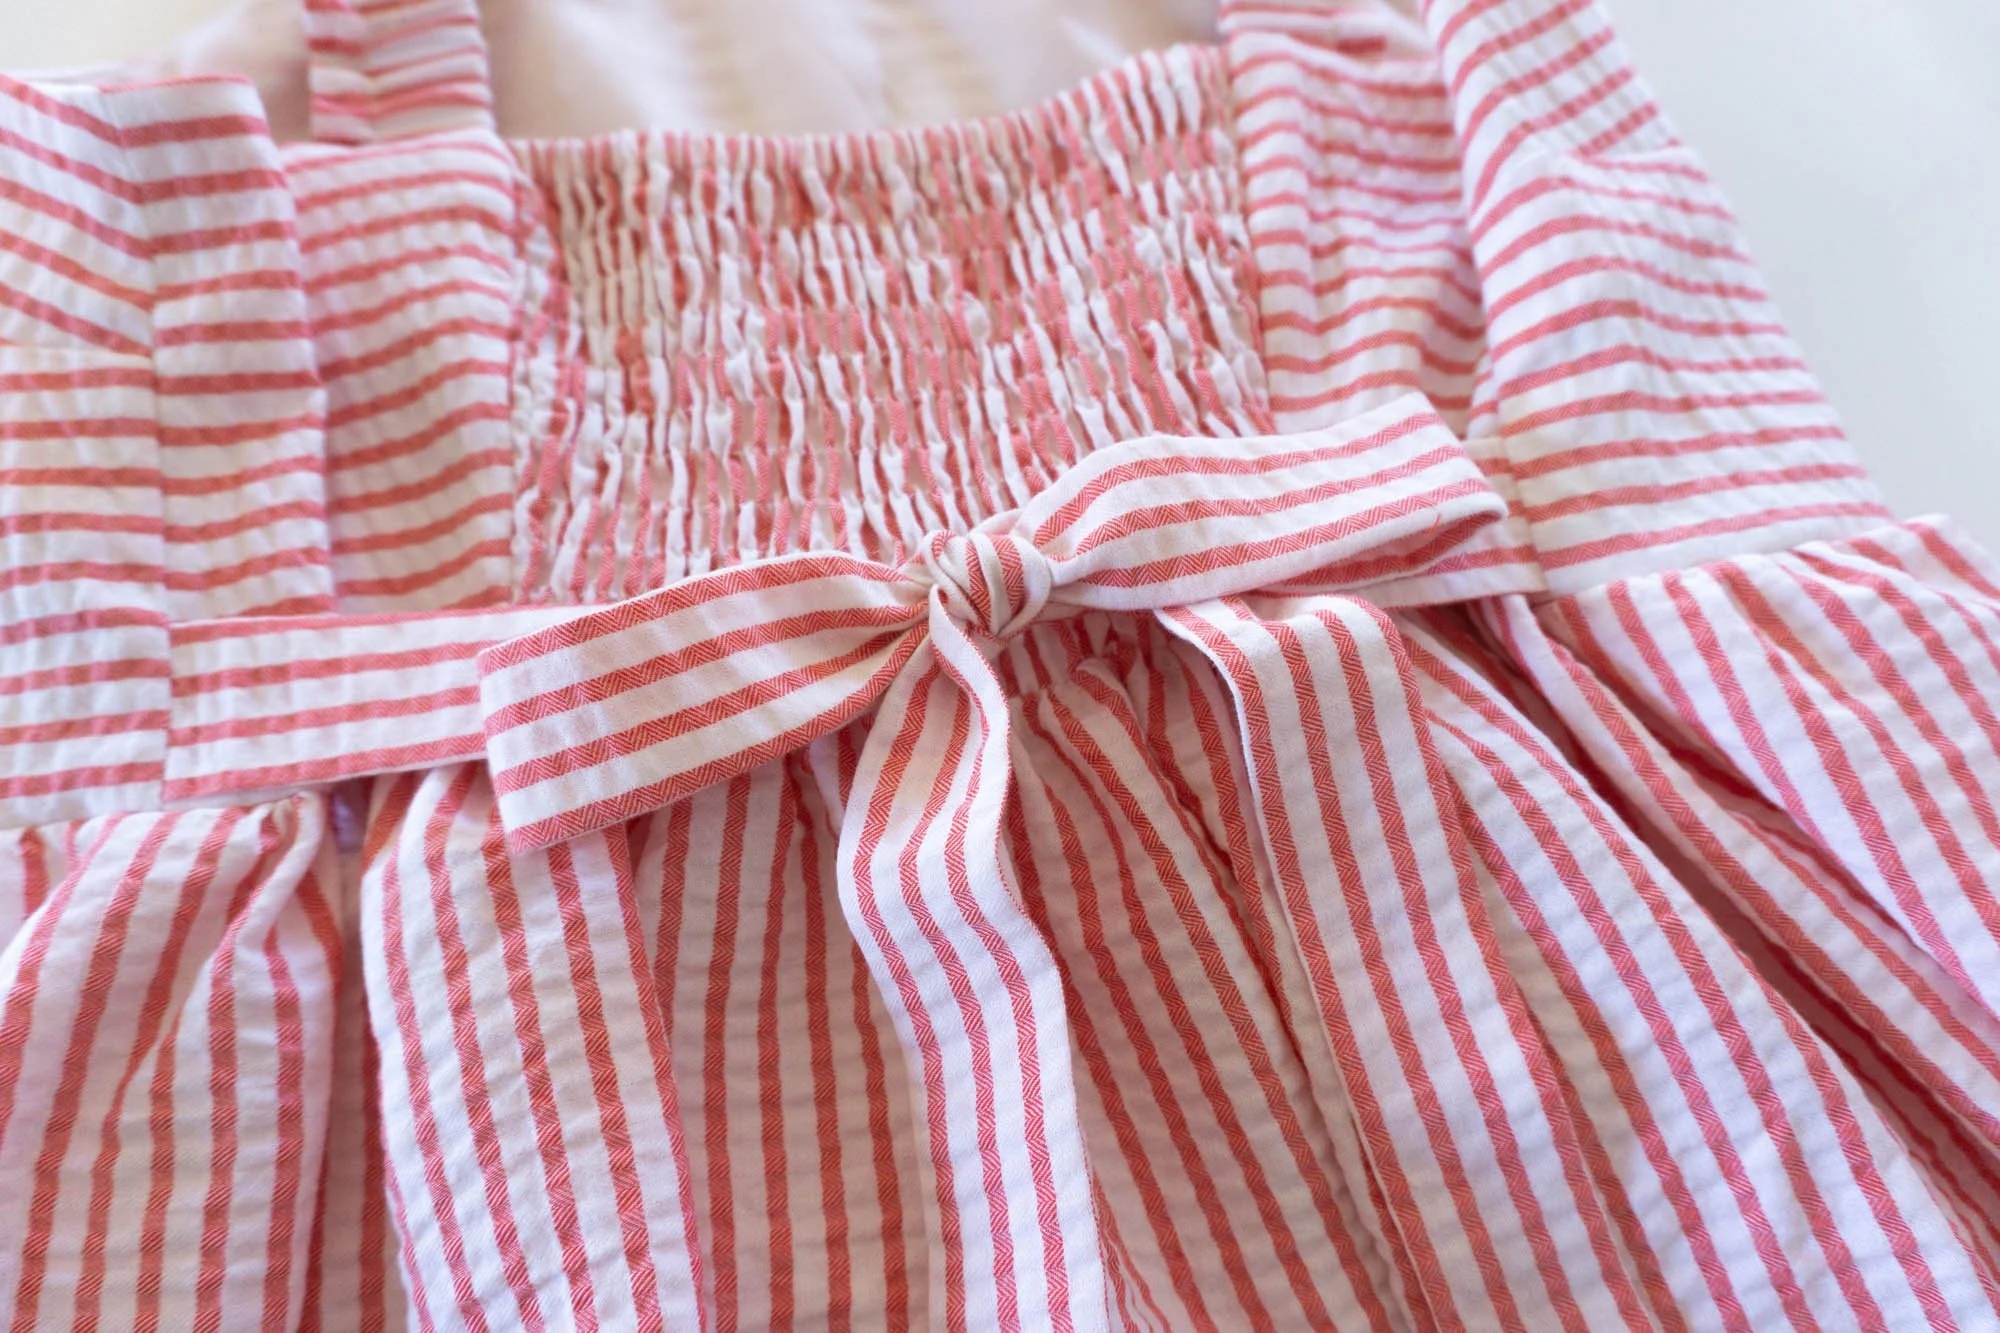
Hello sew-friends! Today, I have a fun tutorial that will add an extra ruffle and a bit of stretch to the straps of your dress or top. I'm using my Eva Tops & Sundress pattern but any pattern that has a separate pattern piece for the strap should work.
For this design, the fabric for the strap works as a casing for elastic. The ruffle is created by making the casing a little wider than the elastic and topstitching, like you would do for a paper bag waistband. In this tutorial, I'll show you how to draft the pattern piece and sew the straps.
HOW TO DRAFT elastic straps
Below are formulas and a diagram for drafting the elastic straps so that you can easily plug in your desired measurements and get a custom pattern piece. If you like this style of drafting tutorial, I have another blog on Substack called Sewing With Numbers where I share lots of pattern drafting tutorials, just like this one.
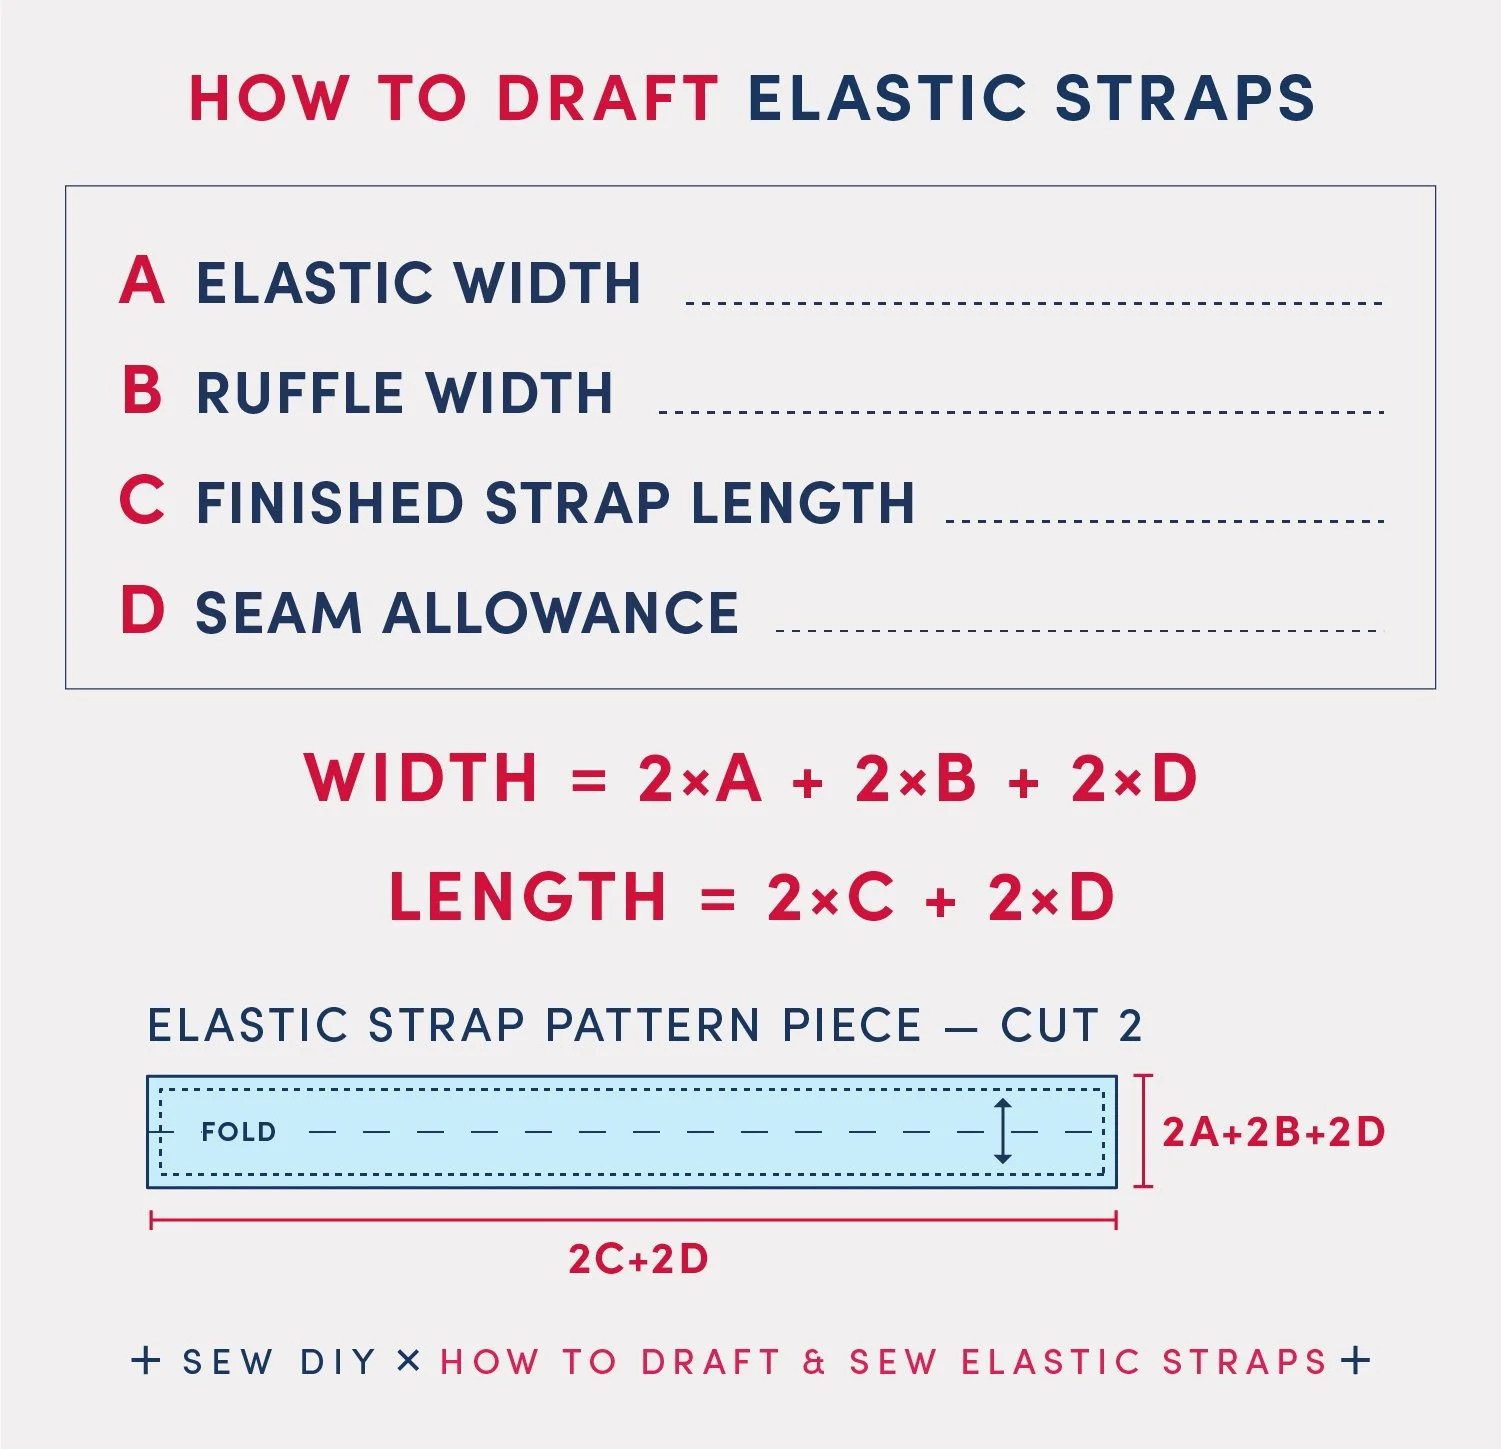
You'll need to decide a few things about the finished straps. First, select your elastic and write down the width. For example, I used 1” wide elastic in the sample. Next, decide how wide you want the finished ruffle to be. In the sample, I made .25” wide ruffle. You can go smaller, bigger or have no ruffle at all. Finally, make a note of the seam allowance you're using for the pattern.
A = Elastic Width
B = Ruffle Width
C = Finished Strap Length
D = Seam Allowance
The elastic strap pattern piece is a long thin rectangle. When sewn, it will be folded in half lengthwise so that the wrong side of the fabric is not visible and the raw edges are enclosed. The ruffle is create with topstitching. The width of the pattern piece is two times A Elastic Width plus two times B Ruffle Width plus two times D Seam Allowance. The length of the pattern piece is two times C Finished Strap Length plus two times D Seam Allowance.
WIDTH = 2A + 2B + 2D
LENGTH = 2C + 2D
A couple things to note: If you are using a thick elastic (or thicker fabric), you may want to add about 1/8” to 1/4” ease to the width of the strap. In the formula for the length, I’m using a Gathers Multiplier of 2. This is somewhat arbitrary as the strap doesn’t need to stretch to two times its length. But, it will have a nice scrunchy appearance at 2 times the length. That said, you can use a smaller multiplier, such as 1.5. In that case the length would be 1.5xC + 2D.
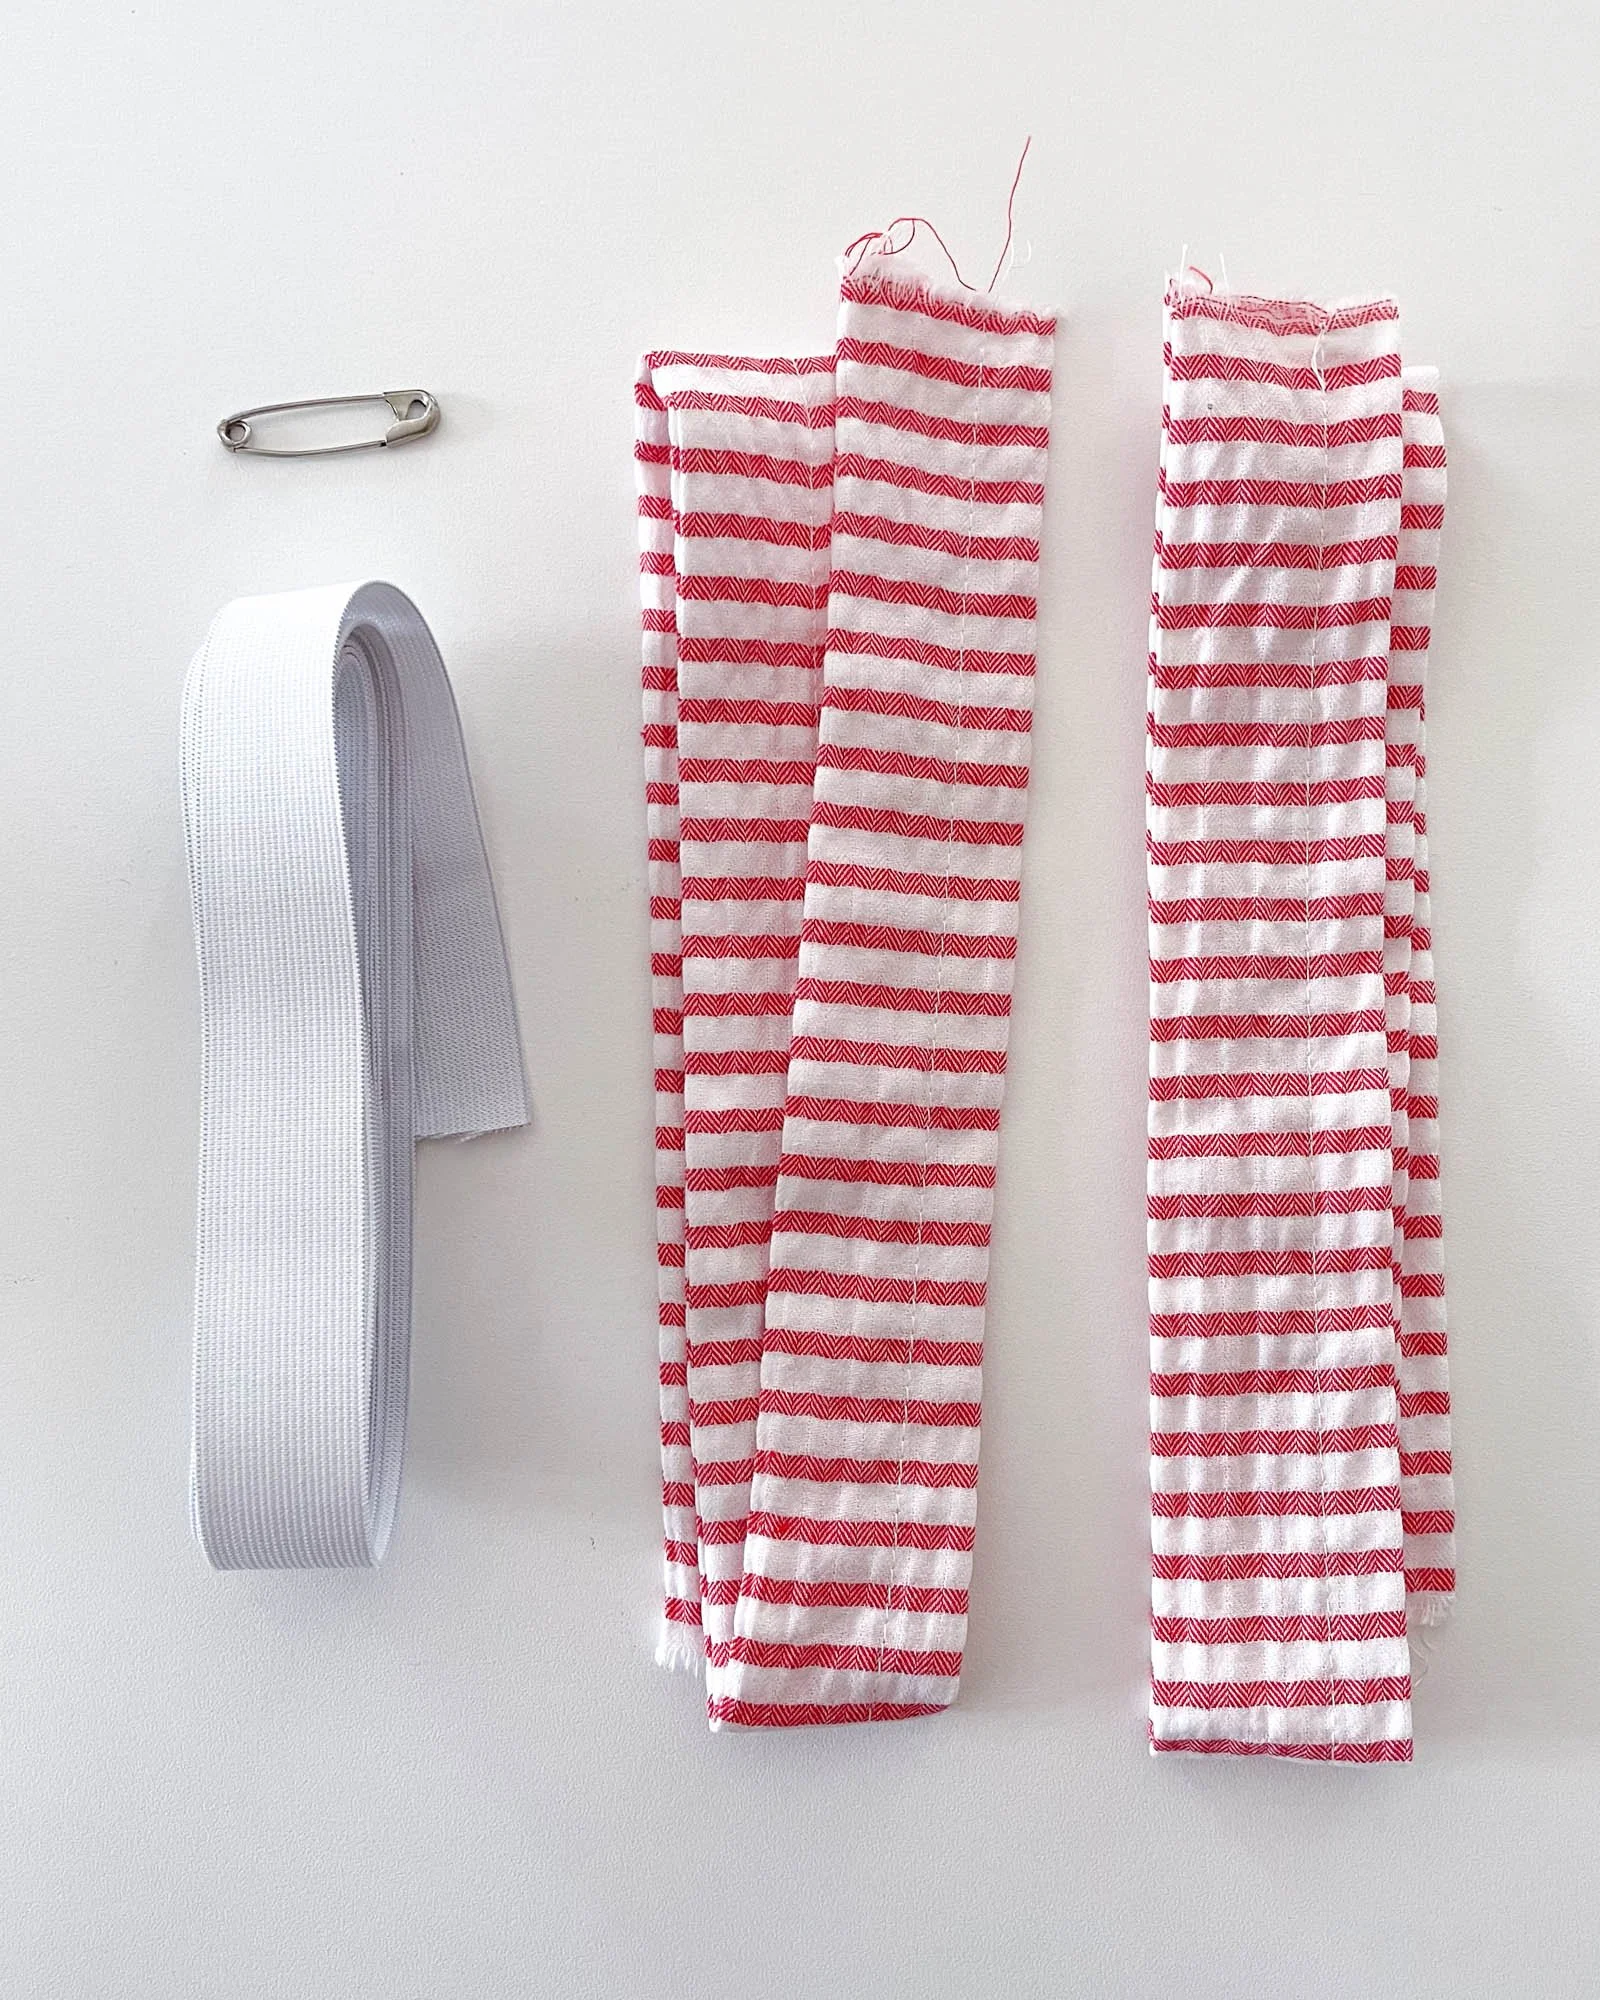
Use the pattern piece or a ruler to cut two pieces of fabric.


HOW TO SEW elastic straps
The only tricky thing about sewing the elastic straps is the fitting. Otherwise, you’re just sewing straight lines. It’s really very satisfying how cute these straps look for such minimal effort. Watch the video below for a quick overview or read on for a step-by-step instruction and illustrations and fitting tips.
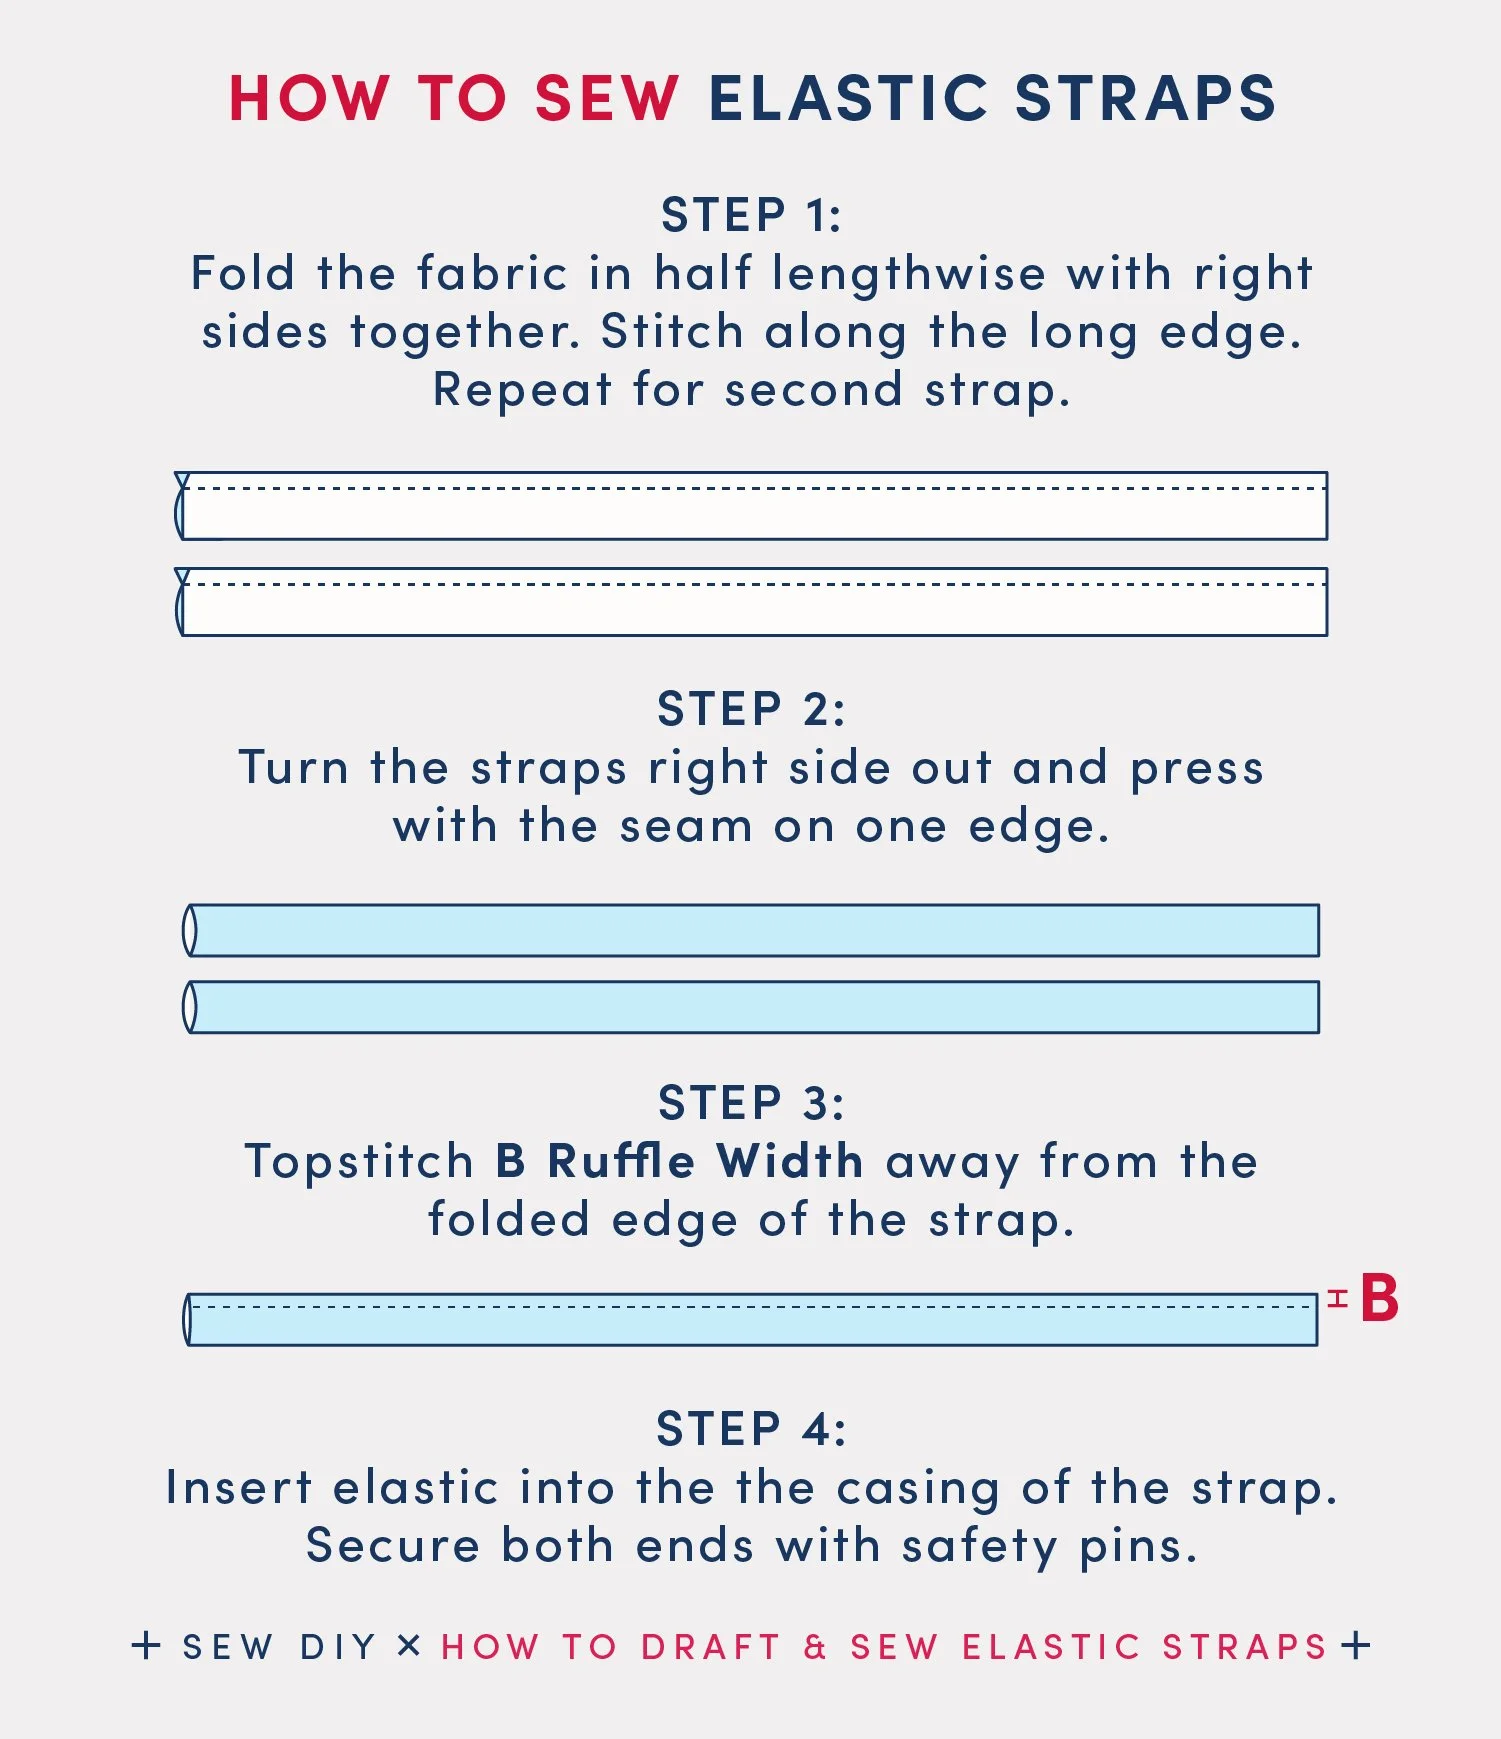
Step 1: To sew the straps, fold the fabric in half lengthwise with right sides together. Stitch along the long edge. Repeat for second strap. Grade the seam allowance.
TIP: Before turning right side out, I like to press the seam open. To do this, I insert a wooden dowel inside the waist tie and center the seam on top. This will help you press the tie extra flat along the seam.
Step 2: Turn the ties right side out and press with the seam on one edge. If the seam is not at the edge of the tie, use your fingers to gently push and roll the fabric so that the edge is flat and not buried inside the tube.
Tip: When turning a strap that is relatively wide and open at both ends, I like to use a safety pin to turn the strap right side out.
Step 3: Topstitch the ruffle. Stitch B Ruffle Width away from the folded edge of the strap. Tip, consider stitching just less than the desired ruffle width to add a little ease to the casing.
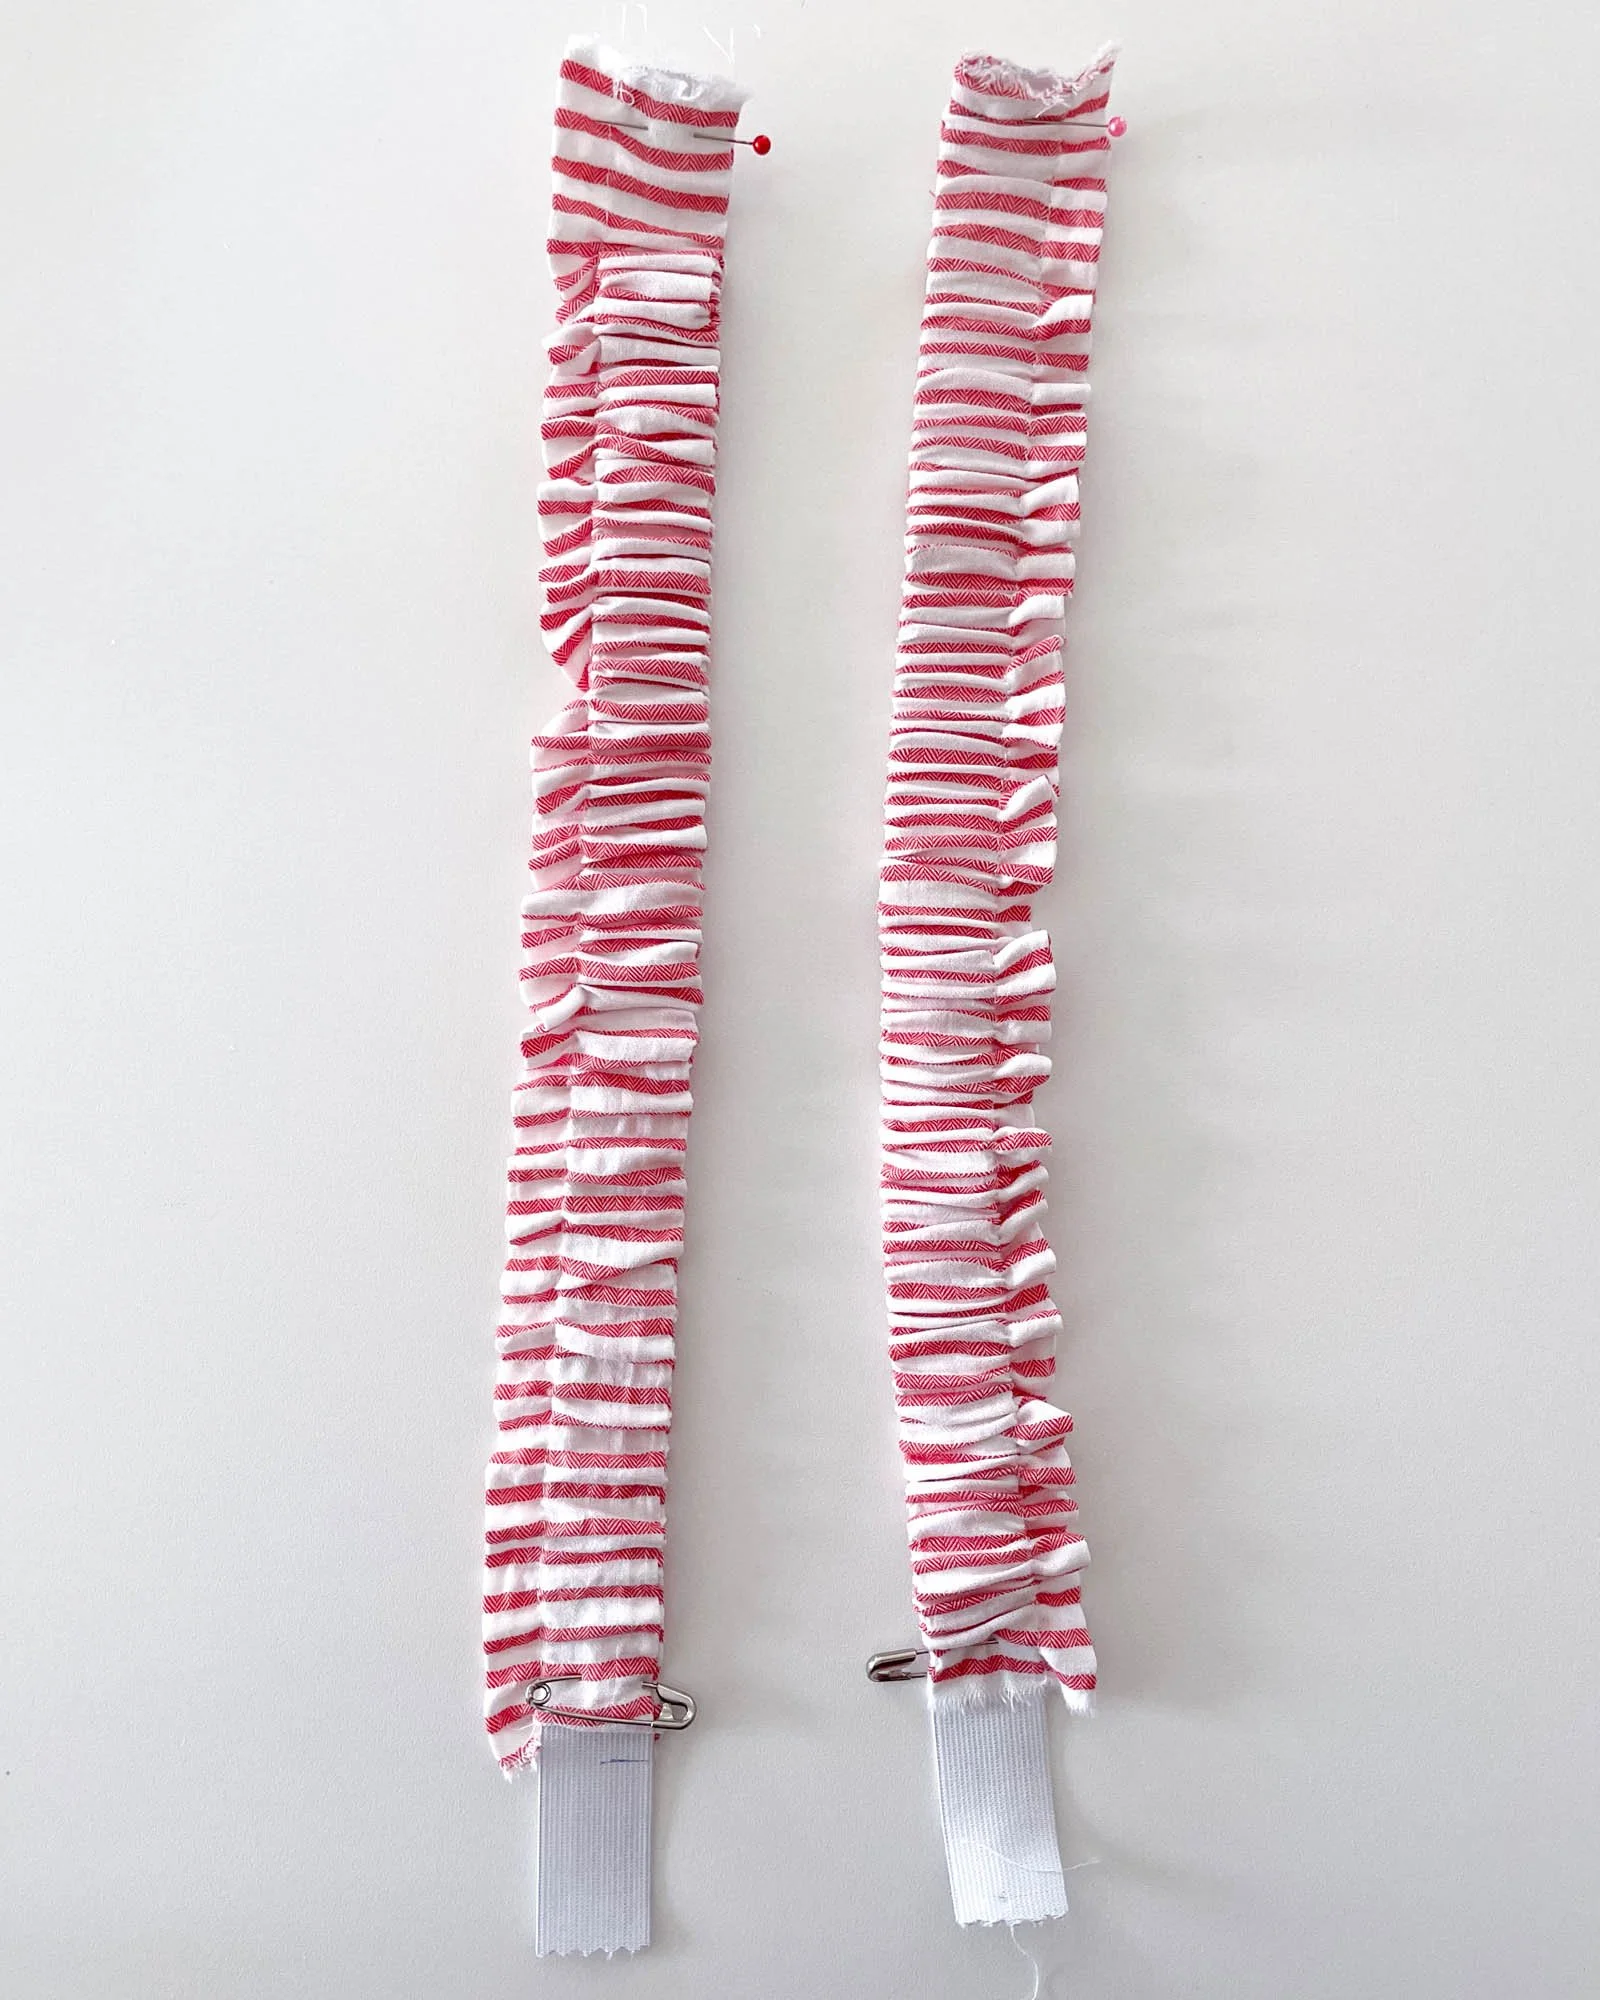
Step 4: Cut a piece of elastic a couple of inches longer than the finished strap length. Using a safety pin, insert the elastic into the the casing of the strap. Secure both ends with safety pins.
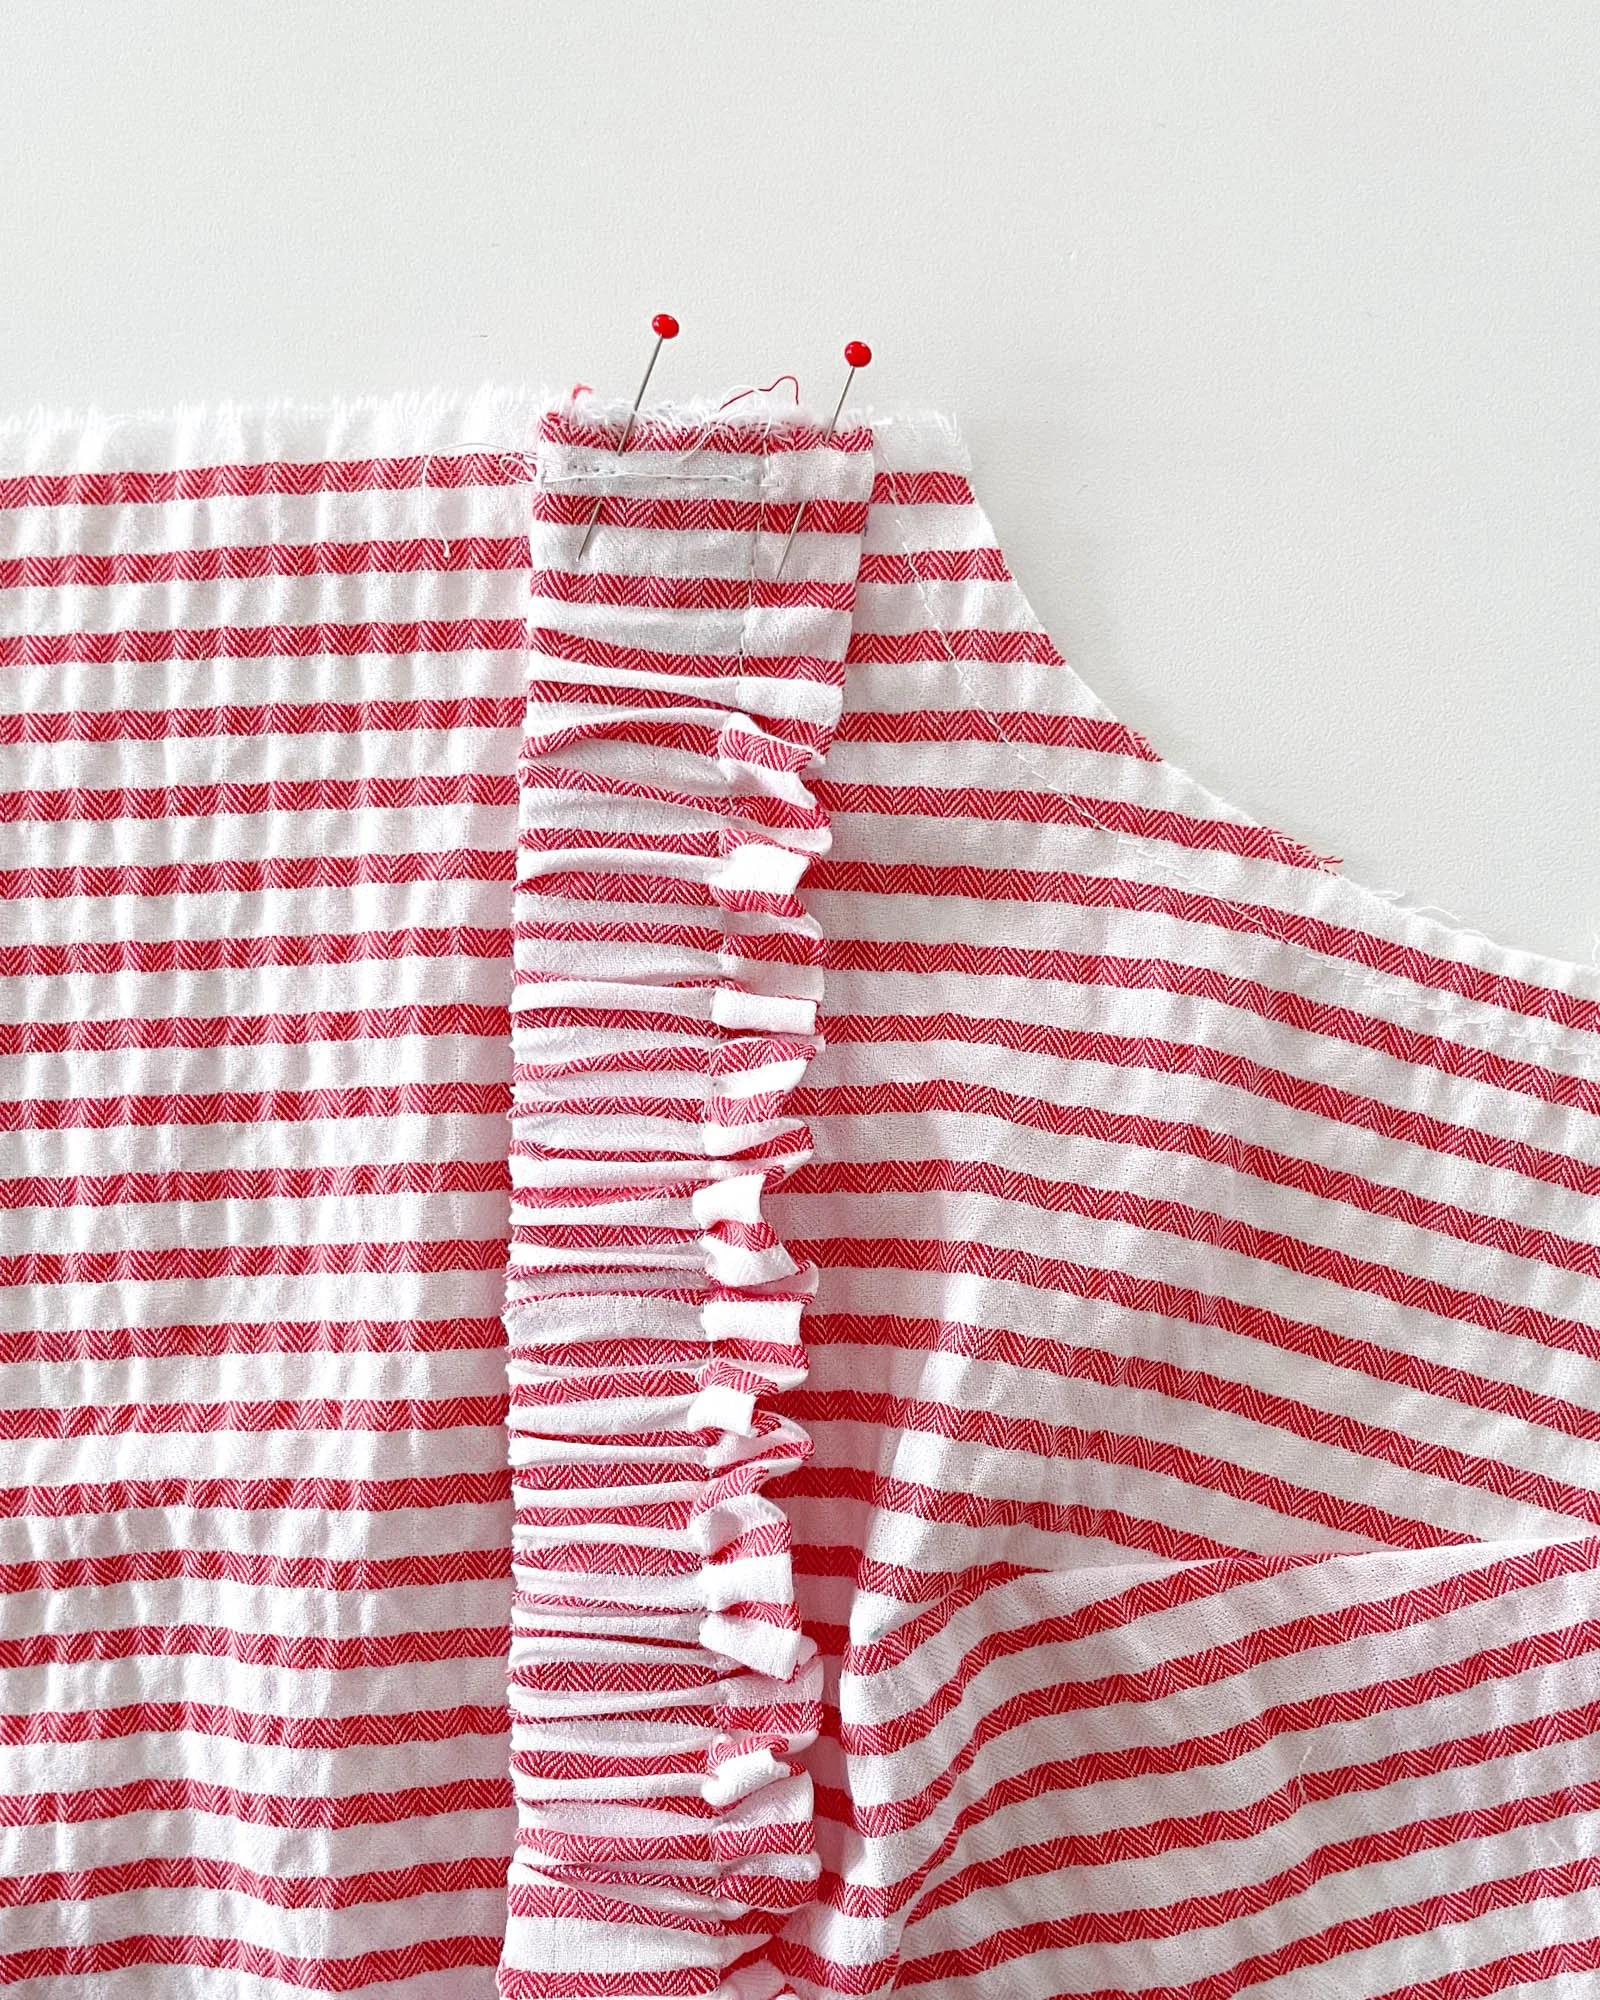
Step 5: Pin the straps to the front and back bodice and try on the top. Adjust as desired.
Note, this is Step 9 in the Eva Tops & Sundress pattern. Next, you’ll attach the facing and the elastic at the center back. In the instructions, at Step 12, I recommend testing the fit again before you understitch and trim away any excess strap. In short, test the fit and adjust the elastic to find what’s comfortable for you before trimming and understitching.
Step 6: Finish the bodice as instructed in the pattern.
Now that you know the basics of sewing elastic straps, you can explore some variations! Here are a few ideas:
Make multiple channels of narrow elastic.
Use elastic thread for a shirred strap.
Create bigger or smaller ruffles.
Cut the strap with a half moon shape for a ruffle that is wider at the top than the bottom.
Remove the ruffle.
I hope that you found this tutorial helpful. Pin the image below to save this tutorial for later. Happy sewing!