
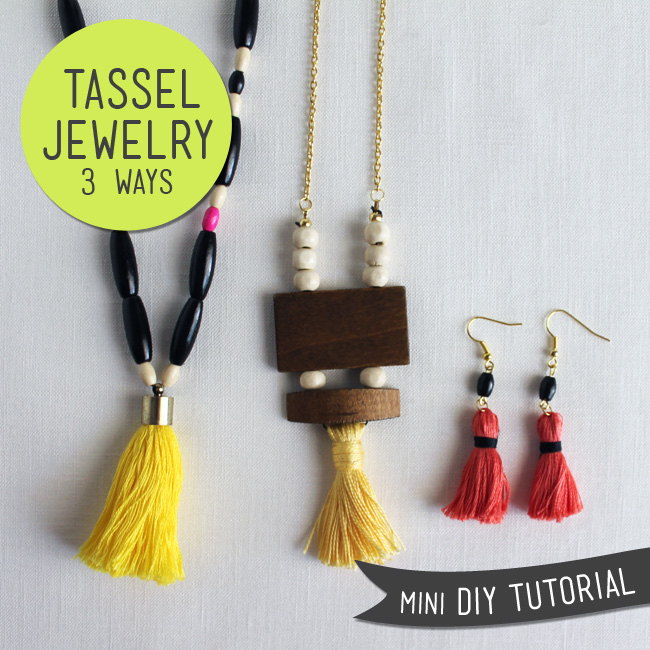
When you get started on something, do you ever find that you just can't stop doing more and more? That's what happened for me with tassels this week. I had a stash of new wooden beads to play with that paired quite well with my tassels. As the focal point of these necklaces, the humble tassel can be quite a showstopper.
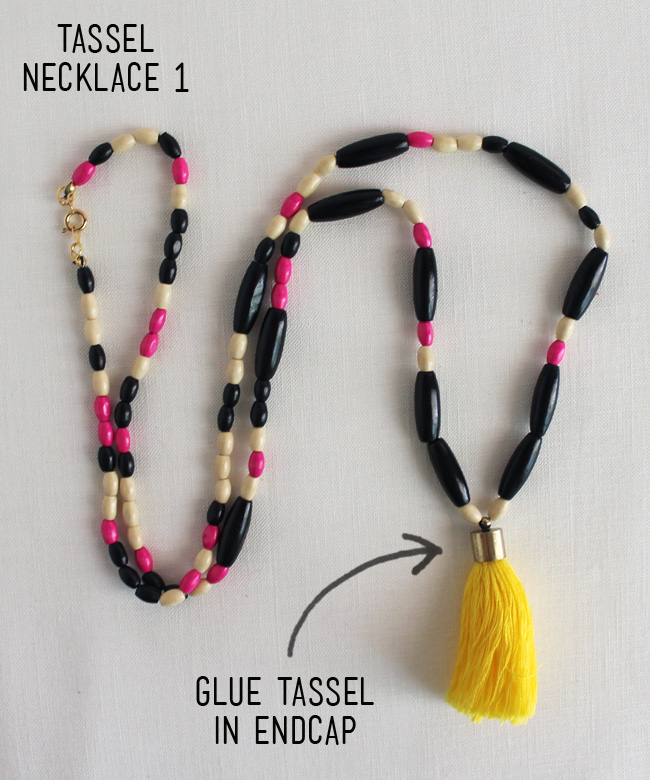
For the first tassel necklace, I used a variety of oval shaped wooden beads in black, cream and hot pink. This is a long necklace that extends to the waist.

Tassel Necklace 1
Supplies
1 endcap
(I also used these endcaps for my Braided Fabric Bracelet. I purchased them from a jewelry supply store.)
Variety of oval wooden beads
(I bought mine from the Bead Factory store in downtown LA. They are also available: Large Black Ovals, Small Ovals.)
Craft glue
Instructions
Step 1: Make tassel. Tutorial here. Glue top of tassel into endcap.
Step 2: String beads and tassel onto beading thread, arranging beads as desired with tassel in the center.
Step 3: Attach knot covers and knot ends of string.
Step 4: Attach jump rings and closure.
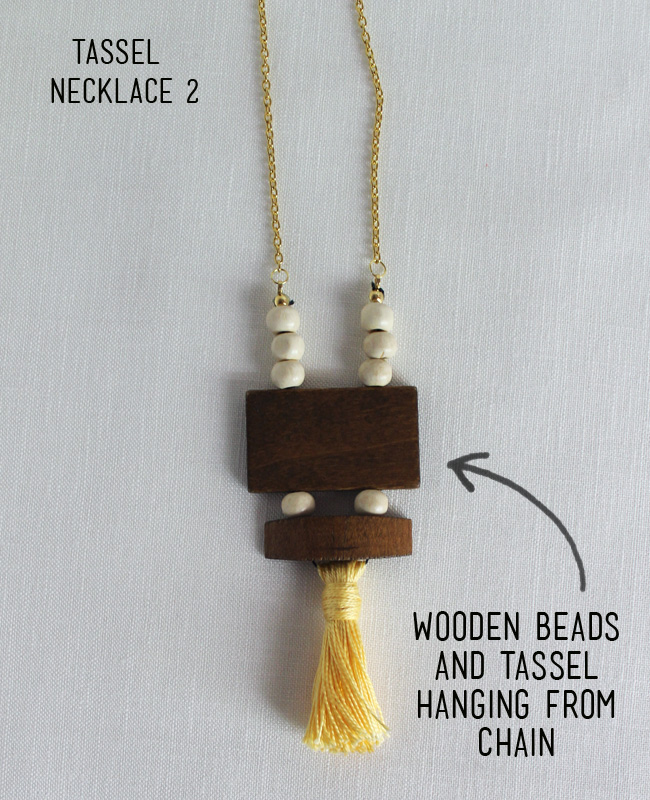
For Tassel Necklace 2, I used a tassel made with pearl cotton and large geometric wooden beads. The shape reminds me of an animal's face. I love the boho, tribal feel of this necklace.
Tassel Necklace 2
Supplies
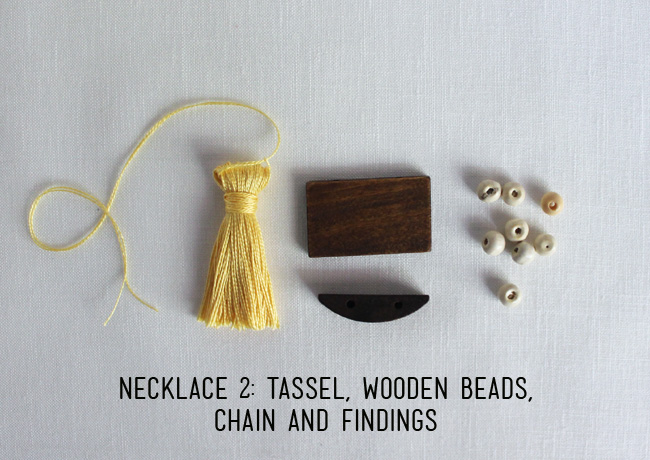
1 large rectangle wooden bead (with two holes in side)
1 half circle wooden bead (with two holes in side)
I bought the large wood beads from The Bead Factory store but can't find them online.
Instructions
Step 1: Make tassel. Tutorial here.
Step 2: String beads as follows: 1 knot cover, 3 small round beads, side one of rectangle bead, one small round, side one of half circle bead, tassel, side two half circle bead, one small round, side two rectangle bead, three small rounds, 1 knot cover.
Step 3: Knot ends of string. Add a dot of glue and close knot covers.
Step 4: Determine desired length of necklace. Cut two pieces of chain. Attach to knot covers using jump rings.
Step 5: Attach jump rings and closure to ends of chain.

Would you believe that this is the first pair of earrings that I've ever made?!?! Yes, it's true. Aren't they fun and cute? Lately, I've been really lazy about wearing earrings so hopefully these will jumpstart me back into ear adornment.

Tassel Earrings
Supplies
Embroidery Thread (or thread of choice) in black and coral
2 small black, oval shaped wooden beads
Instructions
Step 1: Make 2 tassels. Tutorial here. Wrap neck of tassel with black contrast thread. For these tassels, I used embroidery thread and combed it out a little bit.
Step 2: String a small piece of coral thread through top loop of tassel. Tie a square knot and trims ends. Carefully move knot to the center of tassel.
Step 3: Attach jump ring to top of each tassel.
Step 4: Place one bead on eye pin. Attach earring hoop to opposite end, make loop on free end of pin and trim away excess. (For help check out this video, starting at second 30.)
---
I hope you find these mini tutorials useful. I love the bohemian feel of the tassel and making these pieces was a lot of fun.


