One reason people often recommend starting off sewing a skirt rather than pants is that skirts are usually much easier to fit than pants. That crotch curve can create all sorts of fitting dilemmas and one of the easiest to solve is the rise, also called the crotch depth or crotch length. In today’s video tutorial, I’ll show you how to shorten and lengthen the crotch depth evenly across the front and back. And as a bonus, I’ll show you how to adjust only the back rise. This is a really simple pattern adjustment to make and very useful if you are petite or tall (like me!)

How to estimate the adjustment
The trickiest part of any pattern adjustment is to decide how much you need to adjust the pattern. There’s not a magic formula to determine this because every pattern company will be different and pants have different intended fits (low-rise vs. mid-rise vs. high-rise). Plus, every body is different so even if you are the same height as me, we could have very different proportions. For example, my torso is very long so I only need a 34” inseam but someone else who my height may have a shorter torso and longer legs. It will take some trial and error but that’s why we always make a muslin.
When evaluating the rise, one method is to use a flexible measuring tape to measure your rise and then compare that to the pattern (remember to remove the seam allowance from your measurement of the pattern). Check out this video from Professor Pincushion on how to do that.
As you get to know your body better and try out different patterns, you’ll be able to estimate this number better. If you have a shorter torso, you can pinch out the excess from your muslin to determine the adjustment needed. (Check out this post from Lladybird on that.)
If you’re tall, you can’t use the pinch out method though. You could compare the crotch depth of the pattern to an existing pair of pants or do the method of measuring your rise mentioned above to estimate your adjustment. I recommend erring on the side of making a larger adjustment so that you can do the pinch method on your muslin. I’ve made the time consuming mistake of making small adjustments and ended up making four muslins before I got the right fit.
A few things to remember when adjusting the rise:
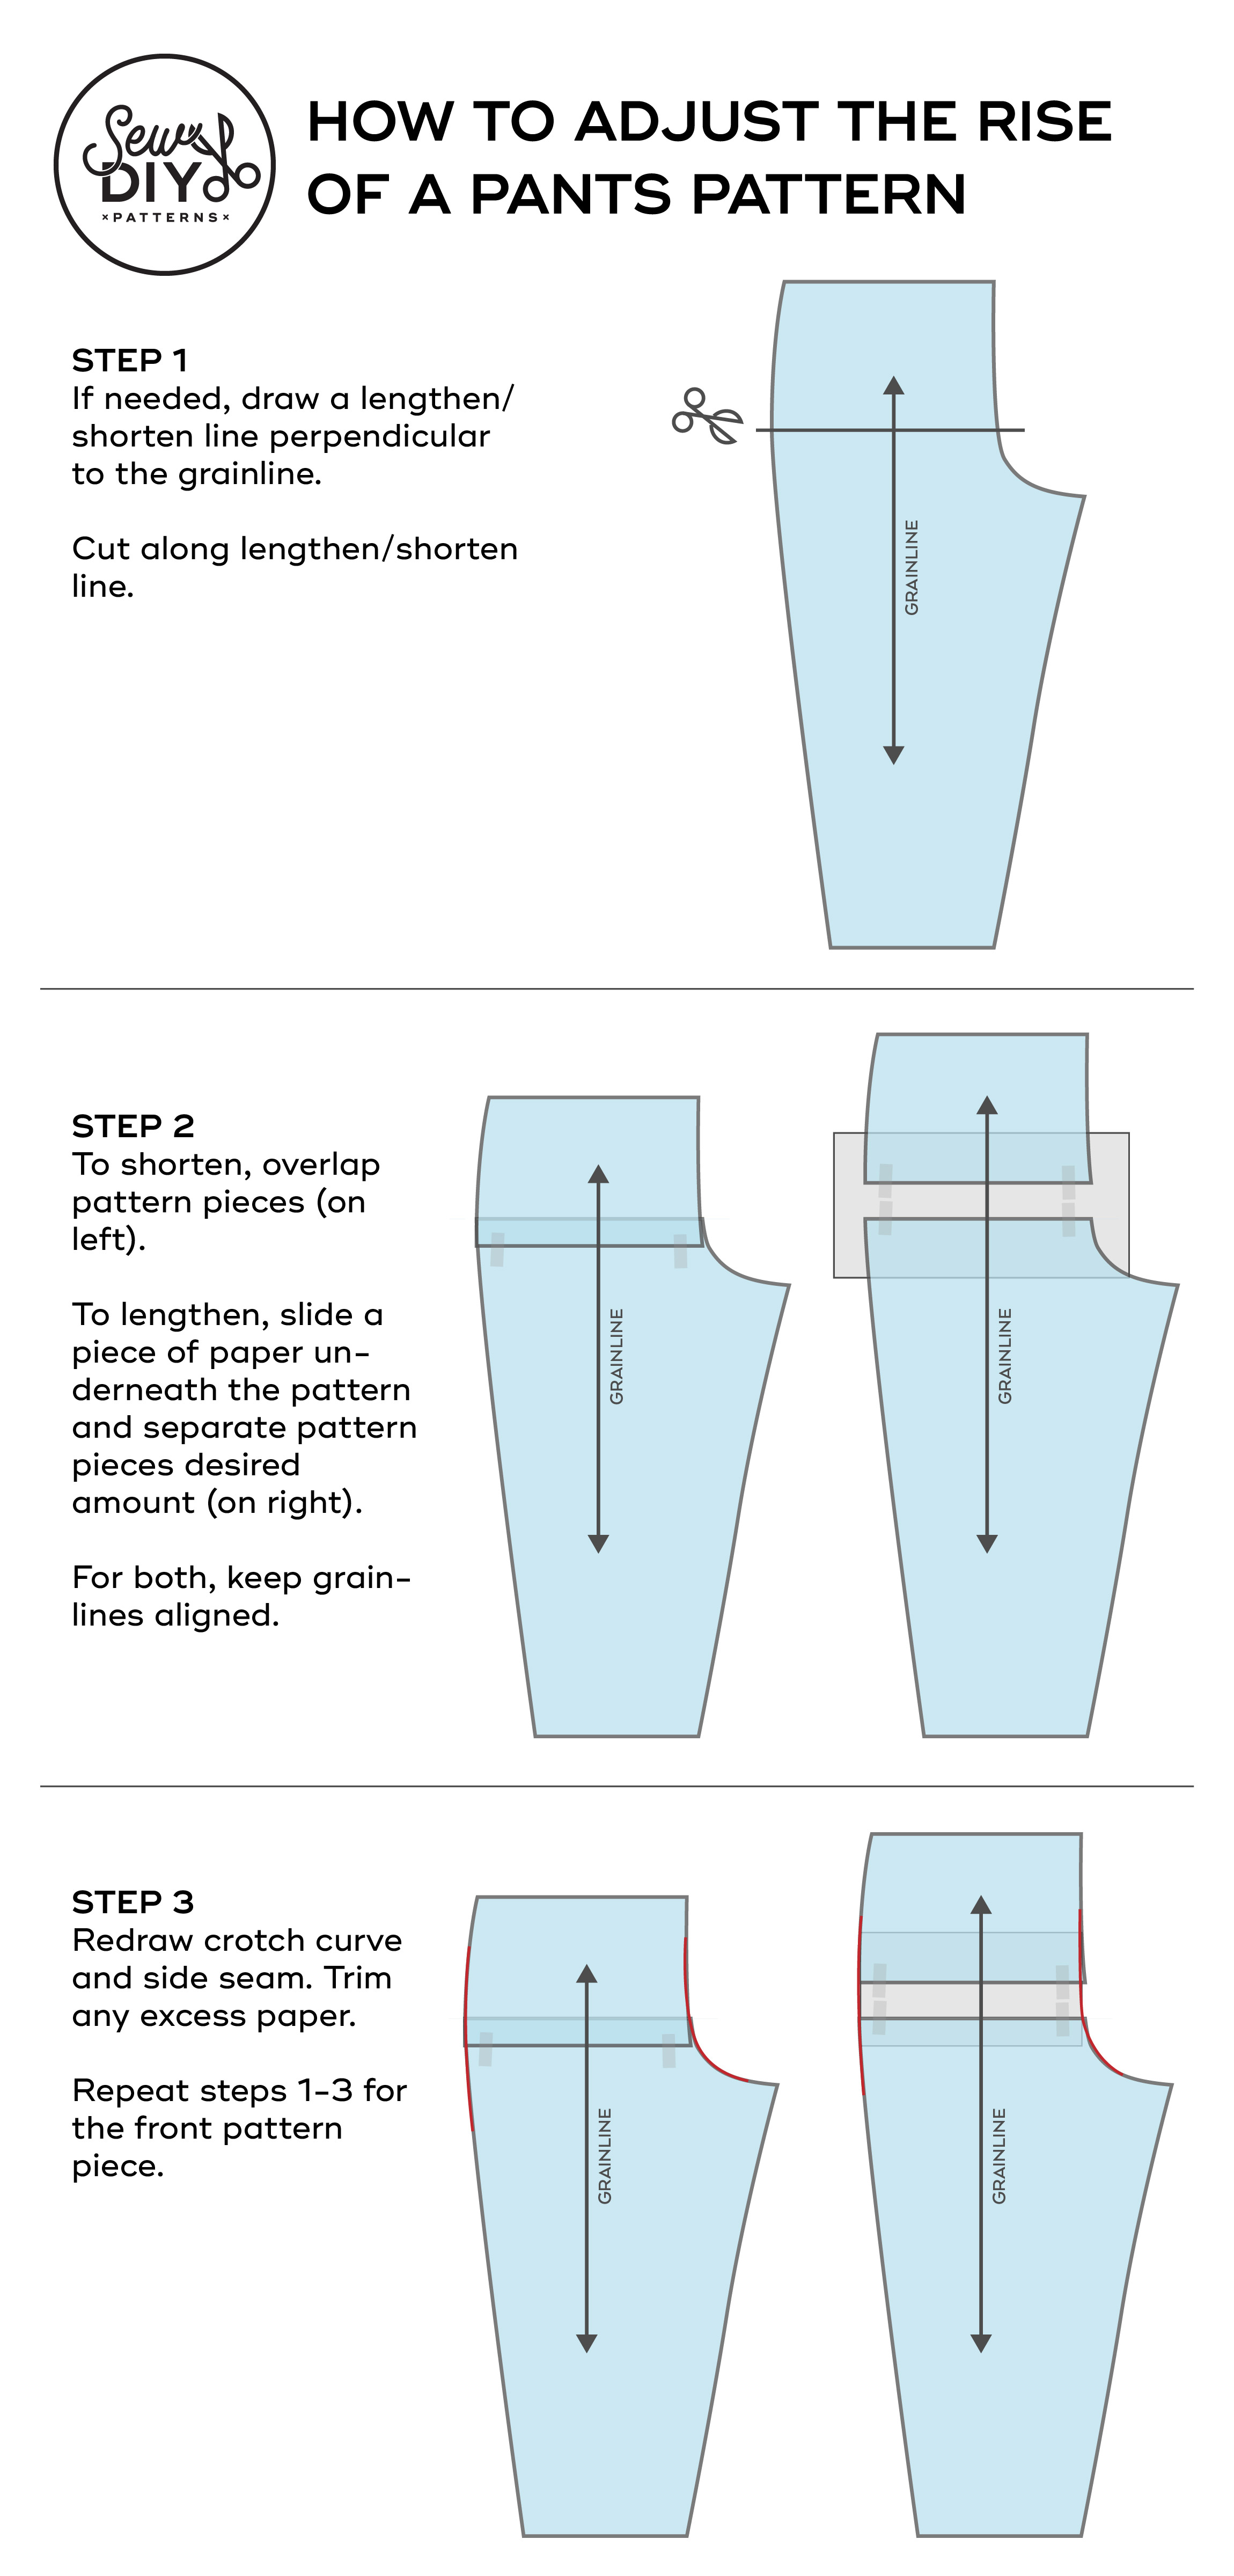
1. Lengthen/shorten lines need to be perpendicular to the grainline.
2. Make the same adjustment for front and back pattern pieces as well as any side panels.
3. Keep your grainline lined up when you make the adjustment (the exception is if you’re only adjusting the back)
4. Be aware you may need to lengthen or shorten your zipper, pocket and fly pattern pieces.
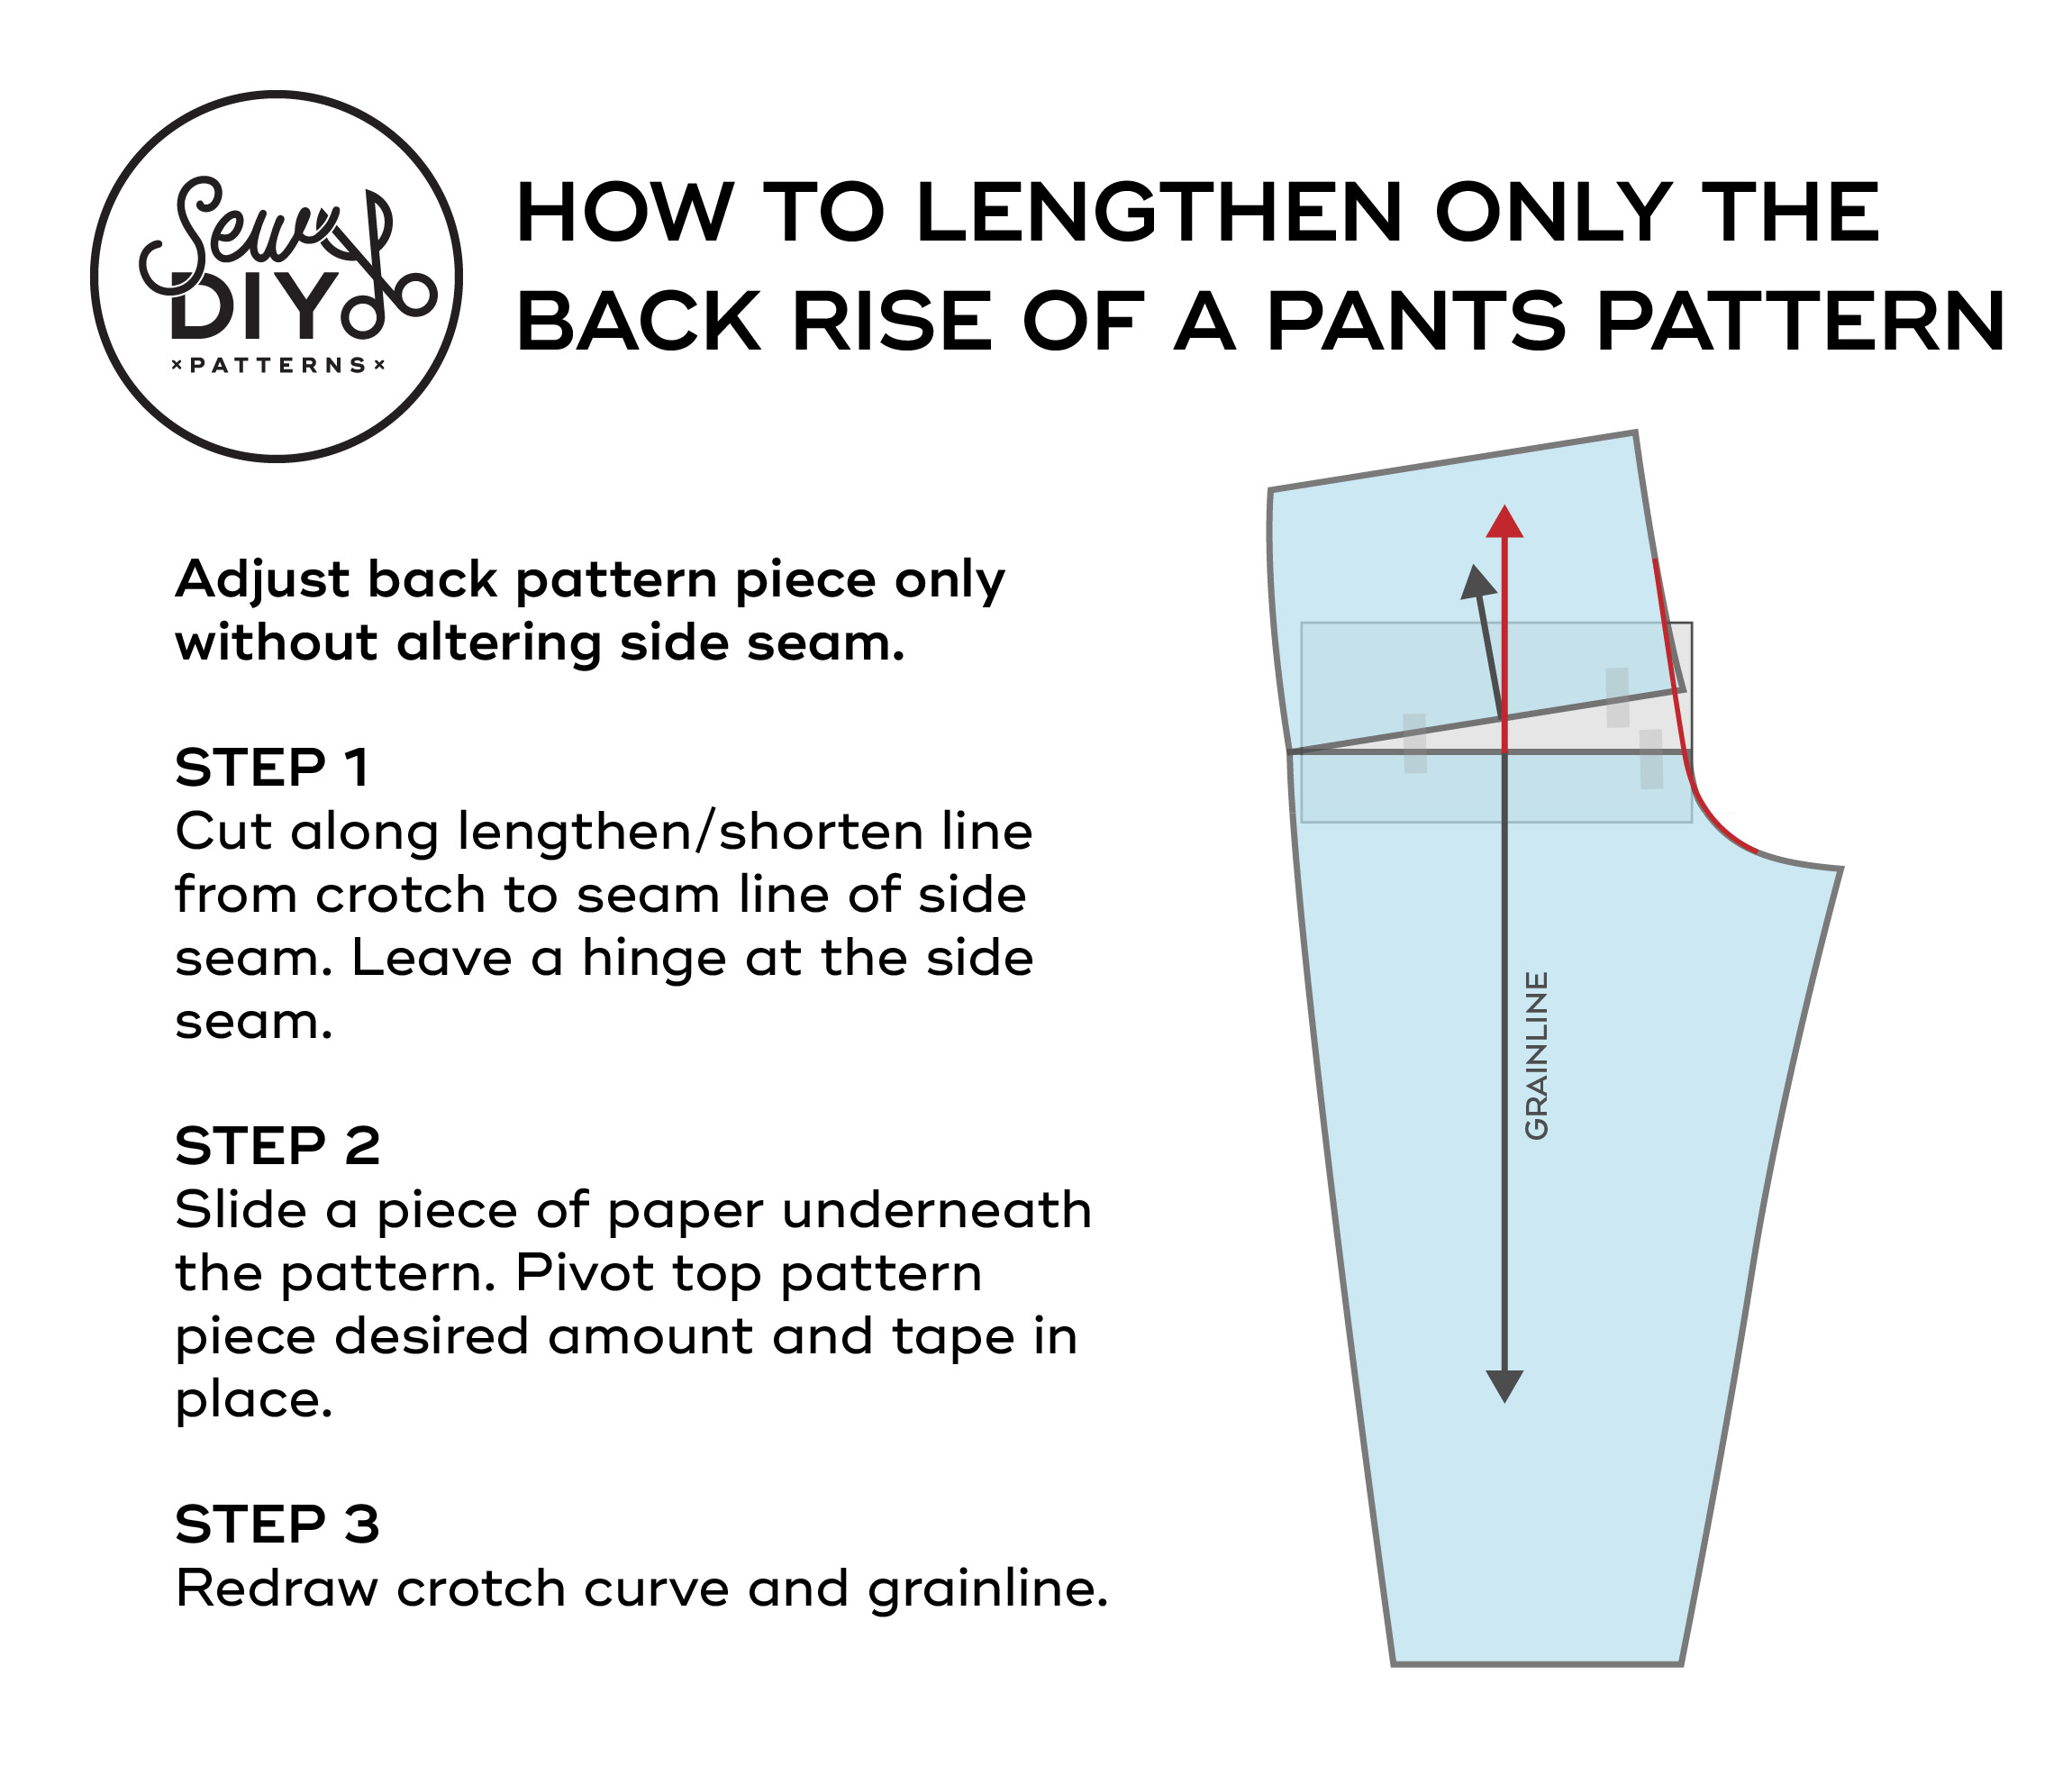
For more info on lengthening the back rise only, I recommend this post from Designer Stitch. I hope that this video was helpful. Let me know if you have any special requests and if you haven’t already, I’d be so honored if you subscribe to my YouTube channel. Happy sewing!